Ensure, the registration method (Standard, Monitored, Waitlist) has been updated in the portal.

Simultaneously, you may visit and download the Content Submission Template - Lightbox Registration Form here.
This new Certain Master Template - Lightbox Registration Form is created for Multi-day or Single day events. A full flow set up where a one page Welcome Page will react as the Thank You page with minor differences after registration.

Ensure, the registration method (Standard, Monitored, Waitlist) has been updated in the portal.
Simultaneously, you may visit and download the Content Submission Template - Lightbox Registration Form here.
Setting up the Event:
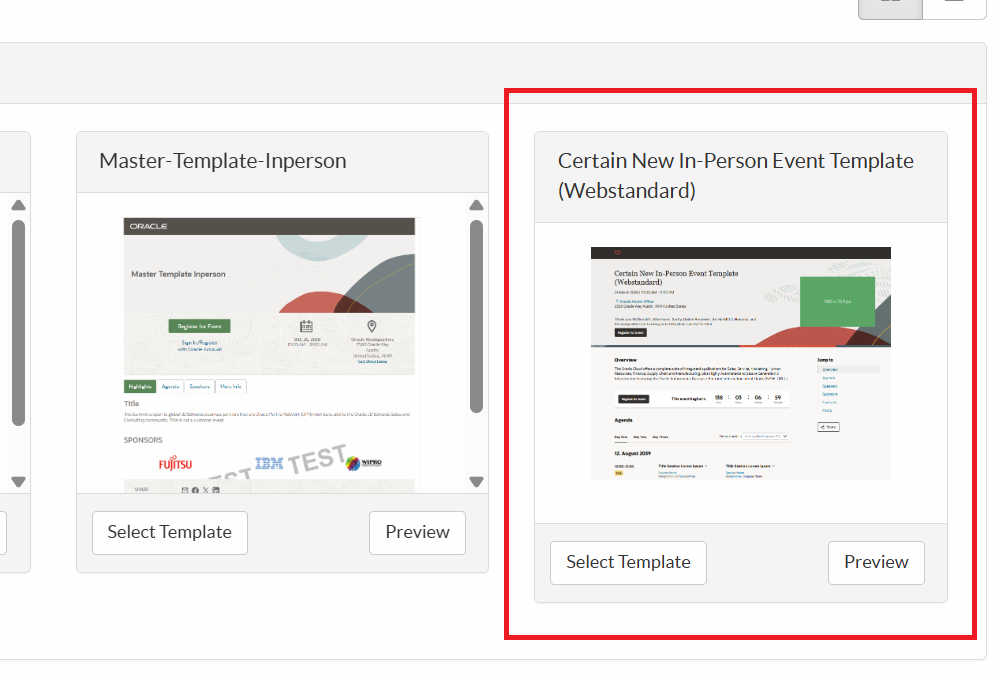
In the Accounts --> Select Marketing --> Click on Templates --> Choose the Certain New In-Person Event Template (Webstandard).
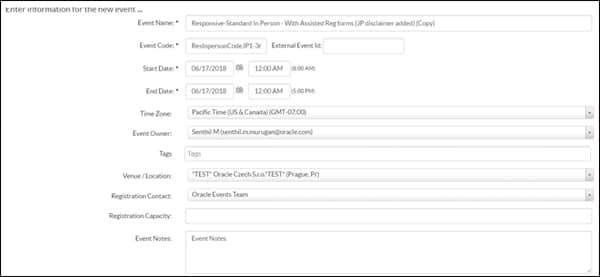
Once selected, update the necessary details about your event and click next. Once all the details are filled, click on Save and your event is created.
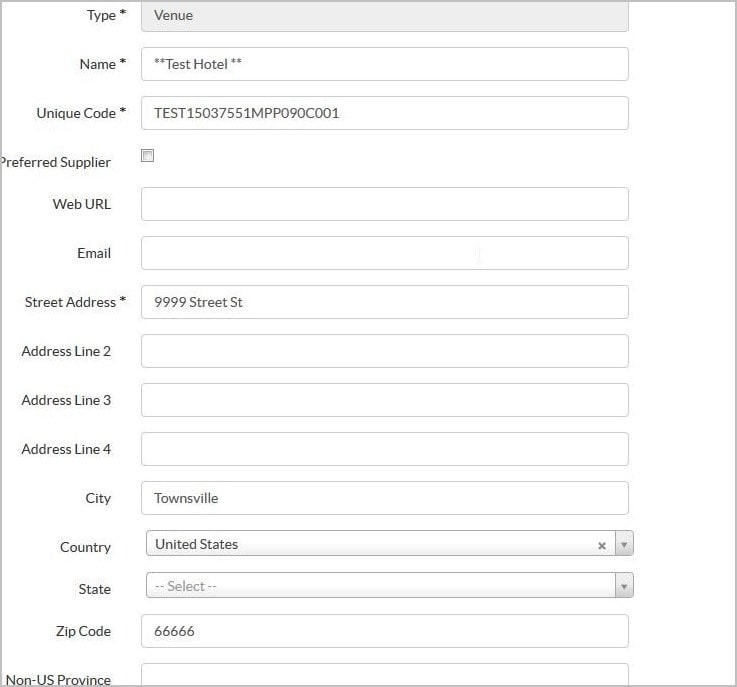
Go to Plan--> Event setup --> Details. Cross check all the details and update missing ones.
Update the require fields as shown in the below screenshot while processing the template selection.

Note: Ensure the right program code is updated in order to flow the registrants to the Eloqua CXD for lead flow. If failed, then contact record gets stuck in the Eloqua.
Event Attributes and Goals :
You can update or retain the values as per event


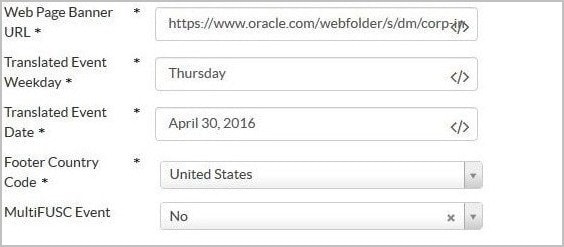
Update the fields of the above Screenshot from the content given in the request portal, if any of the fields are not given in the portal. Confirm the same with the marketer
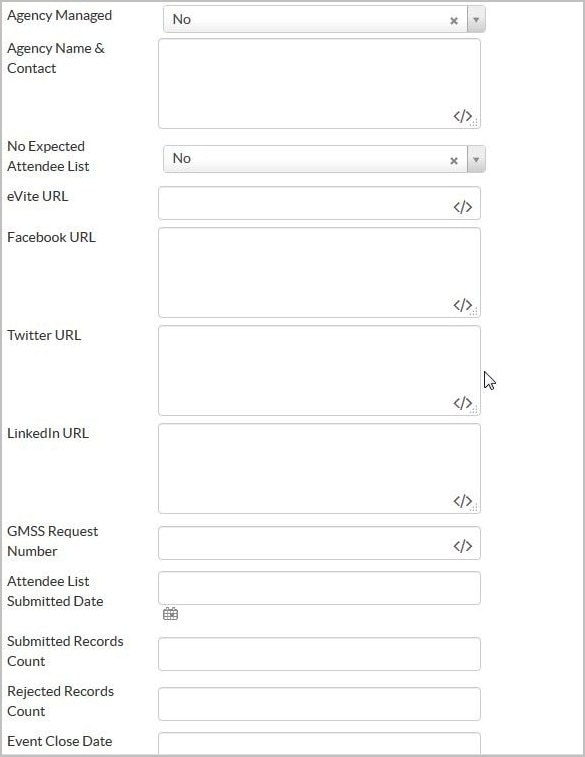
For the above Screenshot - The GMSS Request Number field is mandatory and must be filled
The remaining fields are filled if the details are given in the portal, else they are left blank
Update the fields of the above Screenshot from the content given in the request portal, if any of the fields are not given in the portal. Confirm the same with the requestor


Role assignment : Registraion Support
Registration Support provides Event access to the Marketer in the Certain tool. You can choose the email id from the dropdown list. If Marketer's email id not found, please contact GMSS helpdesk team.

How to update the Disclaimer Module - (RWL008)
1. You must first generate a disclaimer through the Disclaimer Generator.
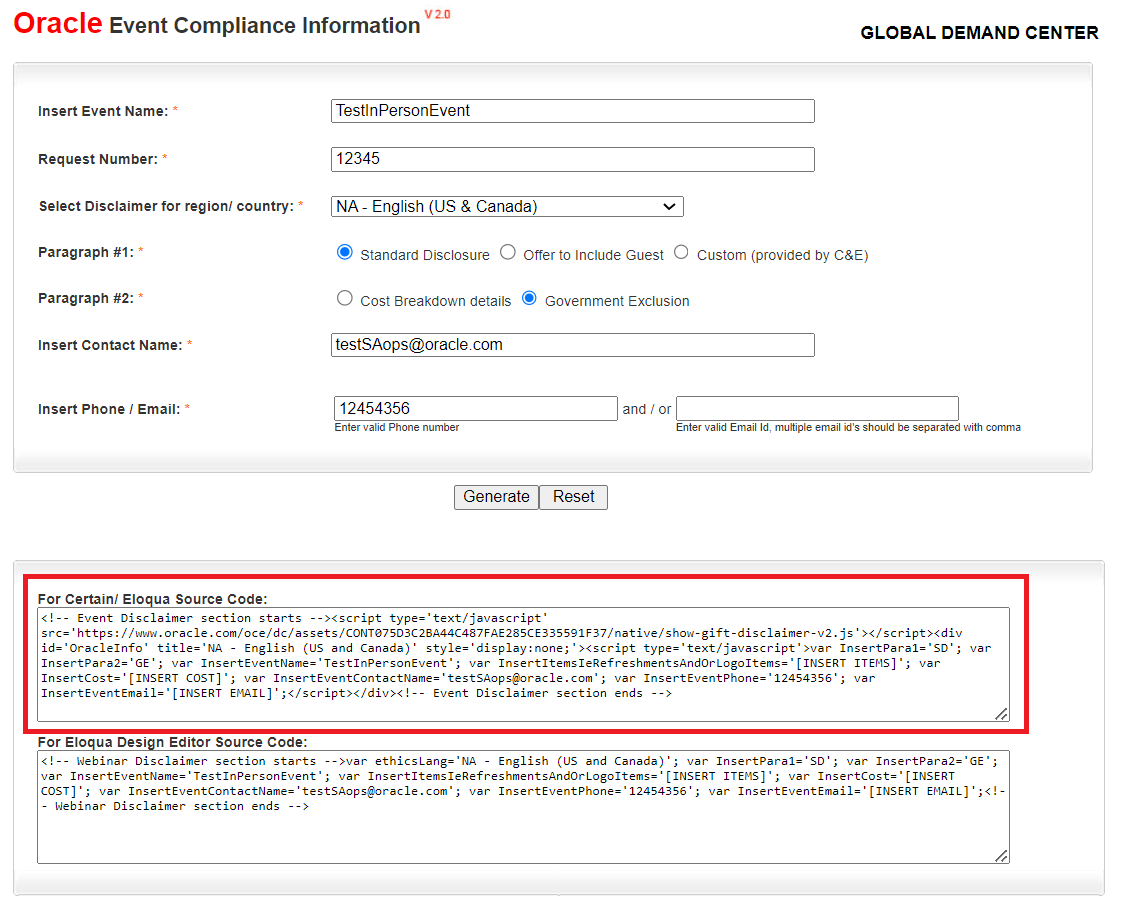
2. Once generated copy the code and navigate to Certain Plan > Configure and select the Primary Display footer part.
Note: Always test and check your changes to see if it appears fine and working.
How to Add Pillar Color Scheme?
1. Go to the Certain Notification Generator
2. Select the color scheme from the dropdown list.
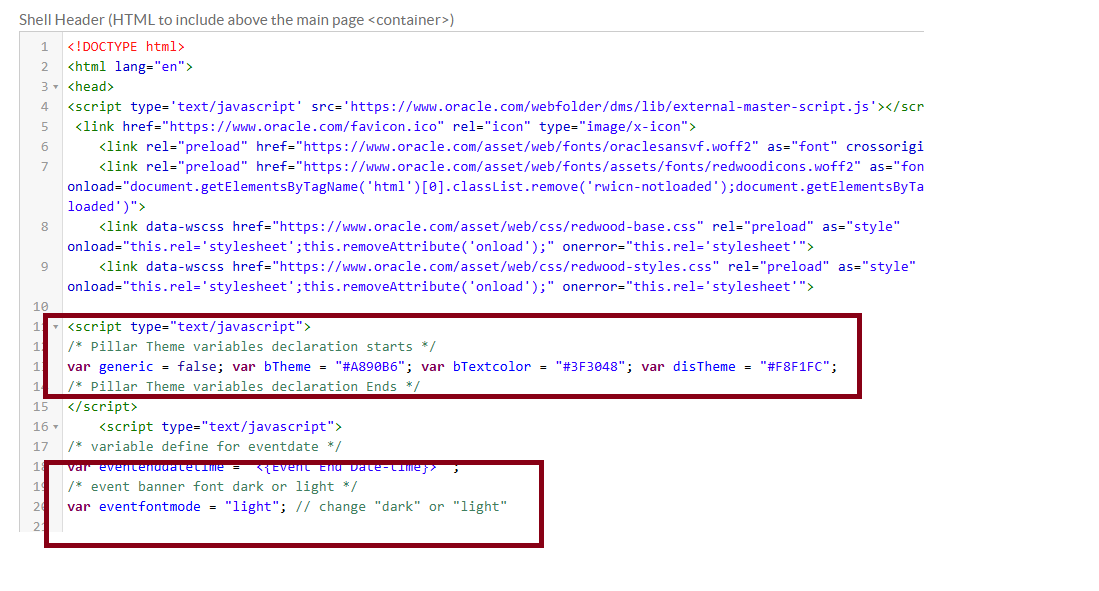
3. Copy the generated code from the Event Page Theme Script, navigate to Certain Extended Display > Shell Header and paste the code. Please see the image below for appropriate placement of the code.
4. Ensure to update the font in the header to dark or light based on the banner slected.(ex: Dark background would have light fontmode and light background would have dark fontmode.)
How to update the Promo Banner?
1. Go to Plan > Display > Extended Display > Shell Footer.
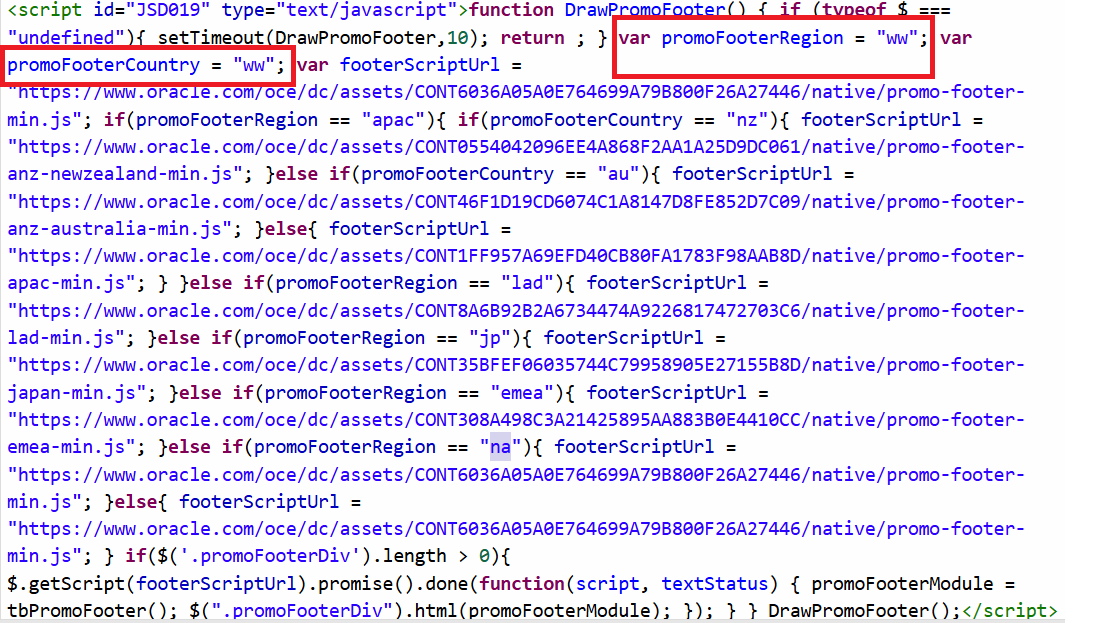
2. In the Shell Footer, locate this function DrawPromoFooter.
3. Once located, look for these two variables promoFooterRegion and promoFooterCountry and update them with your region and country. Based on that, your chosen promo footer should display.These are the options availible (APAC, EMEA, NA, JAPAN, ANZ-AUS, ANZ-NZ, LAD, LAD-BRAZIL, WW).
How to update the footer code?
1. Go to Plan > Configure > Extended Display > Head section.
Kindly make use of the country language code mapping file for the details.

How to update Meta tag and titles.
1. You can see these under the Plan > Extended Display > Head section
2. Ensure all meta details are updated. Currently we have added merge fields to fetch from event details section. You can change based based on your requirement.
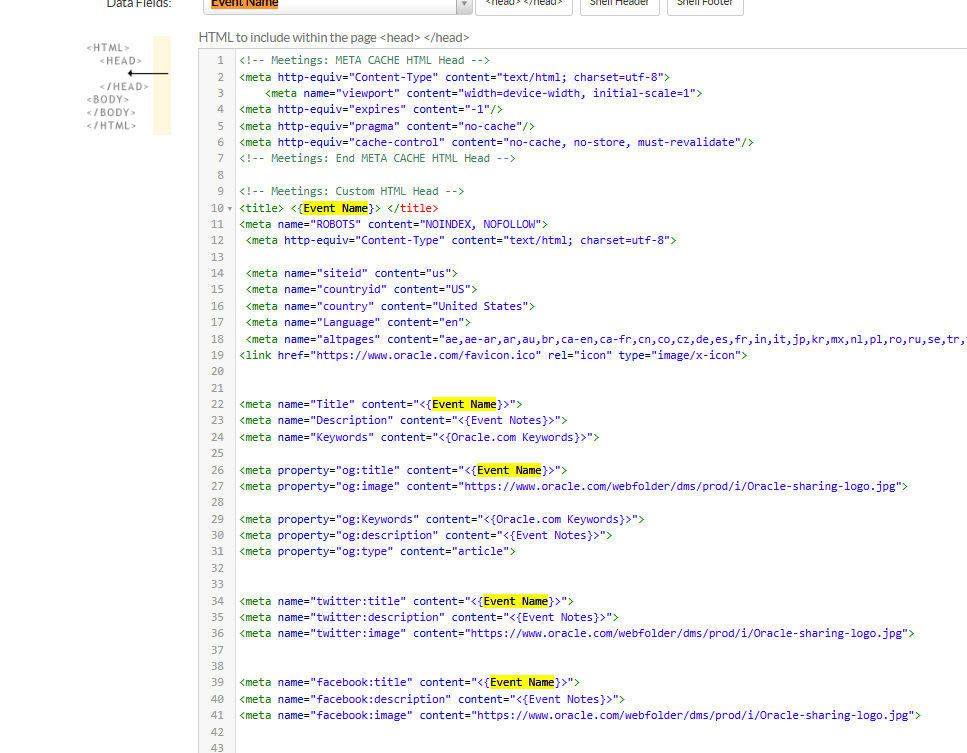
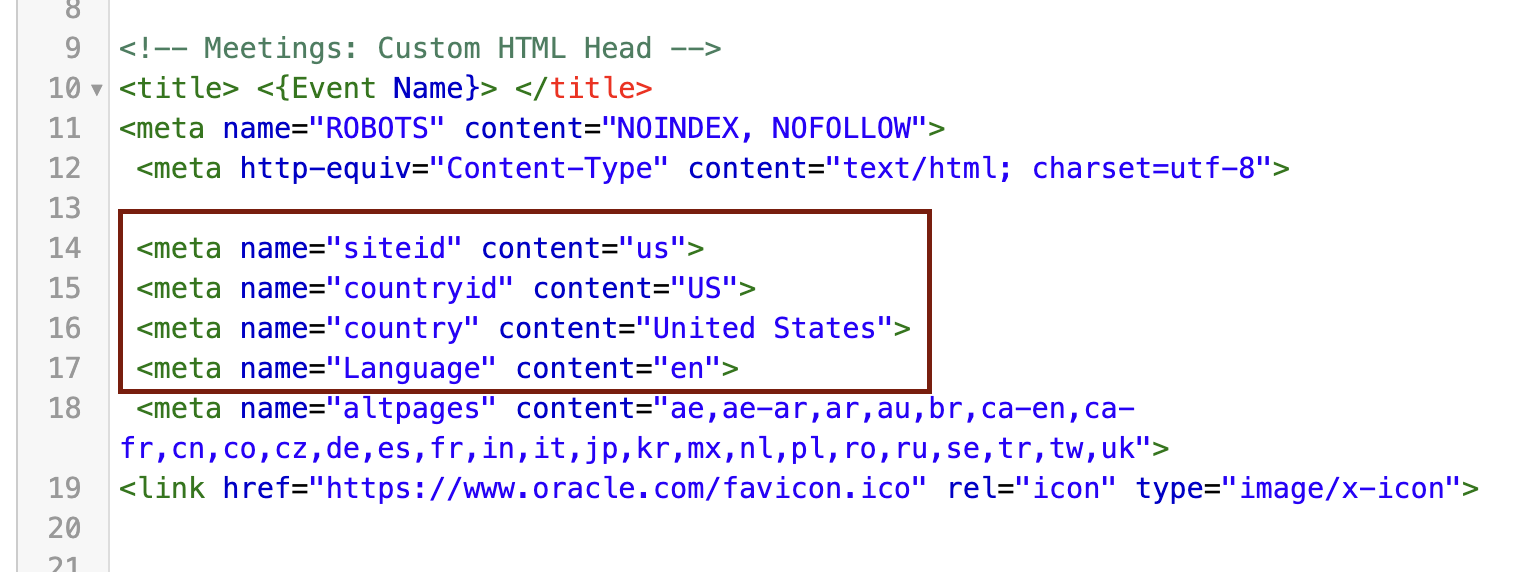
NOTE: We kindly request that the details provided below, specifically the meta information (siteid, countryid, country and language) remain unchanged. These elements are essential for reporting purposes, and we appreciate your support in retaining them as-is. At this time, no changes are planned for these fields. In case there are any future revisions to these fields, we will ensure you’re promptly notified.
In this section, we will learn how to set up an event website, which will perform as a welcome page when the event is promoted through channels like emails or advertisement.
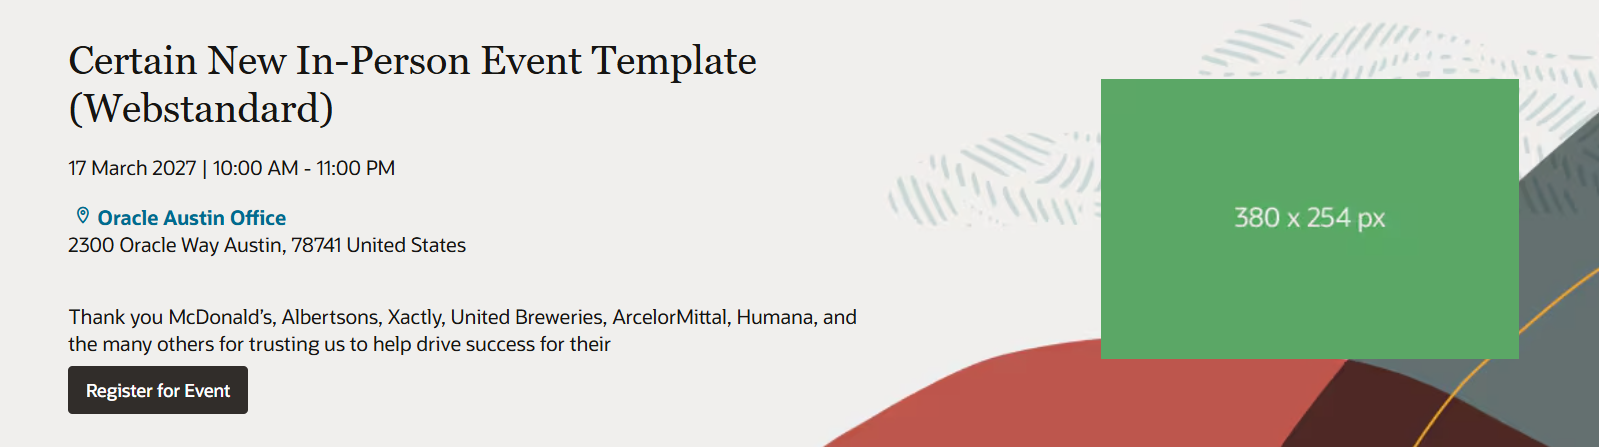
This part of the page can be edited by simply going to the Plan > Content Display > Content Blocks and locate your chosen header type (HeaderWithImage or HeaderWithVideo).
Kindly take note that the Banner can only accommodate either an image/video or a full width image with this size (1920 × 360px).
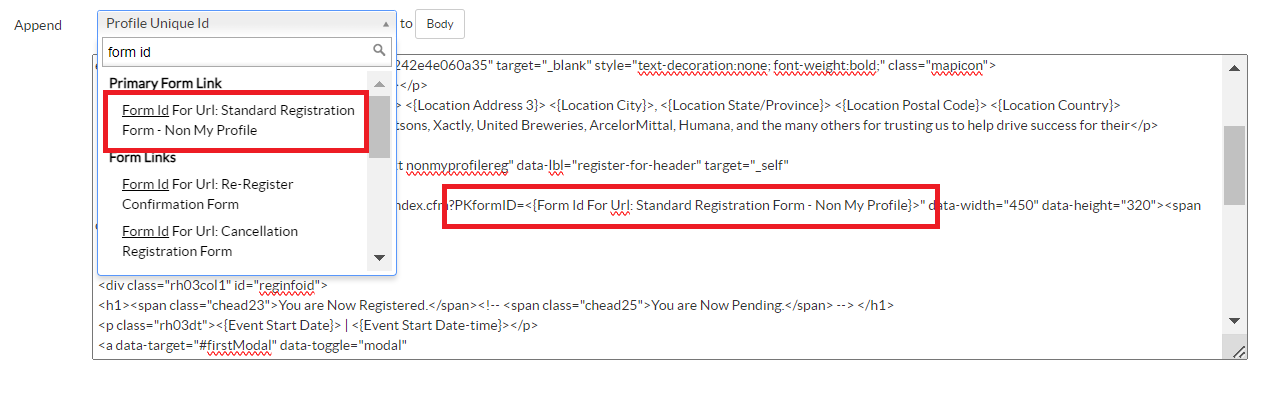
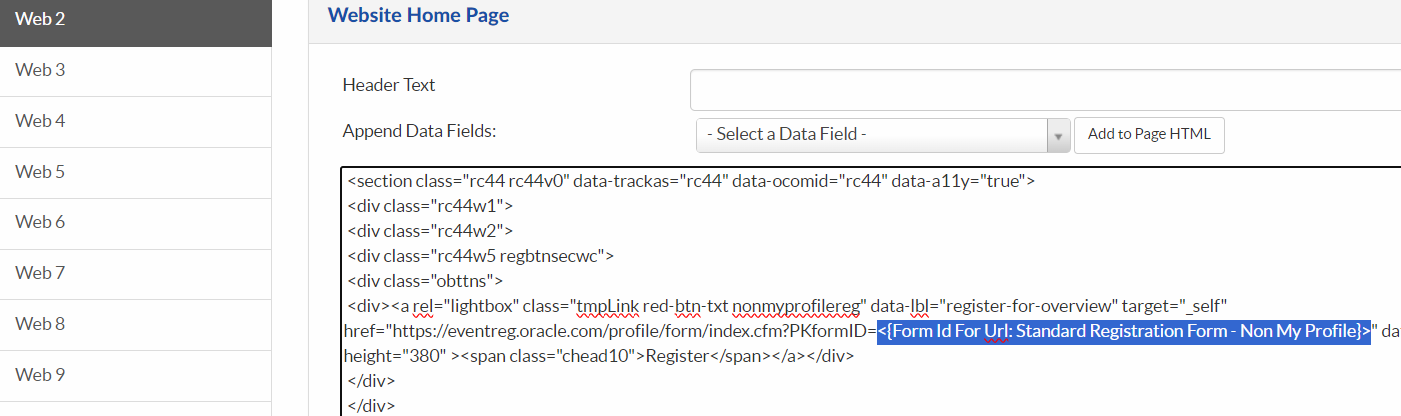
1. To update the PKformID, go to Plan > Content Display > Content Blocks then select your chosen Header, either HeaderWithImage or HeaderWithVideo.
2. Click the edit button on the right side
3. Highlight this code <{Form Id For Url: Standard Registration Form - Non My Profile}>
4. From the Append dropdown select your chosen Form ID
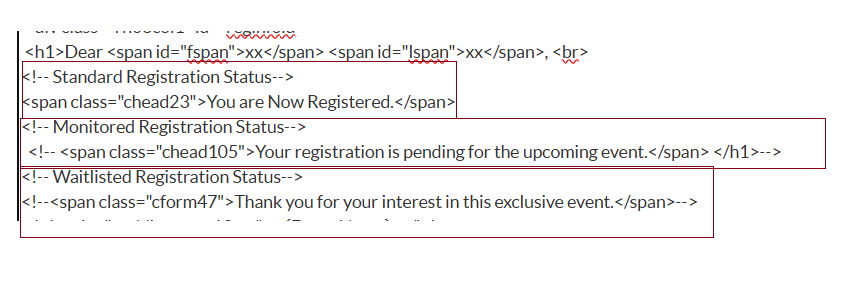
Note: Depending on the registration type, you will need to enable the form on the welcome page and display the appropriate message on the Thank You page. Currently, it shows the message for standard registration by default. If you have monitored or waitlisted registrations, please enable the corresponding message as needed.
How to change from Image to Video? - RC44v0
1. Go to Plan > Configure > Extended Display > Shell Header.
2. In the Shell Header at the bottom part of the codes you will see the designated code for the HeaderWithImage or HeaderWithVideo that you need to update.

3. Once located, highlight it and scroll up then select from the Data Fields either "HeaderWithImage" or "HeaderWithVideo" then place in Shell Header.

How to customize the header banner CTA?
1. Go to Event Setup > Content Display > Content Blocks > open either the HeaderWithImage or HeaderWithVideo whichever you selected.
2. Once opened, look for the class="chead10 topcta">.
3. Once located, replace the class from "chead10 topcta" to "topcta" only.
4. After replacing the class, you may now proceed in replacing the text to your discretion. Do not forget to check and test for dark and light modes.
To update the details here, just go to Promote > Event Website > Web 2. Take the Web 2 code and update the details required. Do not forget to adjust the PKformID based on the Registration type and the time which would adjust the countdown. The rest of the details would follow.
Locate the code below to update the PKformID - RC24v0
Overview:
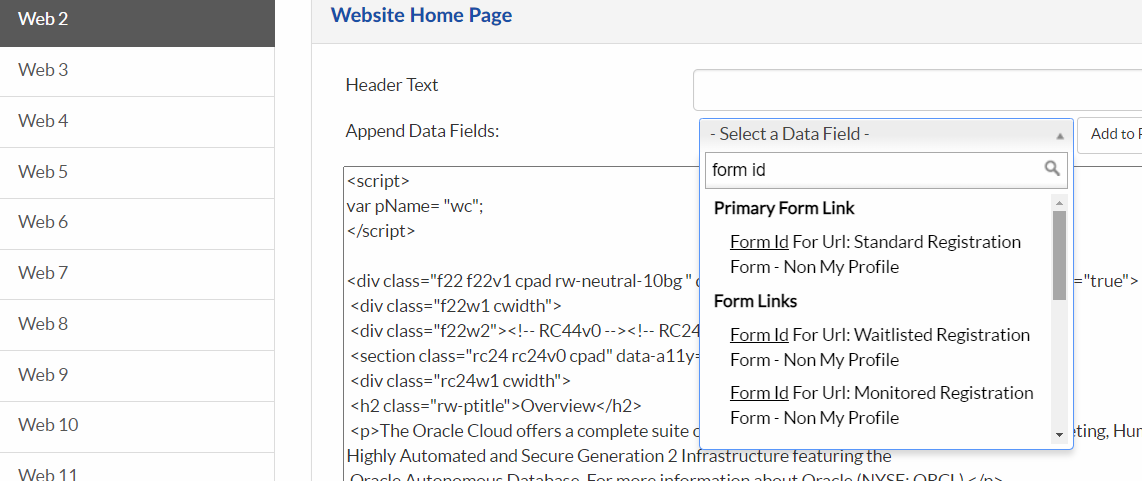
1. To edit the Overview PKformID, go to Promote > Event Website > select Web 2.
2. Search this code <{Form Id For Url: Standard Registration Form - Non My Profile}>. Based on the registration type you can update the FormID URL by selecting it from the Append Data Fields as shown in the image below
Tips on content formats:
1. If you opt to use headings and subheadings. You may use these classes below:
<h2 class="rw-ptitle">
<h3 class="rc24subhead">
2. If you opt to have bulleted lists or numbered list. You may use these classes below:
<ul class="obullets">
<ol class="decimal">
How to update the Countdown Timer? - RC44v0
1. Generate a time through the Web Standards.
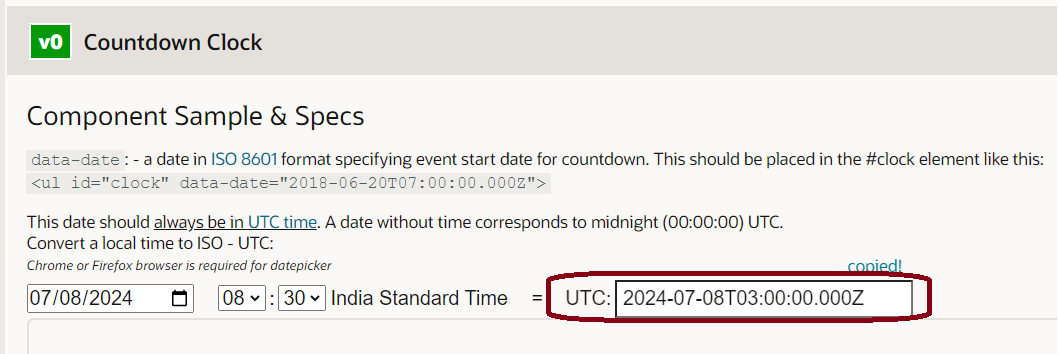
a. Note down the generated time similarly with the image above.
Note to always make sure that the time you are entering is converted to UTC. You may use this link for reference on the time differences.
2. To apply the time you generated, locate this code - id="clock". Simply replace the time inside the data-date - like this <ul id="clock" data-date="2024-08-30T18:30:00.000Z">. Once done, it should reflect in the Days, Hours, Minutes and Seconds accordingly.

How to update the Agenda Module? - RC51v0

There are 2 options here, a Single Date Agenda and a Multi-Date Agenda. If you opt for a Single Date Agenda, you just have to update the content and components.
Note that this module will have a tab option if it’s a multiday event, and a single section for single day event.
To get started, you must first locate id="Agenda".
1. Once located, you may start through the role="tablist" and select how many days is your event.
 <li><a href="#Day1" id="rt01tab-Day1" aria-controls="Day1" role="tab" aria-selected="true">Day one</a></li>
        <li><a href="#Day2" id="rt01tab-Day2" aria-controls="Day2" role="tab" aria-selected="true">Day two</a></li>
        <li><a href="#Day3" id="rt01tab-Day3" aria-controls="Day3" role="tab" aria-selected="true">Day three</a></li>
2. Now to edit the Agenda per day, you may start by locating the assigned id="Day1" depending on how many days your event is. By identifying this, you will be able to add your event description, session title, time and timezone and as well as the speaker names accordingly.
3. Simultaneously, you may also link a biography/about me of the speaker if available. Just locate class="rc51speakers" and add in the href the url.
<ul class="rc51speakers">
        <li><a href="#" data-lbl="splink" target="_blank" >Speaker Name</a>
        <p>Job Post, Company Name</p>
How to Add or Remove Day List Tab:
1. If your event has only 2 days, remove the <li> tag for Day 3 from the role="tablist". This action will eliminate the per-day tabs displayed in the Agenda.
2. If your event has more than 3 Days - From the role="tablist", add the <li> tag and update the agenda day <li><a href="#Day4" id="rt01tab-Day4" aria-controls="Day4" role="tab" aria-selected="true">Day four</a></li>.
How to Remove the Multi-Agenda Module incase you have only a Single Agenda?
1. Locate first the Agenda section which can be done by searching id="Agenda".
There is comment added for each section to figure out where the section starts and ends.
2. To remove the Multi-Agenda module, simply delete the whole section under this code - <section class="rc51 rc51v0 cpad rc51static" data-trackas="rc51". This goes same with the single agenda too.
3. If you plan to retain single agenda then make sure id="Agenda" is added to single agenda section inroder to display the single agenda module.
How to update the Date and Time in a Multi-Event Agenda? - RC51v0
1. Open the WebStandard and generate through the Agenda Tool.
2. Fill out the necessary details:
Once filled out, a generated code will appear in the Opening Time Slot which you will use later.
Note: All translation is based on data-lang="en" or data-lang="en-gb". Not all translations will be available in the Language Override in WebStandard. If the language you intend is not available then please use English instead.
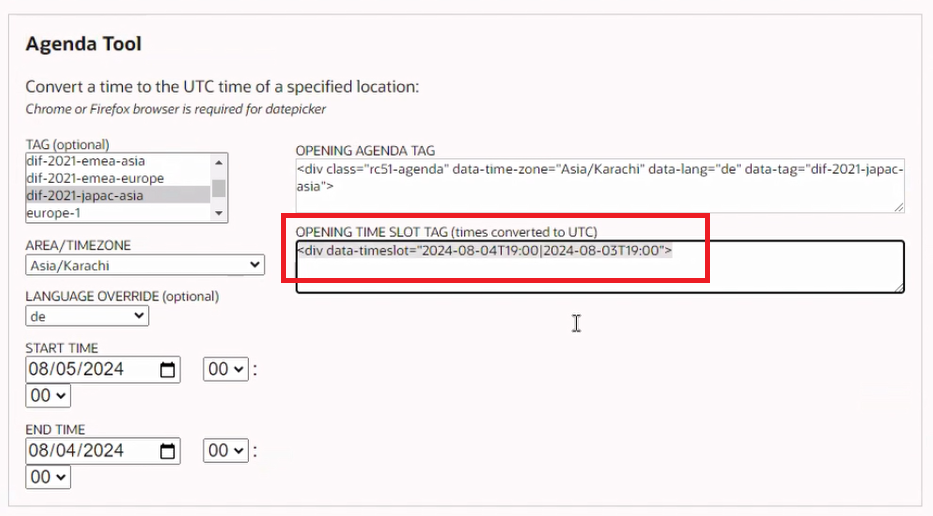
3. Now to edit the time in your Agenda Module, simply go to the Promote tab and under the Websites, go to the Event Websites and then Web 2.
4. Locate this code <div data-timeslot="2039-8-12T20:00|2039-8-12T21:00"> and replace with the generated code.
5. Update per Agenda as they will have the same code to locate. Just update the date and time accordingly. Simultaneously, you can update the Title and Descriptions as well.
Note: To change the meridiem format, follow these steps below.
How to customize Agenda End Time in your event?
There are several options that can be found in the Web Standards template.
Should you need to remove the end time - or completely eliminate the end time display from the agenda - use the following code snippets.
To enable this, go to Plan > Extended Display > Custom HTML Section and add these codes below the BEGIN Redwood CSS/JS.
1. For removing only the end time of last agenda block:
	<style>
	.rc51timeslot:last-child .rc51separator:nth-child(2) {
	display: none;
        }
        .rc51timeslot:last-child .rc51time:nth-child(3) {
        display: none;
         }
        </style>
2. For removing end time of entire agenda block:
	<style>
	.rc51timeslot .rc51separator:nth-child(2) {
        display: none;
        }
        .rc51timeslot .rc51time:nth-child(3) {
        display: none;
        }
        </style>
How to update the Featured Speaker Module? - (RC49v0)
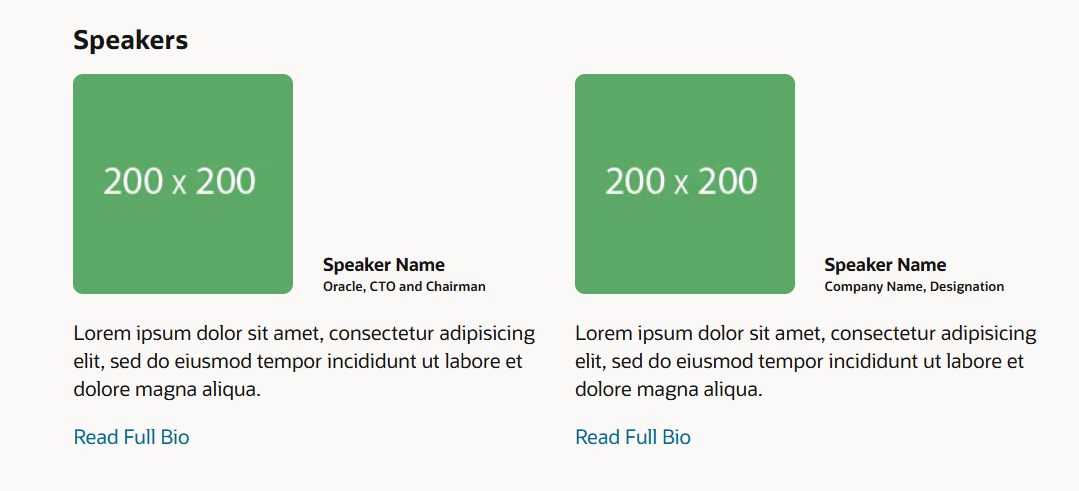
1. To begin adding your featured speakers, locate this id="Speakers" first.
2. Each speaker includes an image, name, title, short description and a bio lightbox that you need to update. If you want to add more speakers, simply locate and copy the rc49w2 div and add the new speakers. With this, you will not face any design issues.
Note: Each <div> set will have two speakers only.
3. Each lightbox may also contain previous On-Demand videos related to the speakers, which you can choose to update if needed.
4. To easily navigate to each speaker, just locate this <div class="rc49feature"> or use their own unique ID.
How to add more speakers?
Note that only two speakers are allowed per row to avoid rendering issues. You can simply do this by copying section to section.
1. Simply copy the whole section starting at the first <section> to </section>.
2. Once you grabbed the whole section. Carefully paste it below the initial section above which contains the first two speakers
3. Please remove the heading part by deleting this <h2 class="rw-ptitle"><span class="ctab3"<Featured speakers></span></h2>.
4. Also please update the Unique ID per speaker - example: id="rc49larry"
5. Once done, you may fill out the details as intended.
Now what if you only opted to have 1 speaker?
1. Simply locate this <div class="rc49feature"> or their own unique ID if available.
2. Once located, you may start deleting each part of that Speaker.
3. Each speaker should have the following classes: rc49row, rc49info, rc49intro, rc49bio which has the OnDemand video.
Note to be extra careful when deleting to avoid distorting the format.
How to update the Sponsor Module - (RC56v0)

1. Locate this id="Sponsors" and add in your [Event name].
2. Once done, you may proceed in placing your sponsored logos. Do note that the logo images should be in specified sizes (136*40px).
<li class="rc56w3">
         <div class="rw-logo rw-logo-centered">
		 <img data-src="Image URL" alt=""></div>
How to update the Contact Section Module - (RC26v0)
Locate first id="Contact"

To add your Point of Contacts, locate <div class="col-item" role="listitem">. Below this, simply update the respective details as needed.
How to update the FAQ Module - (RC105v0)
Locate id="FAQs" to begin with this module

To add your FAQ, just locate <div class="cb105w3">. Add the details after accordingly.
Sticky Navigation and Share Module - (RC78v0) and (RC54v0)
Locate id="topics-label" to start with this module
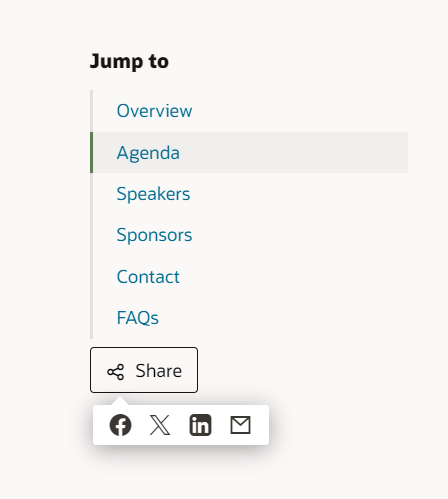
A. To update the Sticky Navigation, simply locate <div class="stickyval"> and update the topics you want to highlight.
B. Edit the Share module by locating <span class="csocial2"> and place the needed share locations (Facebook, Twitter, Email, etc.). Edit the href and add the URL or Contact.
Sharing via Email
When sharing through MailTo (Email), the Event URL will be found in the body of the email. You will then need to manually update the source tracking per your discretion.
To edit that, just go to Promote > Event Website > Web 2. From there locate the data-url and then manually update the URL and source tracking. Once updated, it will automatically reflect when you share through email.
1. When editing the codes, Apply Source Formatting in the Dreamweaver and edit by Section to avoid missing out any details.
1. To update the Confirmation page, click on Forms and then edit button at the right panel of your Primary Form.
2. Select Confirm in the left panel and scroll down to the Confirmation Text section. In header, locate var myProfileredirectUrl.
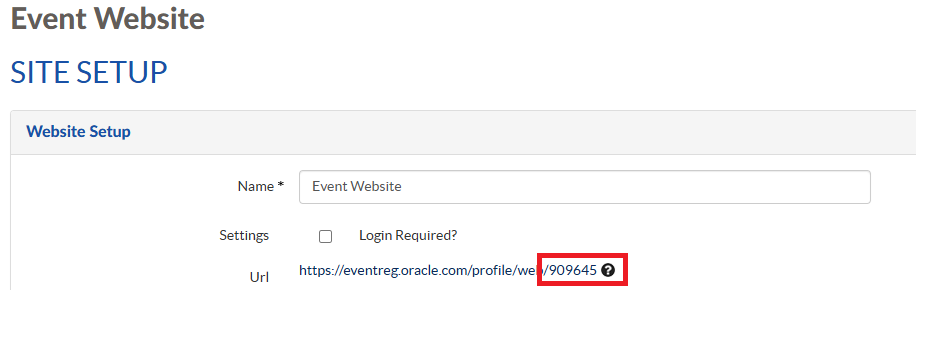
3. Update the website ID.
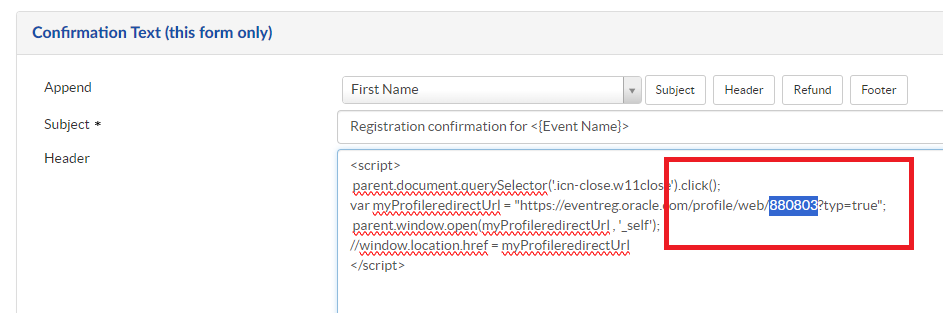
Note: Do not forget to update the website ID in the forms where you see this code - "var myProfileredirectUrl = "https://eventreg.oracle.com/profile/web/897048?typ=true"; " This is a rediction code where we will be able to fetch the welcome page content to the thank you page.
4. Website ID can be found in Event Website -> Site Setup.
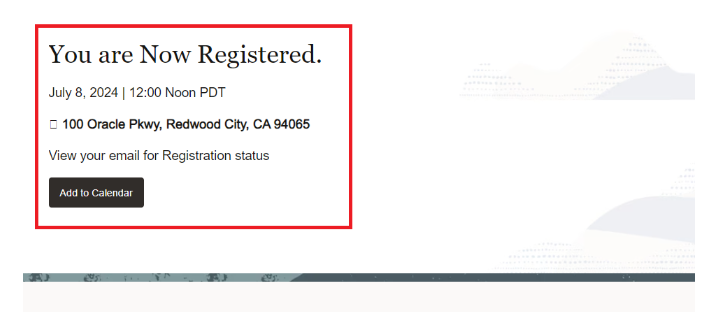
4. Once done, to edit the Confirmation Page content, go to Plan > Content Display > Content Blocks > HeaderWithImage or HeaderWithVideo (depending on what you selected) and click edit button. Next in the Append section, the code of the Confirmation Page will start at <span class="chead23">, so just update the content accordingly.
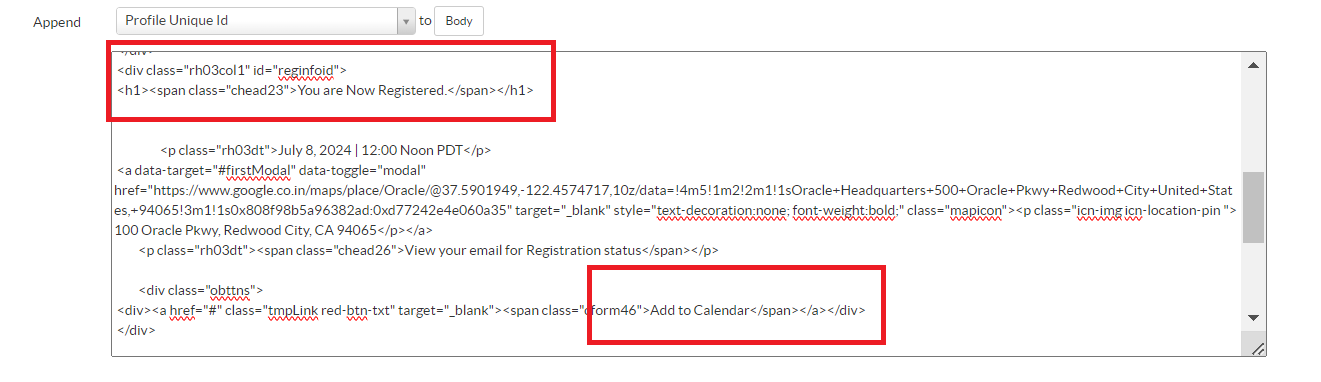
The image below are the only things that would change for the Confirmation Page. The rest would be retained.
Updating the Forms
To create the questions you will need to go to Plan > Event set up > Questions and customize based on the requirement.
How to Add Questions in your Forms:
1. To get started, go to the Event Dashboard > Forms (select your chosen form) > click the Setup.
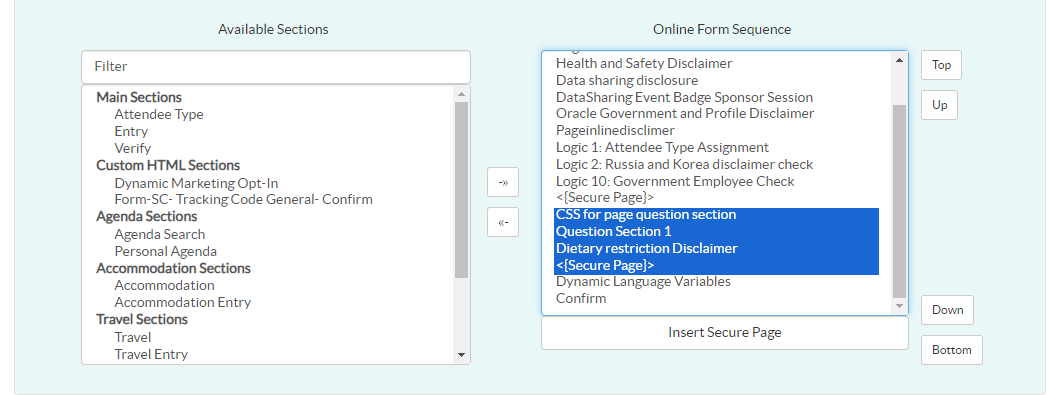
2. Scroll down to the page layout and select the following from the Available sections on the left and add them to the Online Form Sequence on the right:
3. Make sure the sequence is correct. These should all be after the Government Employee check <{Secure Page}>.
4. Once added, you may now go to the Questions setup tab.
5. Select Question Section 1 > click edit > scroll down to the Questions Section > select the questions from the dropdown
Note: Do not forget to update the Question Section Header.
Adding Dietary Restriction Disclaimer
This is only optional but from the form page layout. You may search for the Dietary Restriction Disclaimer in the Available sections. Drag and drop it below the Question Section 1 in Online Form Sequence.
Setting up the Cancellation Page and Other Forms
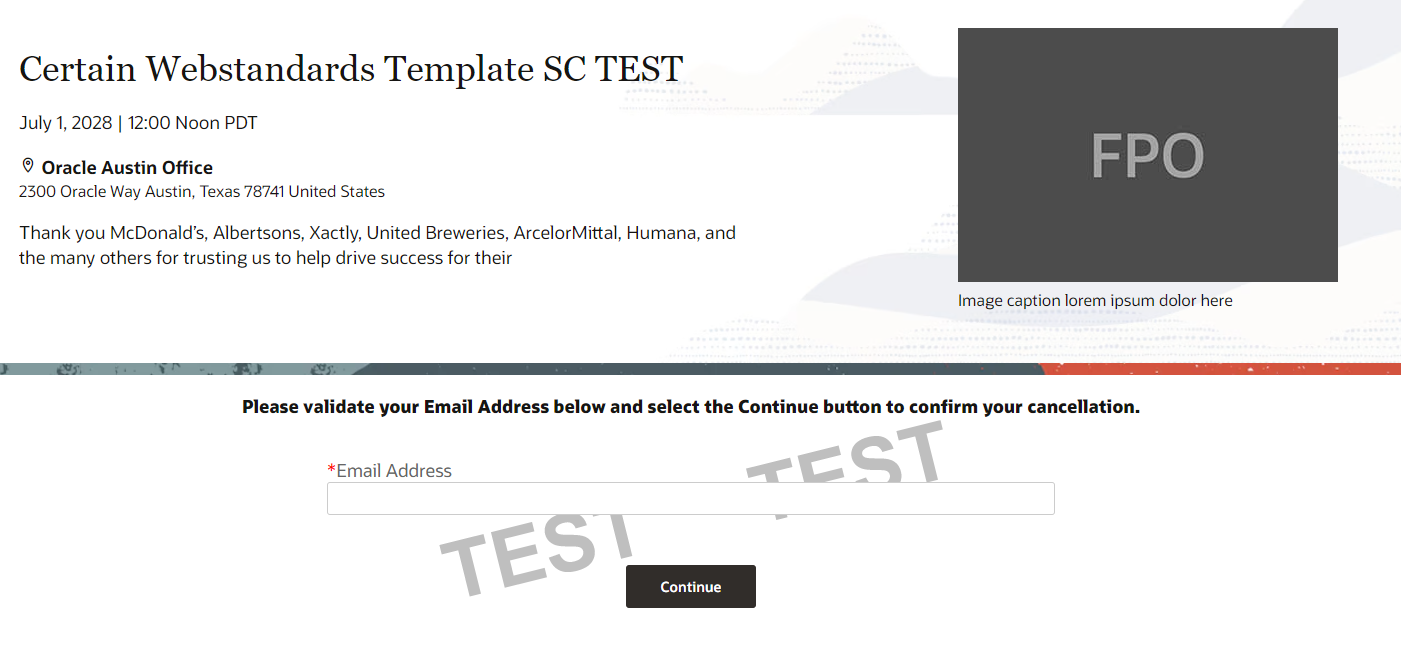
1. To edit the Cancellation Page, go to the Plan > Forms > Cancellation Registration Form > Click Edit > On the left pane, click Confirm.
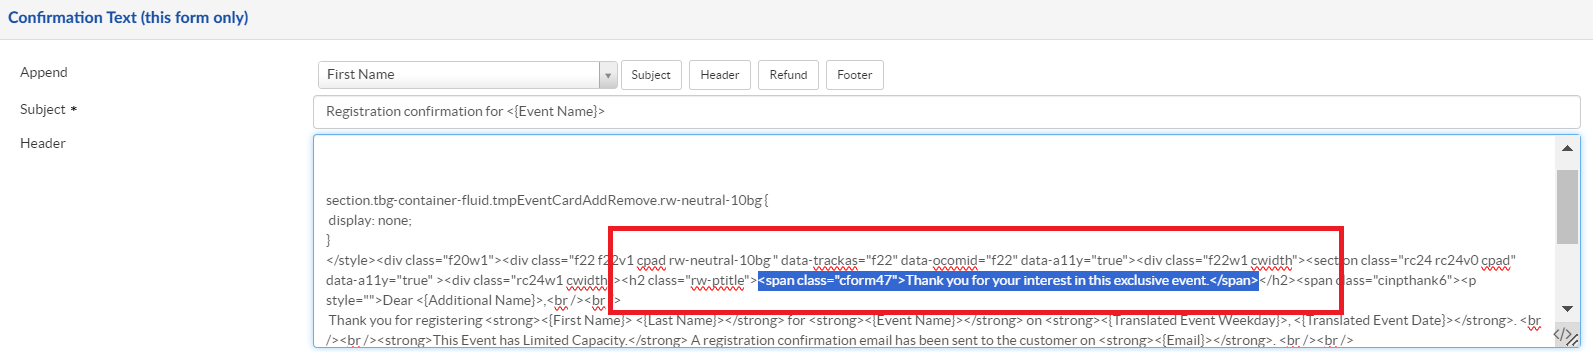
2. This has a default content; however, the content can be edited by removing the span class.
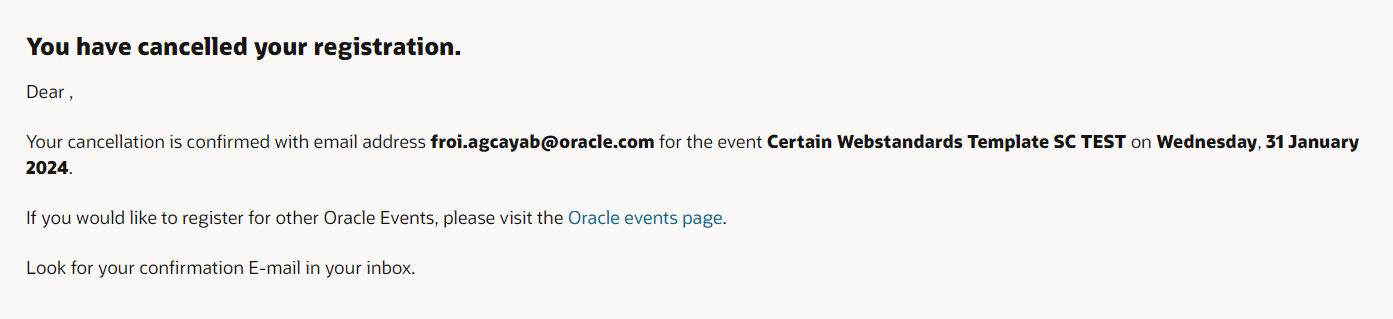
3. When a registrant opts to cancel their registration, they must complete the cancellation form. Once submitted, they will receive a confirmation email in their inbox.
Notes:
• For Non My Profile forms and Re-Register forms, we need to update the website ID which is mandatory. Other forms like the Internal Courtesy, Tele Registration, Walk-In and Cancellation Registration Form have a default flow. However, if you want to modify the content (title), you can do so by simply removing the span class from the confirm tab in the forms.
• In the Tele Registration, when using this form, always remember to update it's Logic.
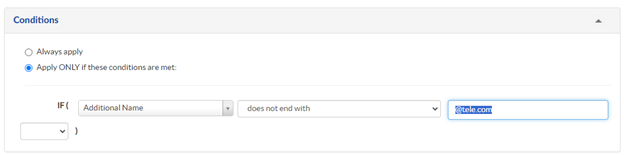
1. Simply go to Plan > Forms > select and edit Tele Registration Form > go to Logic > under the list of Logic Rules > select Check Tele Agency Domain.
2. You will need to update the conditions of the Tele Domain (see the image below for reference).
Navigate to Promote > Communication > Email Templates. Notifications for Communicating with Event Registrants can be copied from the Certain notification generator, and these could be altered based on the requester demand. Each notification should be associated with their respective status.
You can access the HTML code for notifications directly through the Certain Email Notification Generator where you can select the Language and Color Scheme for email templates (notifications). Click here to access the generator.
Let's say an event is Cancelled or Postponed. Few components of the page must be manually updated. Below are the steps on how we can update them.
1. We must first update the header of the page. Go to the Event Setup > Content Display > Content Blocks > select HeaderWithImage or HeaderWithVideo.
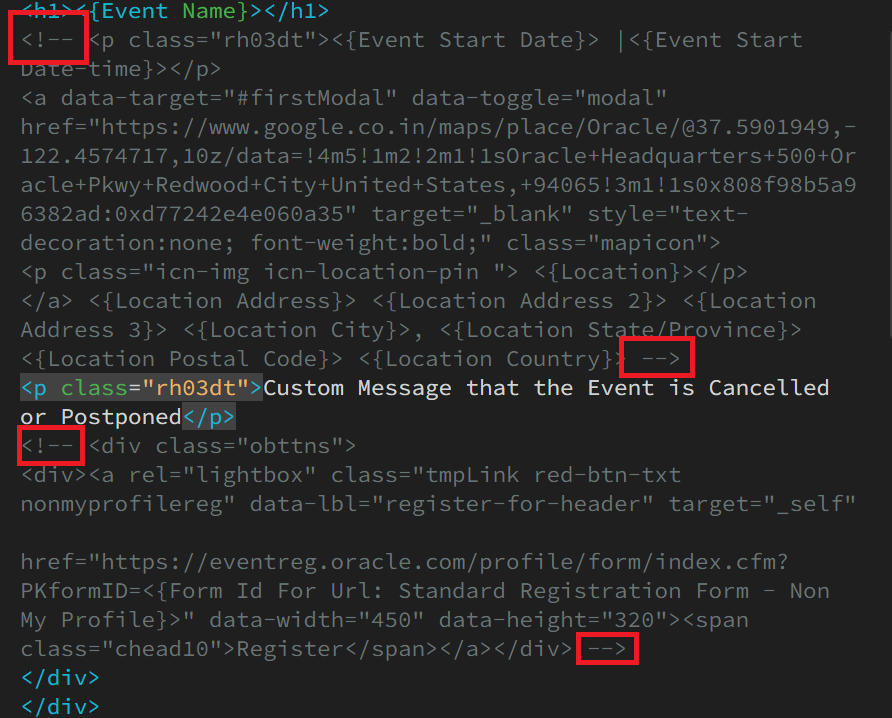
2. Once selected, grab the code and simply comment out the Date, Time, Location and Registration Button. You can retain the Event Name and the Event description where you can notify a custom message that the event is cancelled.
Instructions: To comment out codes, simply include these at the start ( <!-- ) and at the end ( --> ) of each cluster of codes.
3. Once you are done on the Event Header, you may proceed to the Overview module. To update the details here, just go to Promote > Event Website > Web 2.
4. You will basically do the same thing here and comment out the codes for the second CTA button and the countdown clock.
5. Grab the code and locate the section between "RC24v0", this is where you can find the cluster of codes for the second Registration CTA and the Countdown timer.
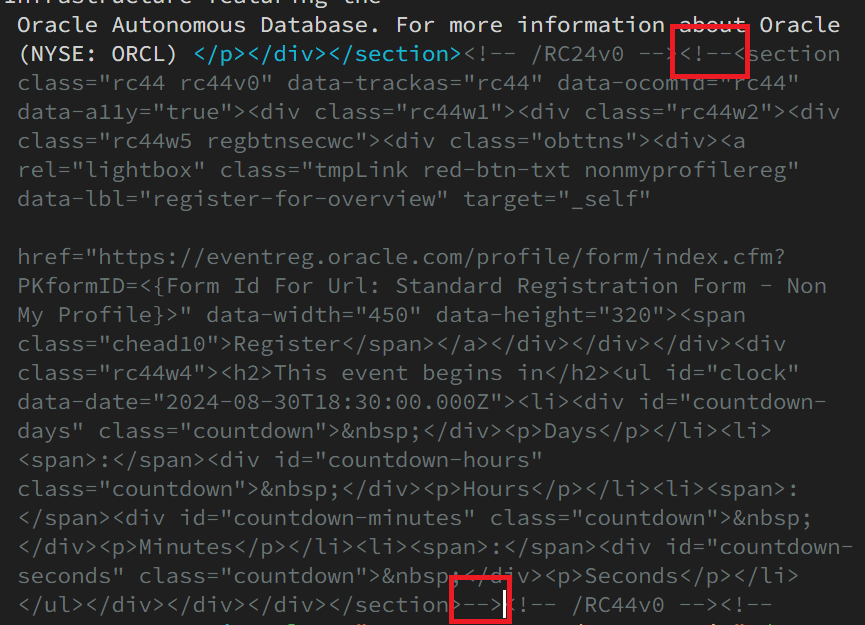
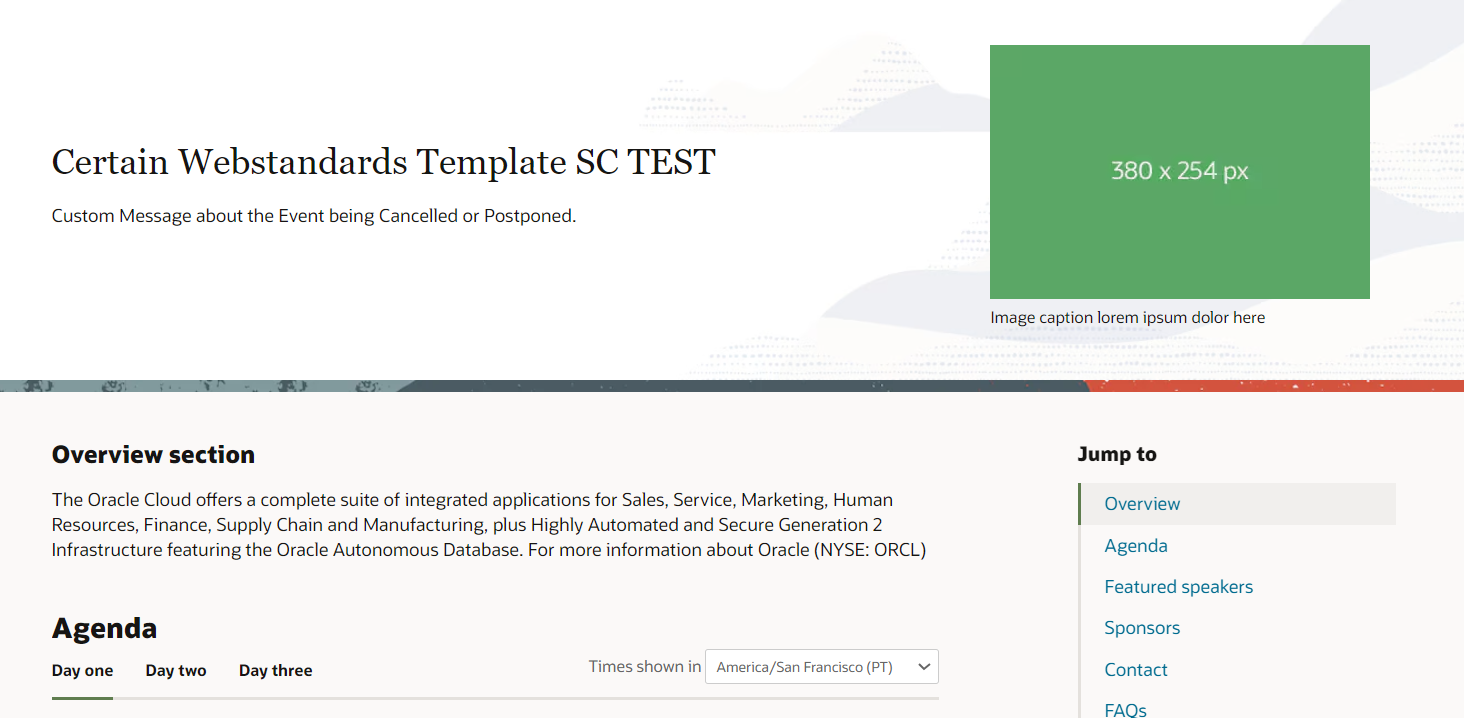
6. Once you are done, you should get a similar look of the page without the Registration buttons.
If yes, click below to confirm completion of this topic.
Yes, I have understood this topic well