Ensure, the registration method has been selected as “Monitored” in the event request before processing for the Monitored Registration setup.

Having your event online allows promoting it easily across emails, social channels, encourages your attendees to share with their friends, and makes it really easy for people to sign up and pay to attend your event.
In this section you will learn the following steps in how to set up an event in Certain and publish it online. After having identified the event request type as ‘Monitored registration’ from GMSS request portal.
A Monitored Registration is a regular registration process, without options to edit or modify. Anyone could register for the event.

 People
3 - 6 |
 Prep time
5 min |
 Time
30 min |
 Difficulty
Easy |
Ensure, the registration method has been selected as “Monitored” in the event request before processing for the Monitored Registration setup.
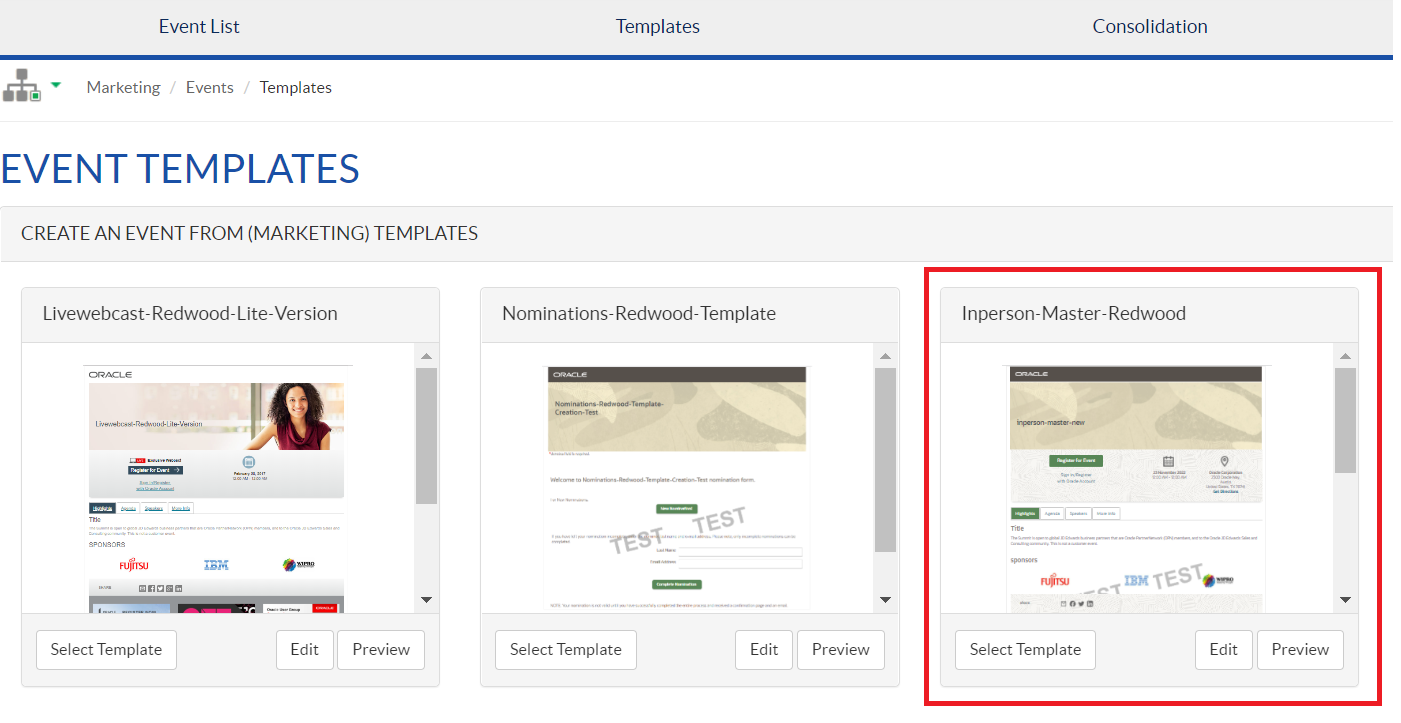
This section describes how to select a template for the Monitored Registration.


Note: Ensure the right program code is updated in order to flow the registrants to the Eloqua CXD for lead flow. If failed, then contact record gets stuck in the Eloqua.

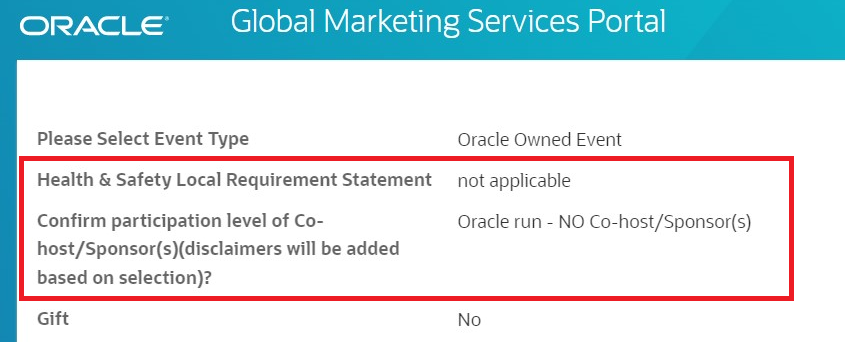
Update the fields of the above Screenshot from the content given in the request portal, if any of the fields are not given in the portal. Confirm the same with the requestor
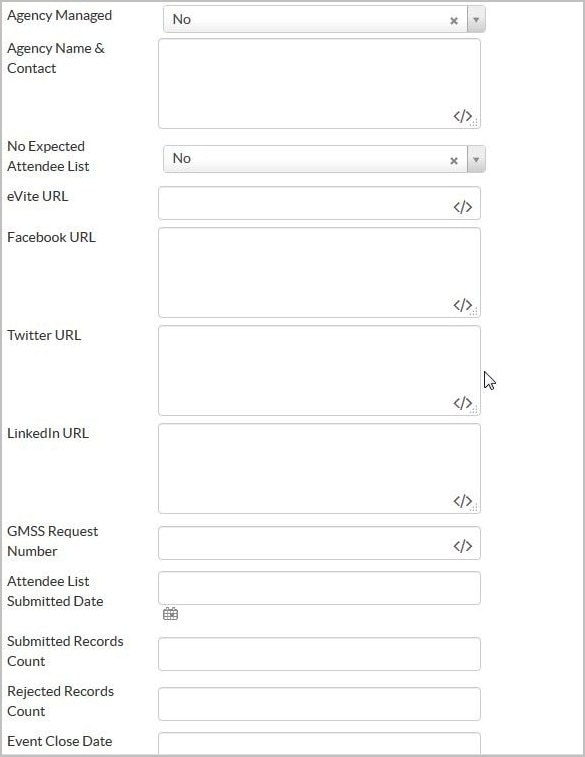
For the above Screenshot - The GMSS Request Number field is mandatory and must be filled
The remaining fields are filled if the details are given in the portal, else they are left blank
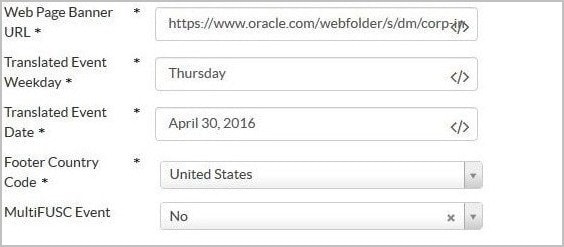
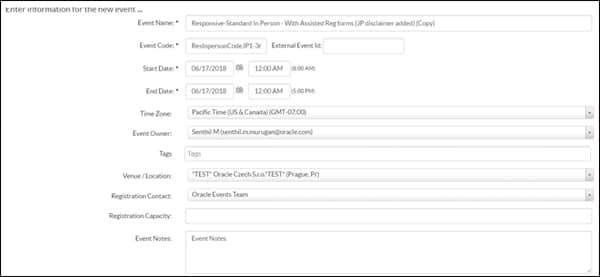
Update the fields of the above Screenshot from the content given in the request portal, if any of the fields are not given in the portal. Confirm the same with the requestor
Note: Ensure the right program code has been updated in order to flow the right contact to the EloquaCXD for Lead flow, if failed, then contact records got stuck in the Eloqua.
This section describes the steps for updating the following pages automatically.
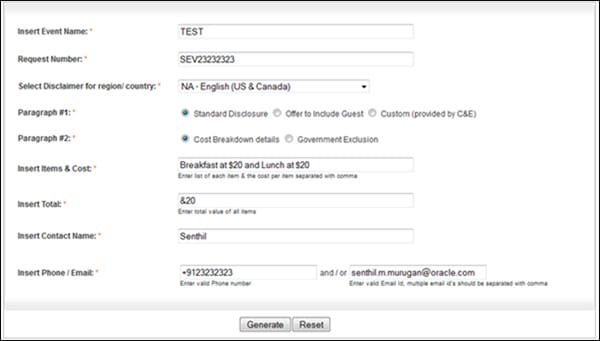
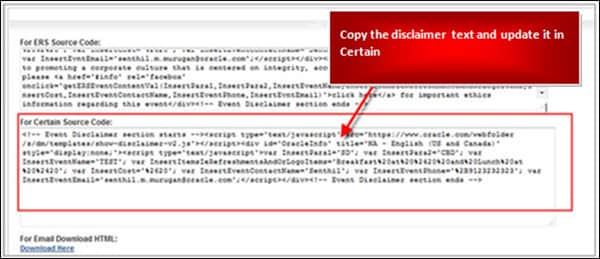
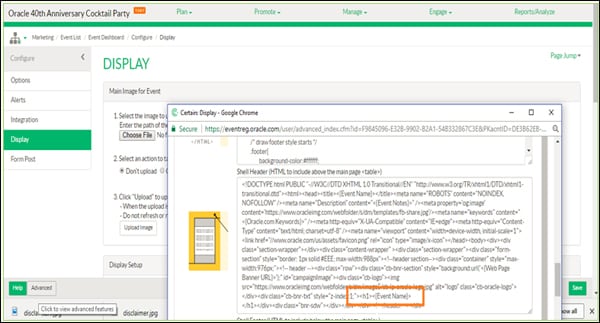
Follow these steps to update the disclaimer that appears in the footer, as highlighted in the following screen shot.

All the fields under the Advanced shell header and footer have been updated with the custom dynamic data field. There is no action required from your end unless you would like to update a custom event name. You can change the event name under Event Setup. Alternatively, you can use the Event Name merge field, which automatically displays the header images. If the requester wants to modify the event name that is displayed in the header image, then you can update the customized event name text instead of using the merge field as shown below.
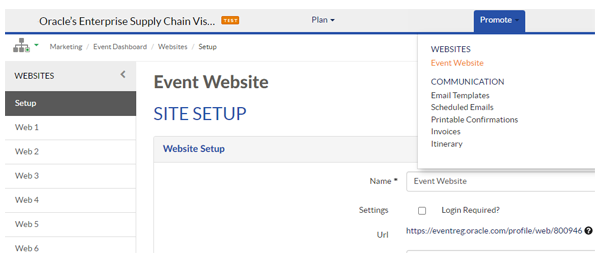
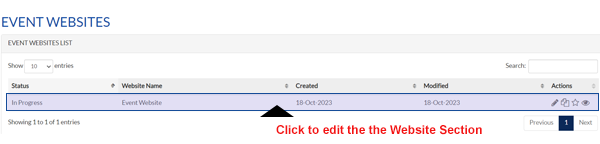
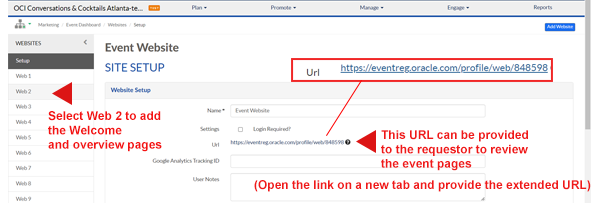
In this section, we will learn how to set up an event website, which will perform as a welcome page when the event is promoted through channels like emails or advertisement.

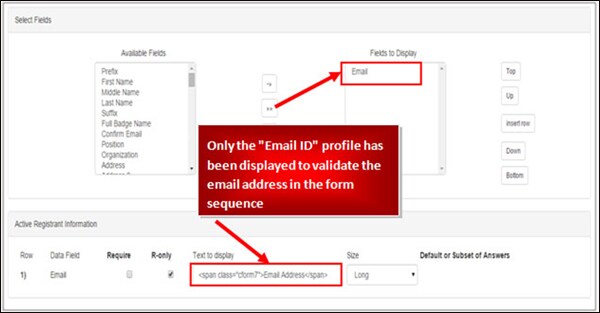
In this section, we will learn how to navigate plan and set up different forms, to capture registrations.
Follow these steps to associate the My Profile Monitored registration form.
5. Accept the default registration status as O_Registration Pending.
6. Check the My Profile form registration status and Logic Flow.

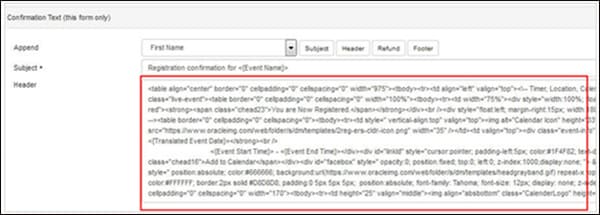
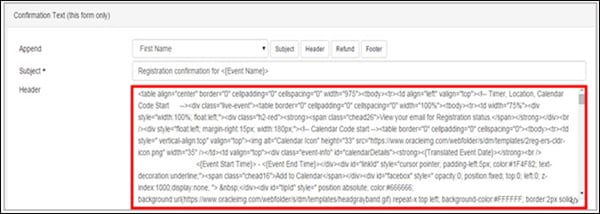
7. On L.H.S, click the 'Confirm' tab, update the thank you page content under the 'Confirmation text' section and save.

Follow these steps to associate the 'Non My Profile' monitored registration form.
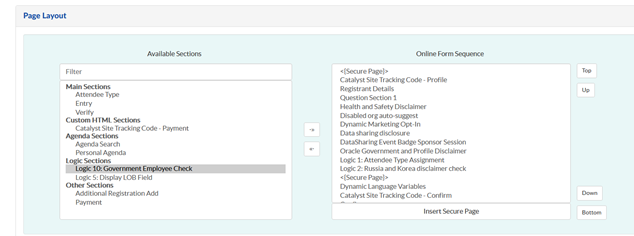
In Certain tool, please make this update: If Government exclusion: "No", Move Logic10 to from right panel to left panel.
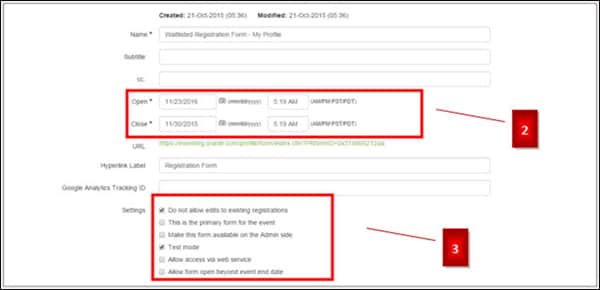
Follow these steps to set up the cancellation form.
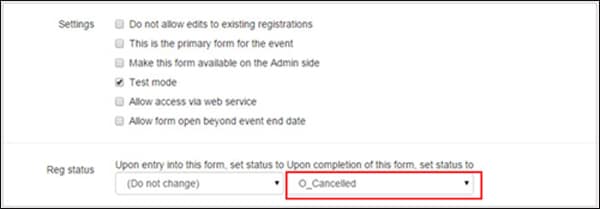
This cancellation form link has been enabled or updated in the confirmation email. The logic has been set as default, and we don’t recommend adding or removing any logic or profile fields under this section.
Header Text
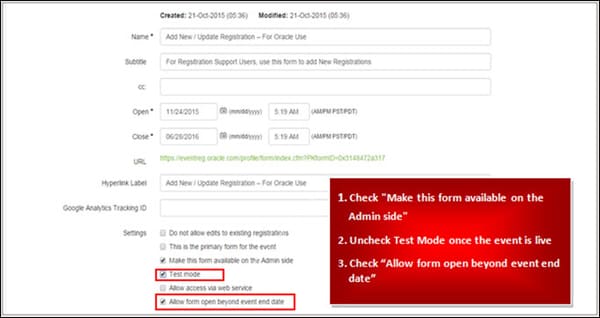
This section is added to the In-Person Event Master template and is used by registration support users within Certain to add their registrants at event time.
When the event request is approved, the analyst does the following:
Note: No changes to be made on the confirmation page or to the form processing steps.
Example:

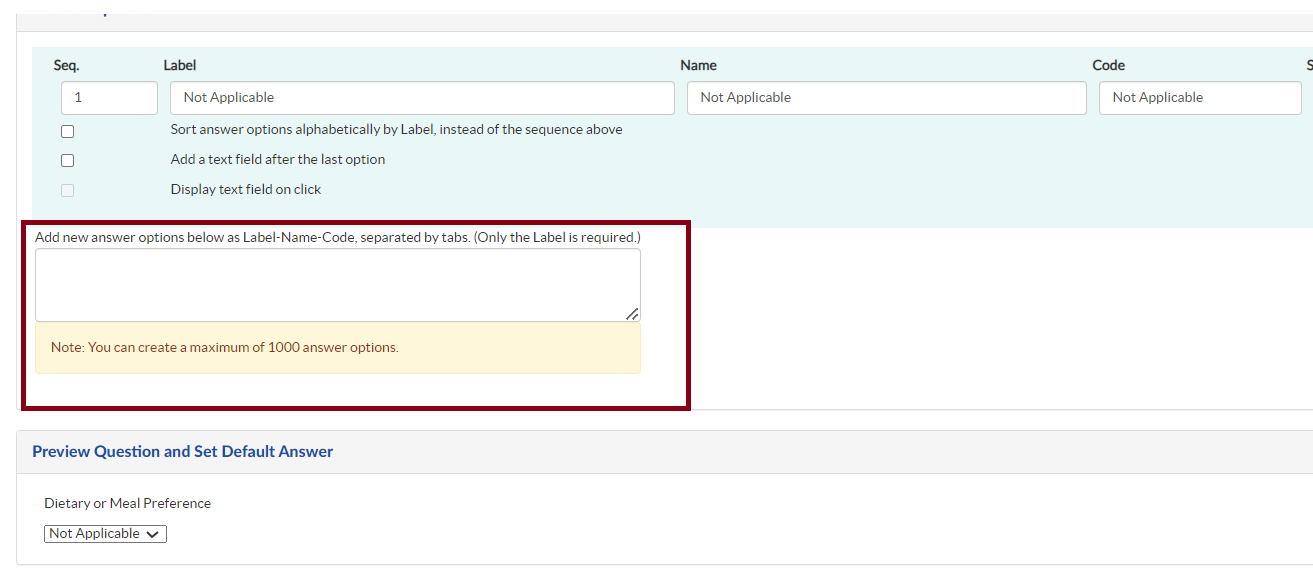
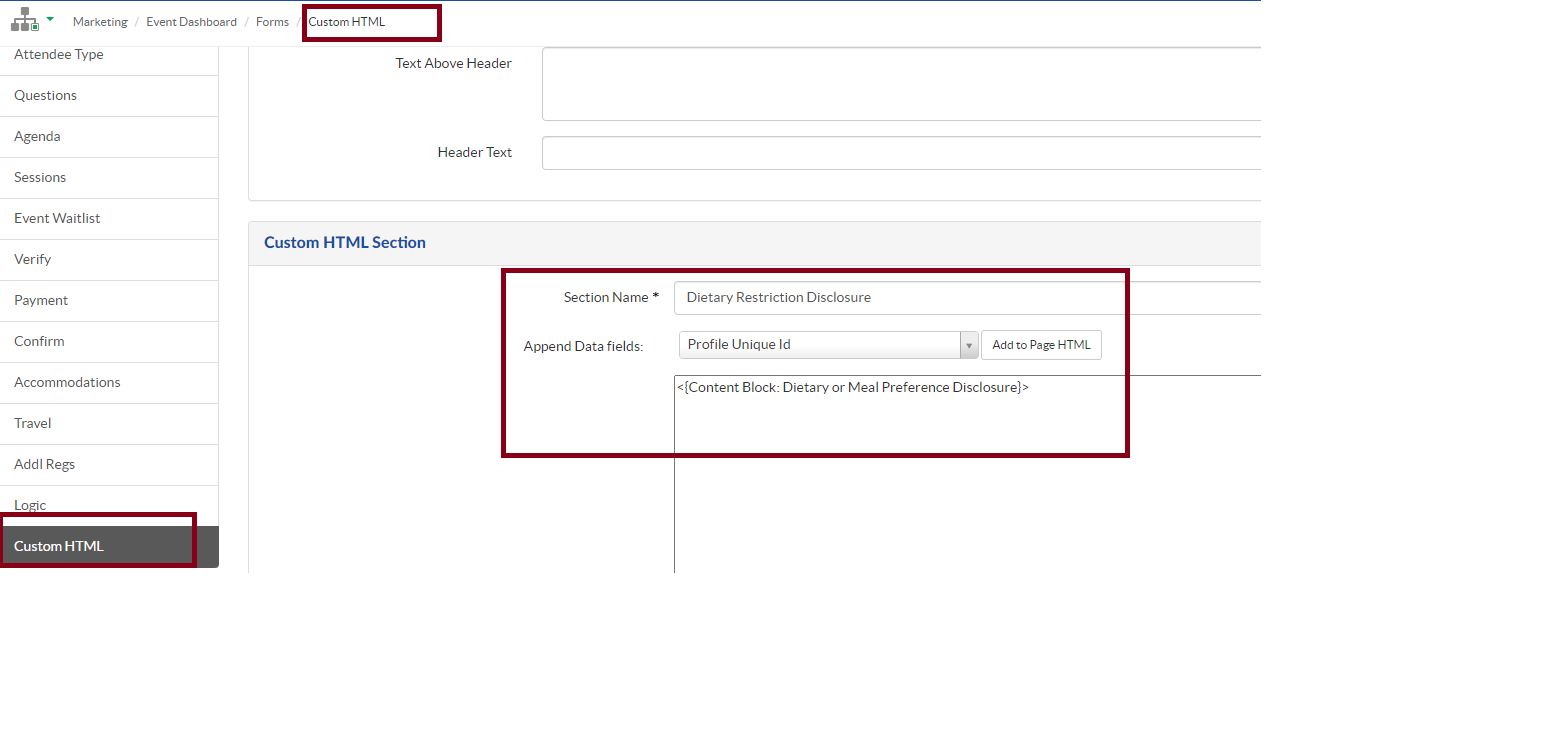
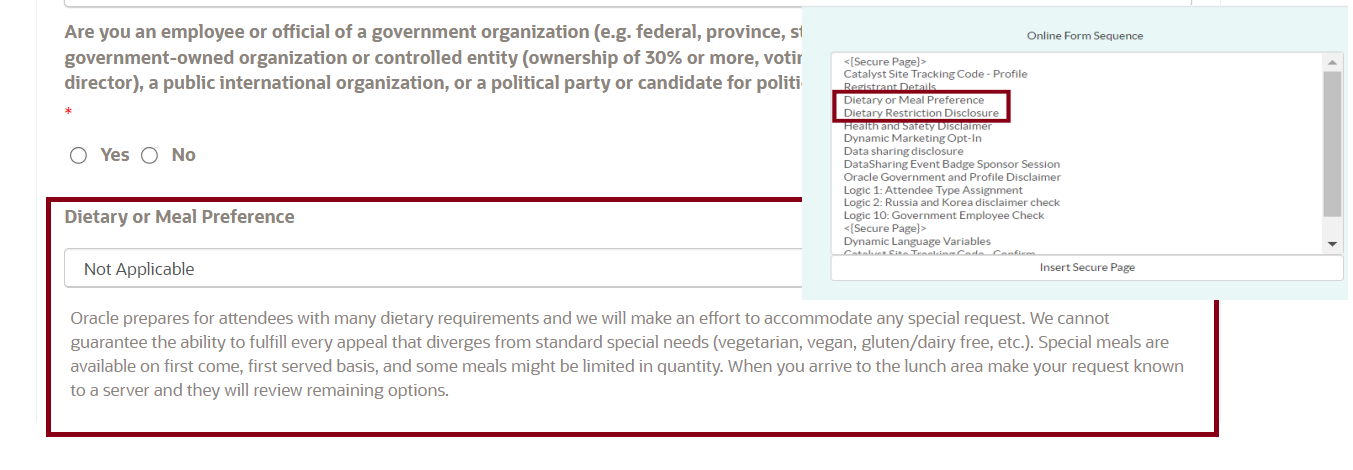
STEPS YOU WILL NEED TO FOLLOW TO ENABLE THE DIETRY PREFERENCES IN YOUR EVENT:


There are different types of notifications and this can vary based on the event and registration type.
Certain master templates have the following notifications added as default to support the Monitored registration type.
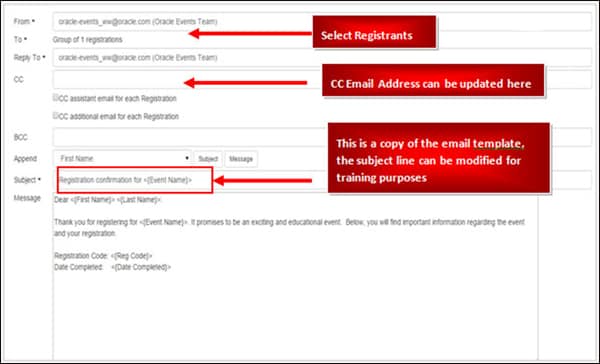
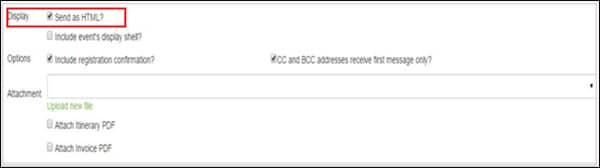
Navigate to the 'Promote' tab ➔ Communication ➔ Email Templates.
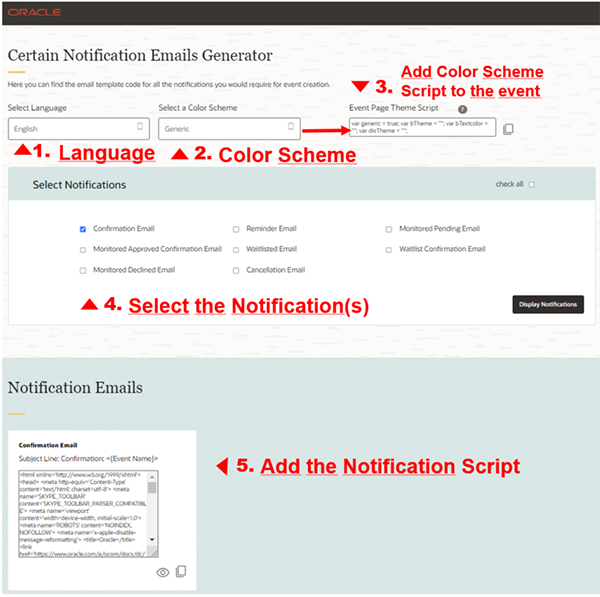
You can get the HTML code of the notifications directly on the Certain Email Notification Generator where you can select the Language and the Color Scheme so you can update on each one of the email templates (notifications) you need, you can go to the generator Here
Below are the notifications which are to be used for monitored registration

The following custom statuses have to be created for monitored registrations.


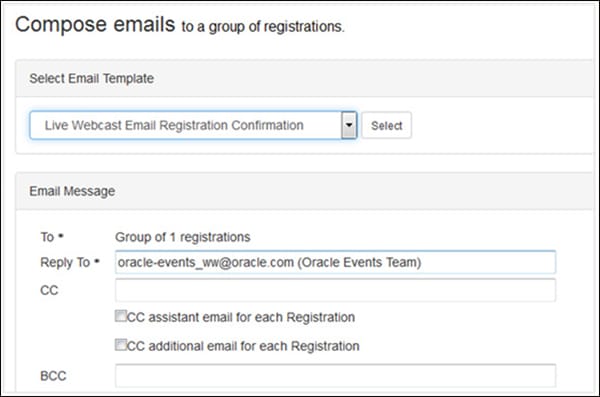
This section covers how to send the test notification to the requester for review.

Note: If you select all, then the test notification will be triggered to all.

The reminder notification has to be enabled and scheduled once the event is created in Certain.
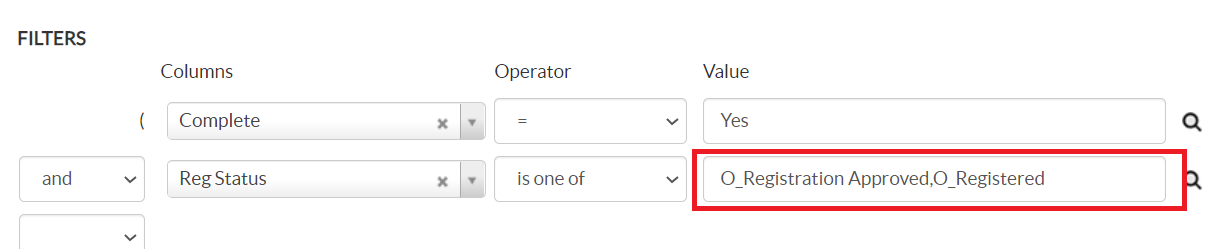
Filter Values
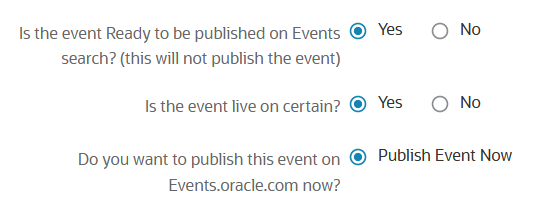
In this section, you will find steps for publishing events on events.oracle.com, also known as the events search page.
In Certain Application,
Under the Plan module, click Event Setup and update the following fields.
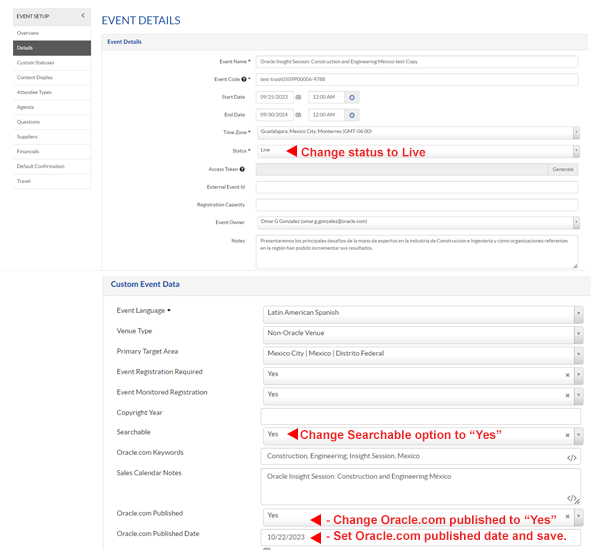
In GMSS Portal,
You can view this Guidelines for Events Publishing to know important steps to follow and things to consider when publishing events on the Oracle Events Search.
If yes, click below to confirm completion of this topic.
Yes, I have understood this topic well