Certain Session Scanning
STEP 1 - Collect the document from the Marketer
Certain requirements:
• Both documents are required two weeks in advance
• Third party vendors may have specific needs – requester will inform you
Marketer must provide two excel sheets. The layout cannot be modified, they must provide them with the following columns:
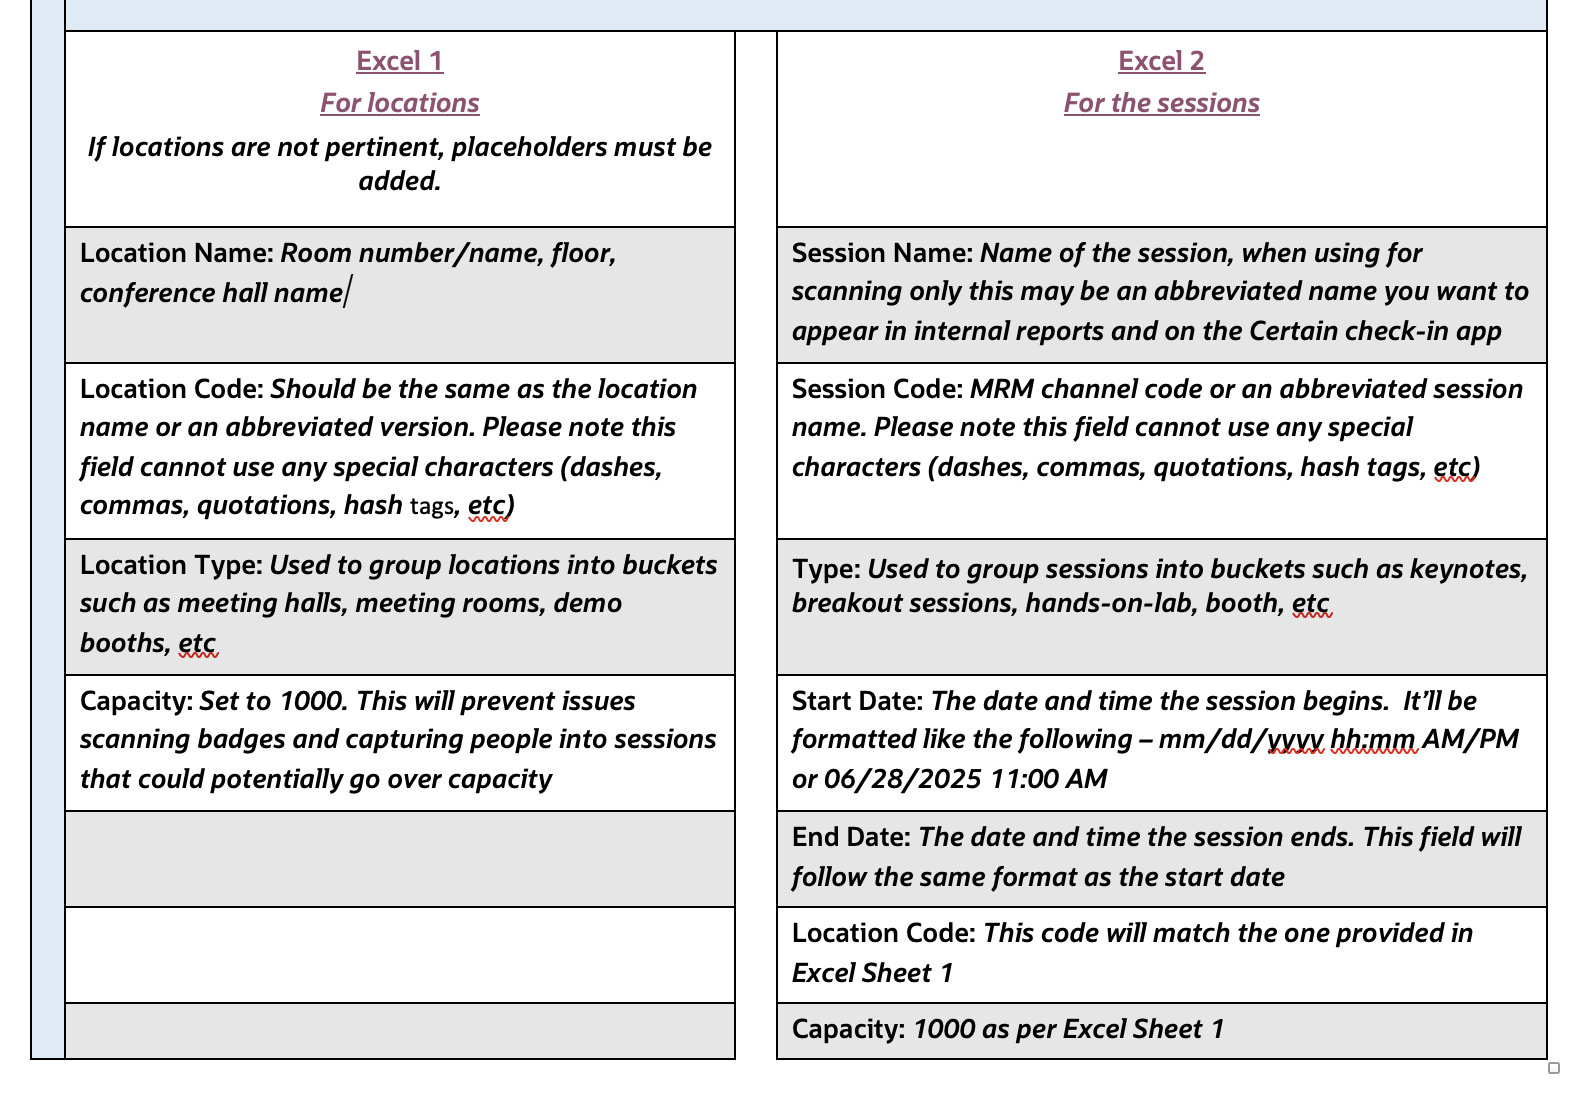
Please find the excel files sample formats (Excel1 for Locations, Excel2 for Sessions).
Note: Convert the sheets to Excel 97 (.xls) or CSV (.csv). If using CSV, they cannot include commas
STEP 2 - Import the sheets in Certain
Import the Locations Details
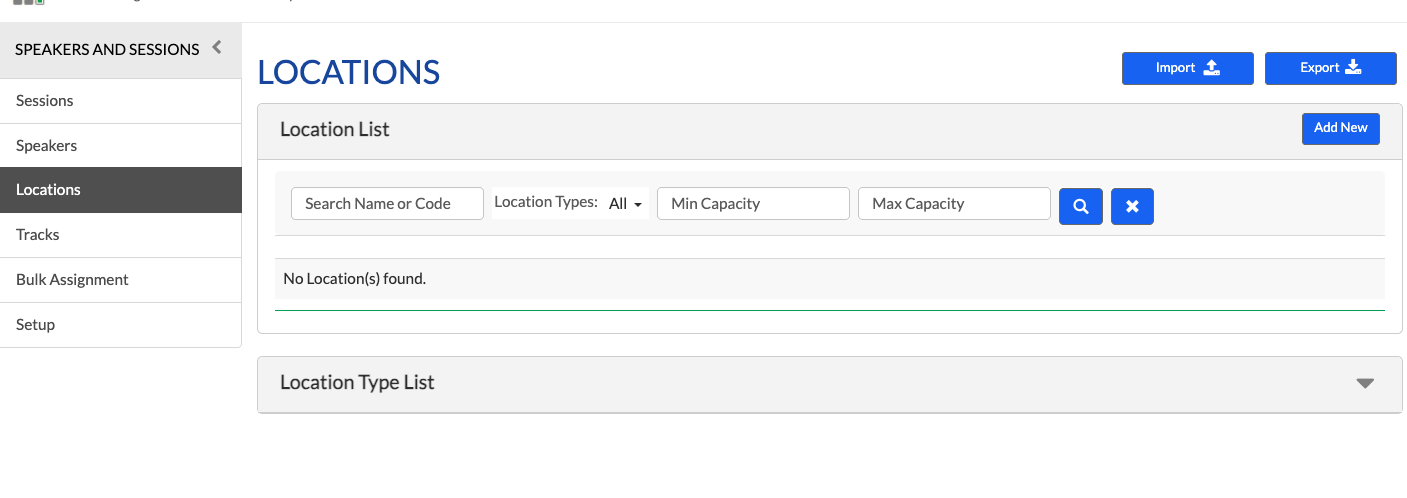
- Navigate to Manage > Speakers & Sessions > Locations
- In the top right corner, select “Import”.
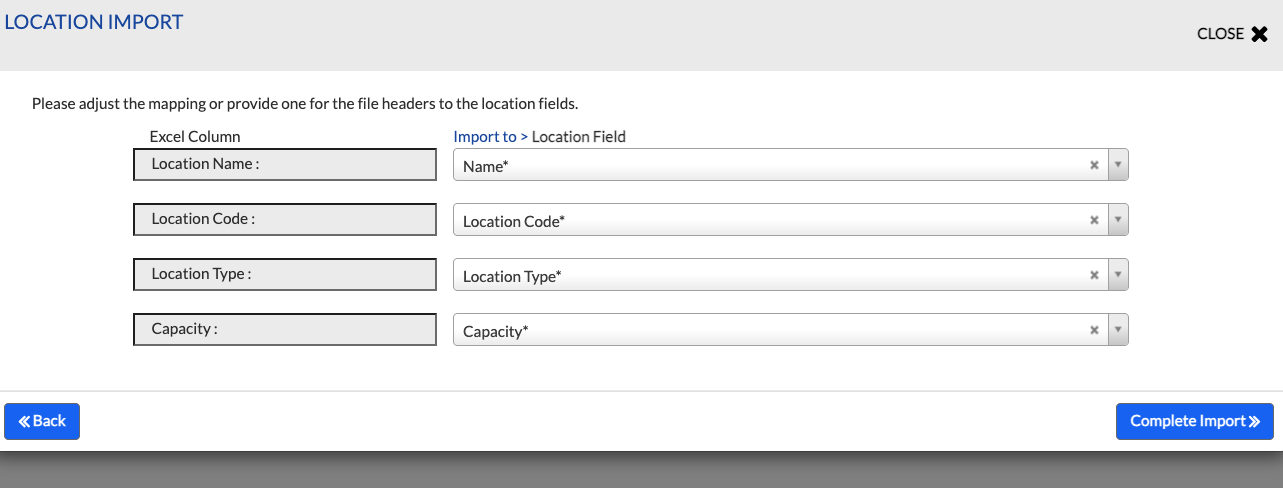
- Drag and drop the Locations file in the import menu.
- In the mapping menu, ensure the fields match appropriately.
- Select “complete import” to proceed.
Wait a few moments and Certain will send you a notification email when the import completes. It will also identify any issues and the row the issue exists on.
Refresh the “Locations” tab and verify that all locations are showing up exactly as they do in the sheet.
Import the Session Details
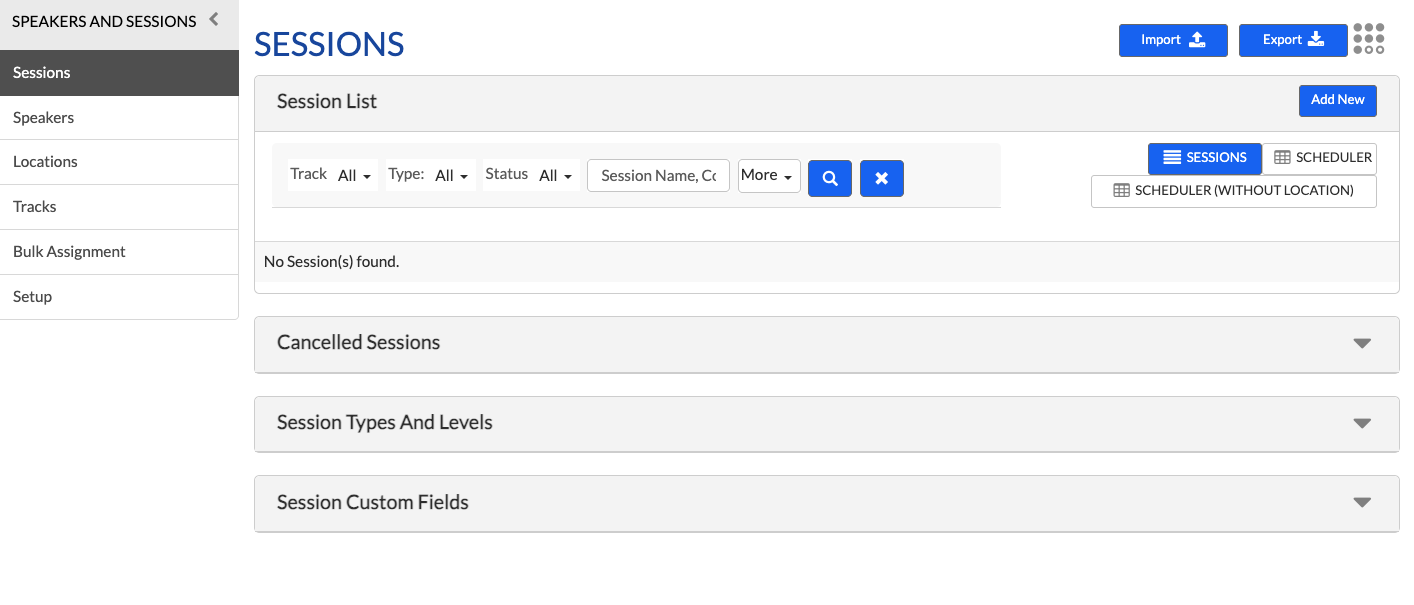
- Navigate to Manage > Speakers & Sessions > Sessions
- In the top right corner, select “Import”.
- Drag and drop the Sessions file in the import menu.
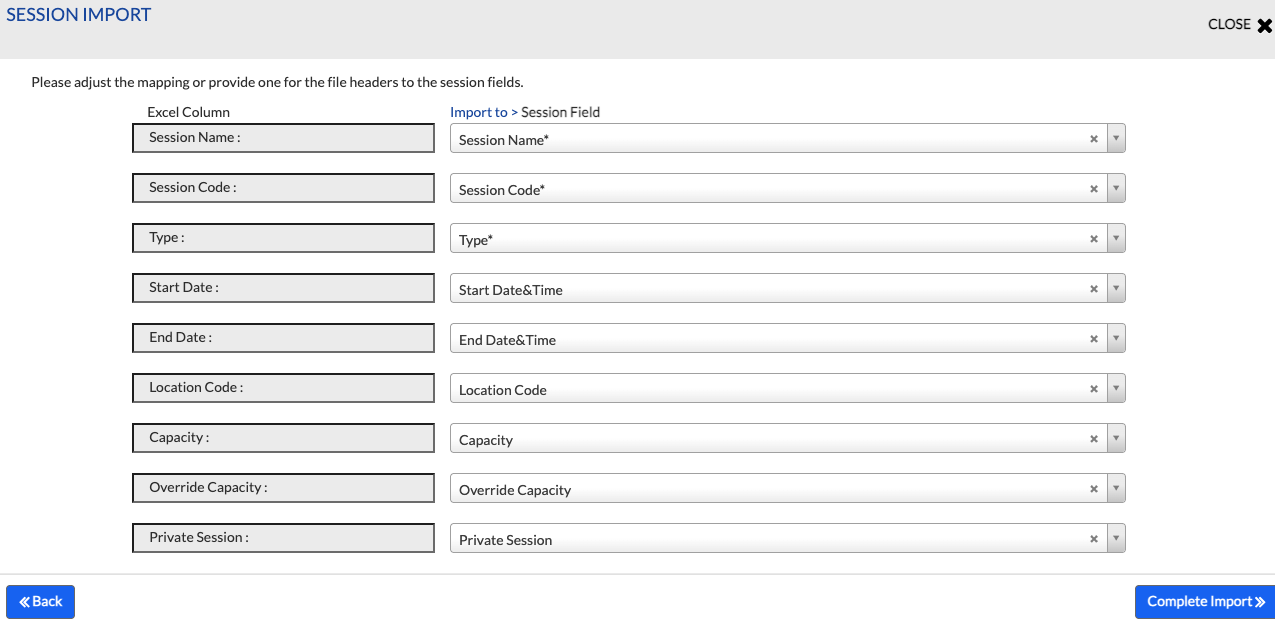
- In the mapping menu, ensure the fields match appropriately.
- Select “complete import” to proceed.
Wait a few moments and Certain will send you a notification email when the import completes. It will also identify any issues and the row the issue exists on.
Refresh the “Sessions” tab and verify that all sessions are showing up exactly as they do in the sheet.
NOTE:
1. Certain does not allow two sessions at the same time in a single location.
If you have multiple sessions at the same time in a single location, you may need to split them (i.e. Conference Hall 1, Conference Hall 2, Conference Hall 3). You may also see error messages when uploading if you try and overlap sessions on a singular location and time.
2. Please verify that the information in both the sessions and locations look accurate before proceeding to publishing.
STEP 3 - Publish the sessions
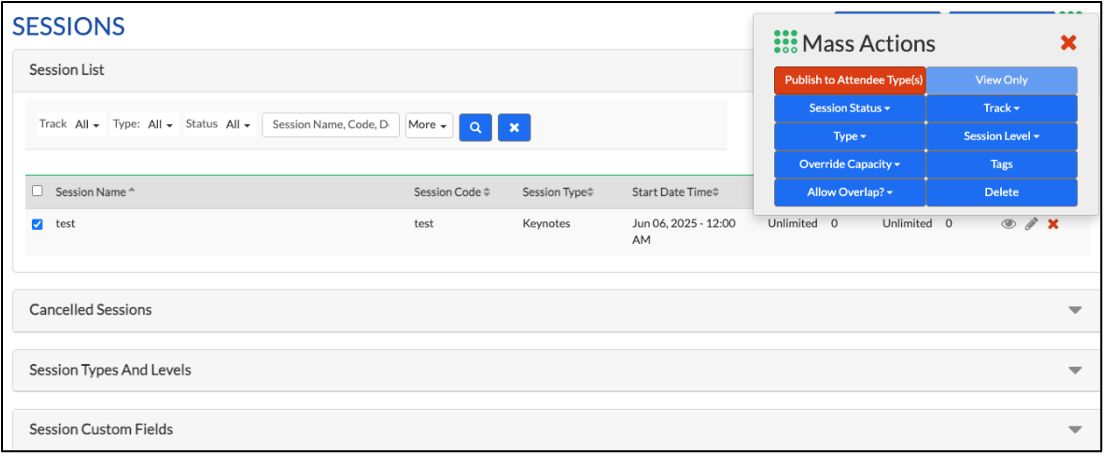
- In the sessions menu, check all of the sessions that you want to publish (This will push the event to ThinkReg).
- Click the “mass actions” button, which is in the top right, next to import and export:
- Click “Publish to Attendee Type(s)”.
- Choose the attendee types this will apply to and select “Publish to Attendee Type(s)”. The sessions will now be successfully published.
STEP 4 - Certain Check-in App Sessions
Once the check-in app has been built and enabled, there will be an option to configure sessions. This will allow registrants to be checked in to each session on-site.
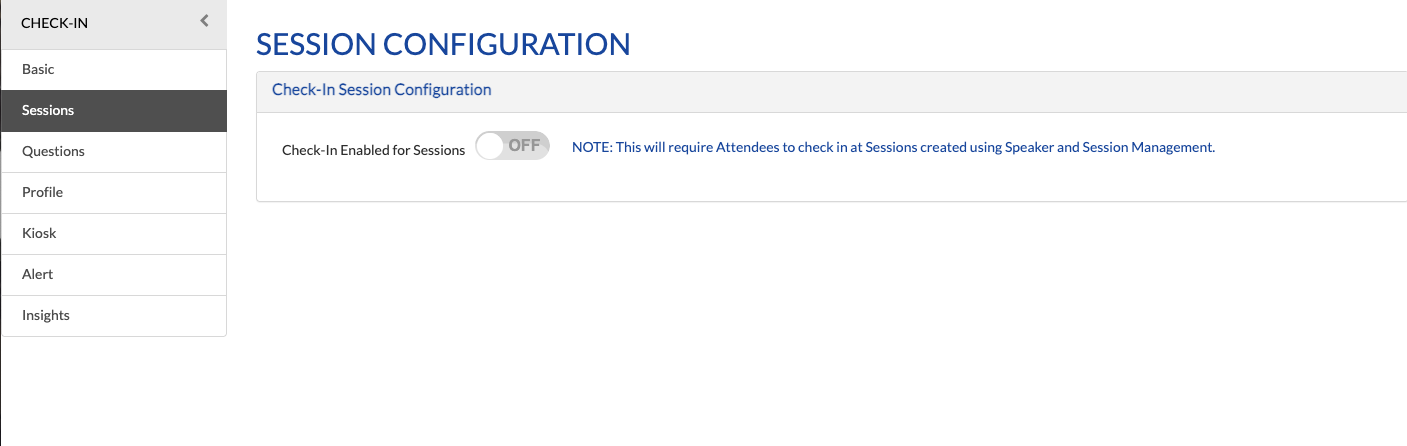
- Browse to Engage > Sessions.
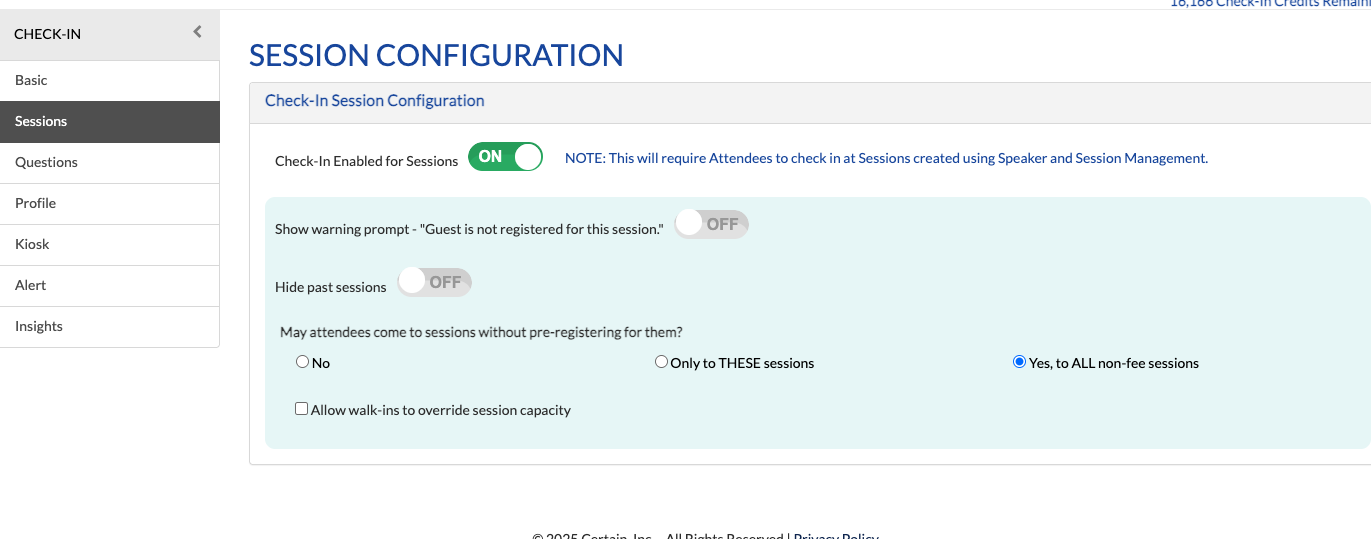
- Toggle the “Check-In Enabled for Sessions to “ON”.
- Show warning prompt - "Guest is not registered for this session." – OFF
- Hide past sessions – OFF
- May attendees come to sessions without pre-registering for them? – YES
1. Save the page. The sessions will now display within the check-in app. You can also verify this if you test the event check-in app.
2. Confirm with the marketer how they are implementing badging and sessions on-site. They may also need a QR code – those directions can be found here.
Related Topics
Nailed it?
If yes, click below to confirm completion of this topic.
Yes, I have understood this topic well