Customer Information Form (CIF)
Customer Information Form (CIF), helps marketers to get to know their customers better. Marketers can customize the registration fields (combination of profile fields and feedback/custom questions) based on the campaign requirement, with an optional lead flow or no lead flow set up.
In this section you will learn:
- Creating a Form
- Configuring a Form
- Creating Form Pages
- Integrating Form

 People
3 |
 Prep time
15 min |
 Time
1.5 h |
 Difficulty
Easy |
STEP 1 - Creating a CIF Form (5 min)
Login into Eloqua.
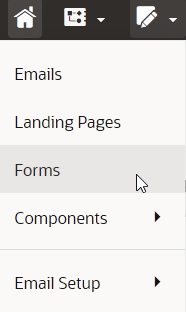
- Click Assets ⇨ Forms.
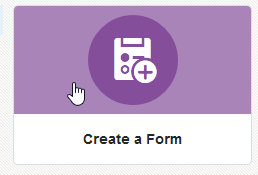
- Click Create a Form ⇨ All Files.
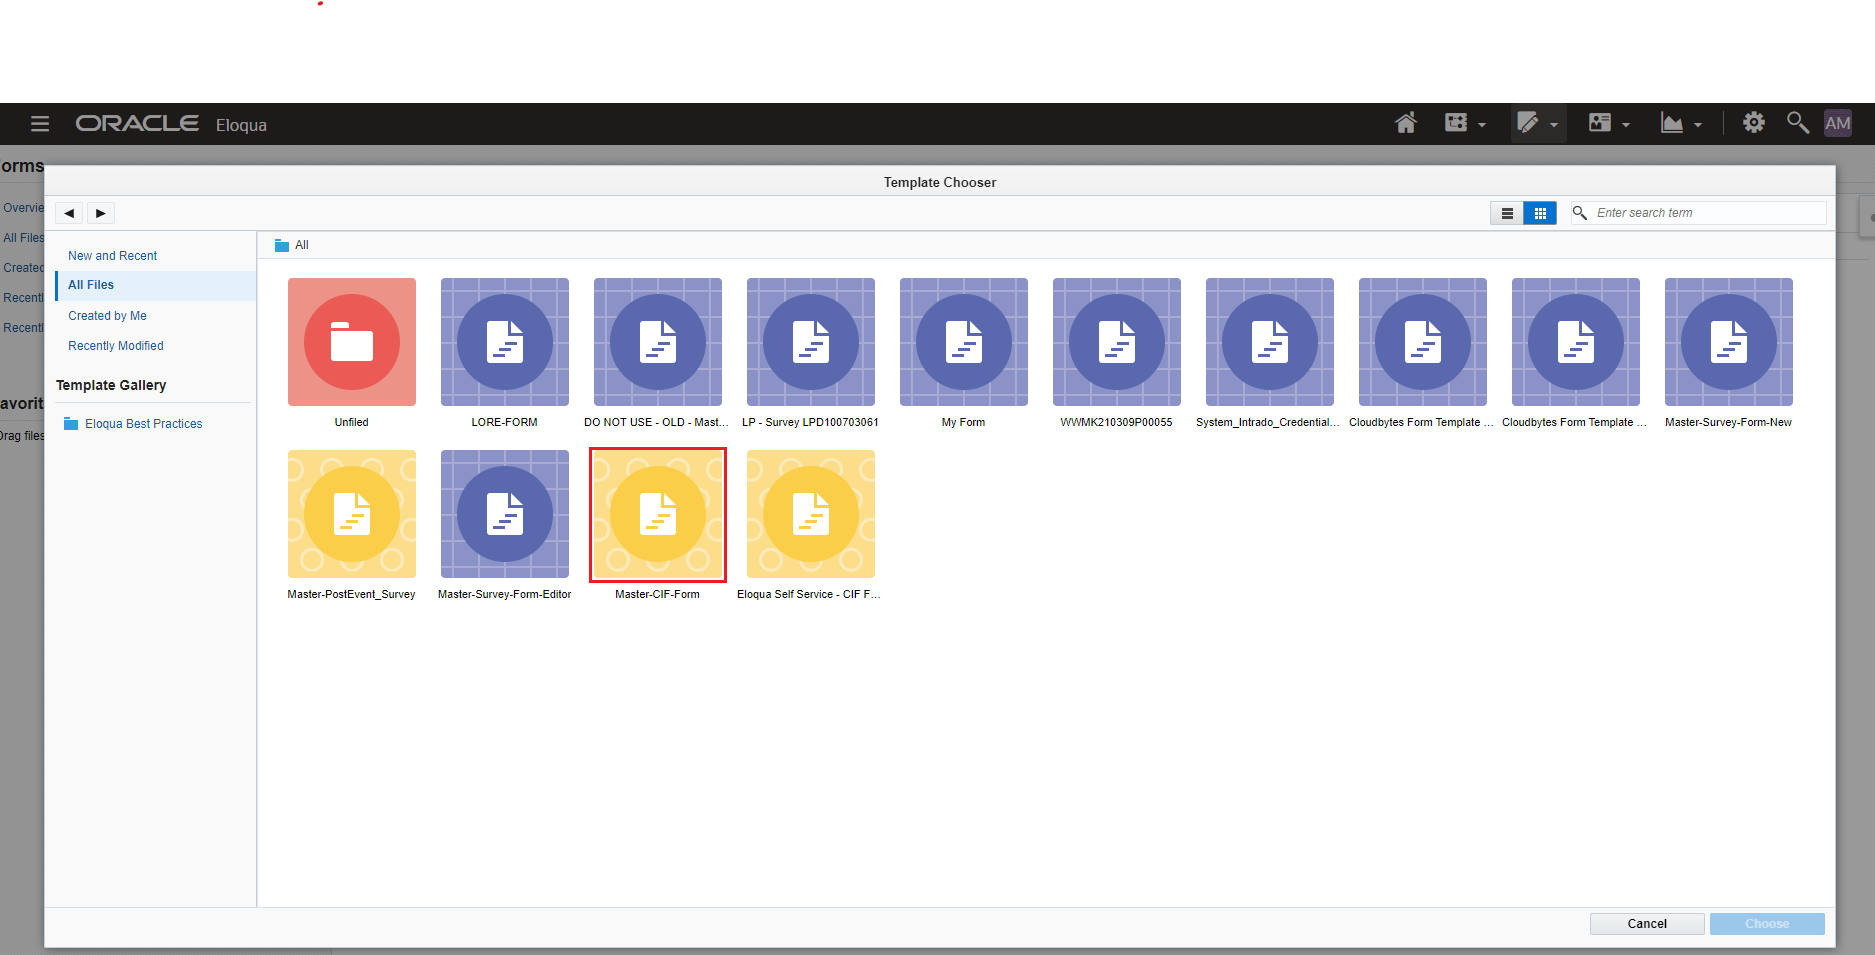
- Select Master-CIF-Form Template and click on the Choose button.
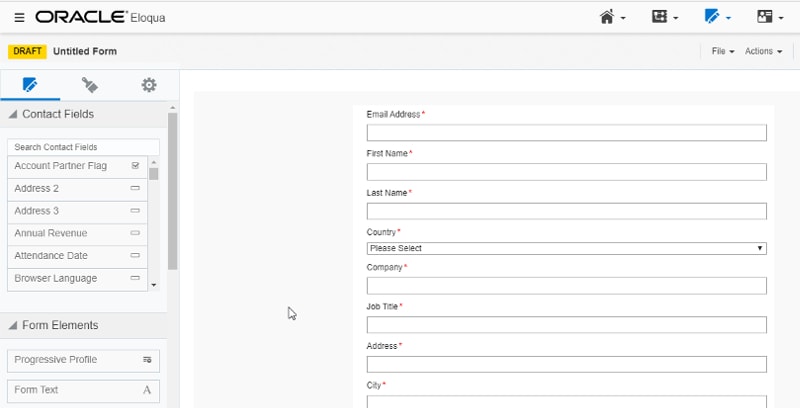
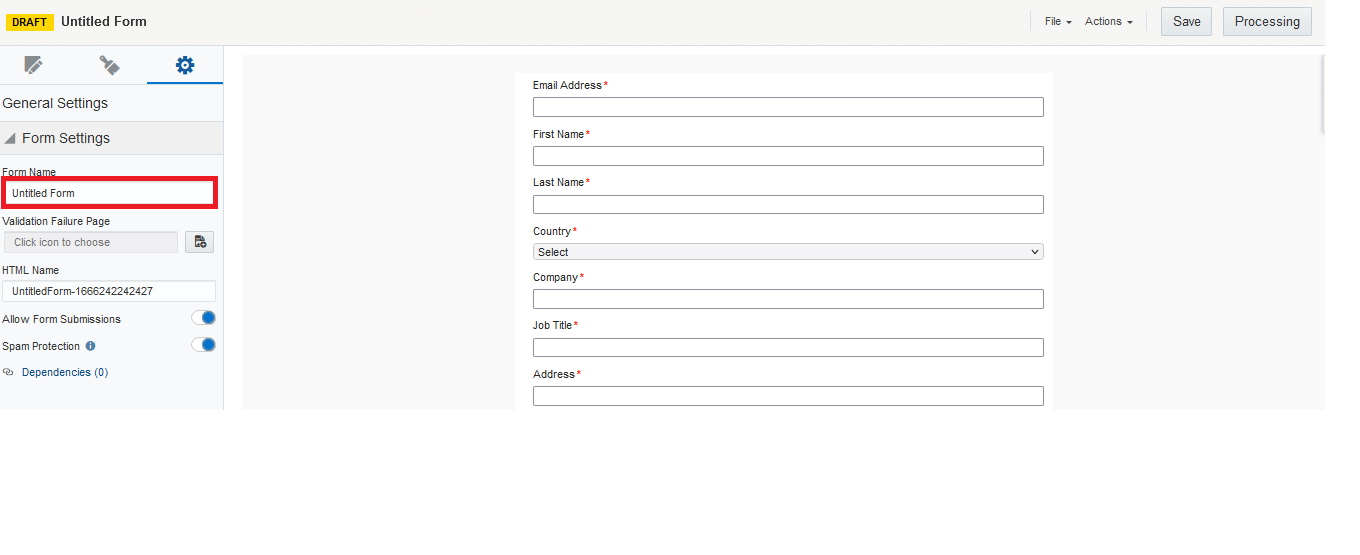
- Form Editor will be displayed with default profile fields and a few hidden fields.
- Rename the Form Name by clicking the below-highlighted section and add HTML name under General Settings. If required, custom questions.
- Save the form into "Business Folder/Non-Marketing Flow Low Engagement folder", which helps reporting. This folder will automatically takes care of Lead flow / No Lead Flow based on the processing steps mentioned in the below sections, which is configured for this form.
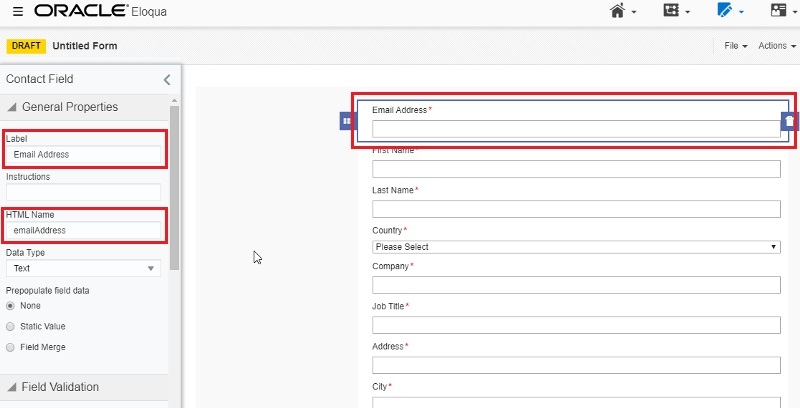
- Field HTML Names and Mapping Targets
In Eloqua, form fields are displayed to the user using Label and are coded in the Landing Page using HTML Name. If you click on each form element, the Labels and HTML Names can be verified. - It’s important that the standardized naming convention be used which is given in the table below for reference. Click on the each form element to verify the Label and HTML Name for each field.
| Field Label | Field HTML Name | Data Type | Field Mapping Target | Update Type | Details |
|---|---|---|---|---|---|
| Business Email | emailAddress | Text | Email Address | Update if new value is not blank | |
| Business Phone | phoneNumber | Text | Business Phone | Update if new value is not blank | |
| First Name | firstName | Text | First Name | Update if new value is not blank | |
| Last Name | lastName | Text | Last Name |
Update if new value is not blank | |
| Country | country | Text | Country | Update if new value is not blank | |
| Company | company | Text | Company | Update if new value is not blank | |
| Company Size | companySize | Text | Company Size |
Update if new value is not blank | |
| Line of Business | lOB | Text | LOB | Update if new value is not blank | Field is no longer in use. |
| Job Title | jobTitle | Text | Title | Update if new value is not blank | |
| Address 1 | address | Text | Address 1 | Update if new value is not blank | Field is no longer in use. |
| Address 2 | address2 | Text | Address 2 | Update if new value is not blank | Field is no longer in use. |
| City | city | Text | City | Update if new value is not blank | |
| State/Province | stateOrProvince | Text | State or Province |
Update if new value is not blank | |
| Province | province | Text | Province | Update if new value is not blank | |
| Zip/Postal Code | cmid | Text | Zip or Postal Code |
Update if new value is not blank | |
| Marketing Opt-in | marketingOptIn | Text | Marketing Opt-in |
Update if new value is not blank | |
| elqCampaignId | elqCampaignId | Text | Last Eloqua Campaign ID |
Always update | Hidden field. |
| cmid | cmid | Text | Oracle Sales Cloud Last Campaign Id |
Always update | Hidden field. |
| Notes | NOTE | Large Text | Lead Description | Always update | Used for custom question. If not used, refer to the 'Processing Steps' section. |
| src1 | src1 | Large Text | SRC1 | Always update | Hidden field. Value captured from URL. |
| src2 | src2 | Text | Hidden field. Value captured from URL. | ||
| elq | elq | Text | Hidden field. Value captured from URL. | ||
| sh | sh | Text | Hidden field. Value captured from URL. | ||
| elq_mid | elq_mid | Text | Hidden field. Value captured from URL. | ||
| openid | openid | Text | Wechat Open ID_CN_MKT | Update if new value is not blank | Hidden field. Value captured from URL. |
| nickname | nickname | Text | Wechat Nickname | Update if new value is not blank | Hidden field. Value captured from URL. |
| unionid | unionid | Text | Wechat UnionID | Update if new value is not blank | Hidden field. Value captured from URL. |
| searchKeyword | searchKeyword | Large Text | Hidden field. Value captured from URL. |
STEP 2 - Configuring a Form (5 min)
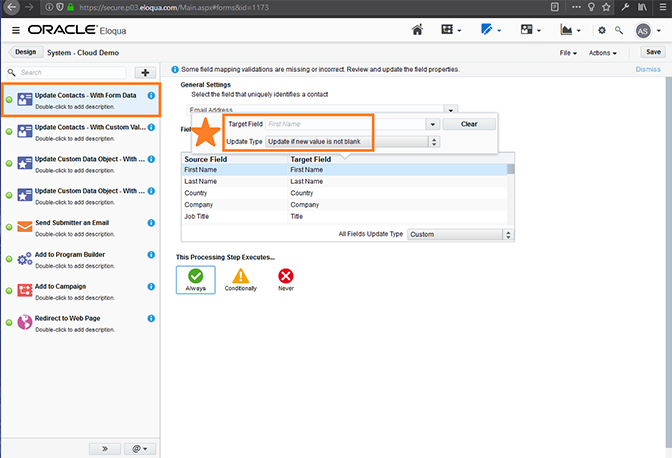
9. Click 'Processing' to configure the form process steps.
In the “Update Contacts – With Form Data” processing step, these form fields are mapped to the Contact fields using the Field Mapping Targets. (refer the above table from the point 7.
Configuration steps for Lead Flow
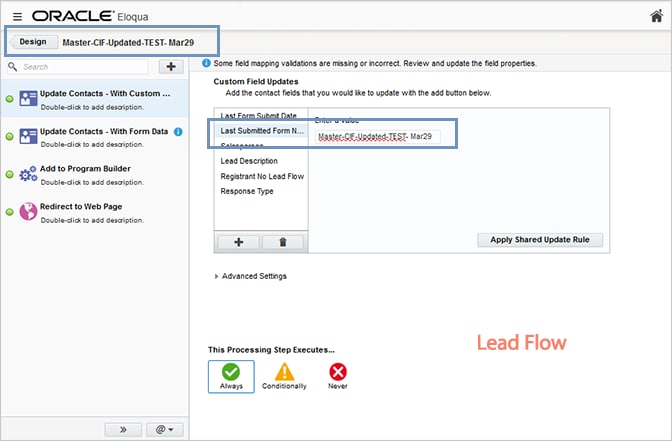
10. Select "Update Contacts – With Custom Values" and ensure the following values has been selected and enabled for Lead flow
**IMPORTANT NOTE:
The Master CIF Template is set to default as "Lead Flow"
Please refer the below screenshots for the more details.
| Contact Field | Update Type | Value |
|---|---|---|
| Last Form Submit Date | Apply date stamp | |
| Last Submitted Form Name | Set to value | <form name> NOTE: Use the Form Name, not the Form HTML Name. |
| Salesperson | Set to value | <to be left blank> |
Lead Description NOTE: Added only if Notes field is not being used in the form. |
Set to value |
<to be left blank> |
| Registrant No Lead Flow | Set to value | <to be left blank> |
| Response Type | Set to value | <to be left blank> |
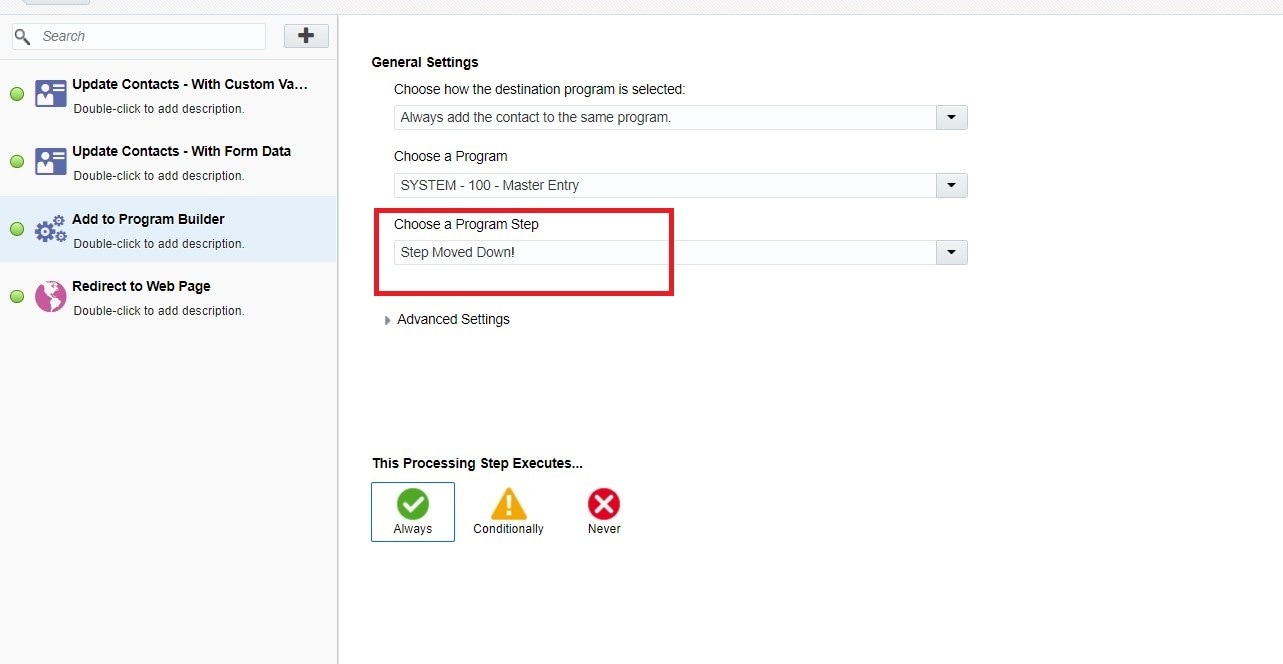
For lead generating forms, after completing the steps in the above sections, add / ensure “Add to Program Builder” processing step is configured. Select “SYSTEM - 100 - Master Entry” and then, select “Step Moved down!”.
Configuration steps for No-Lead Flow
1) Remove Add to Program Builder
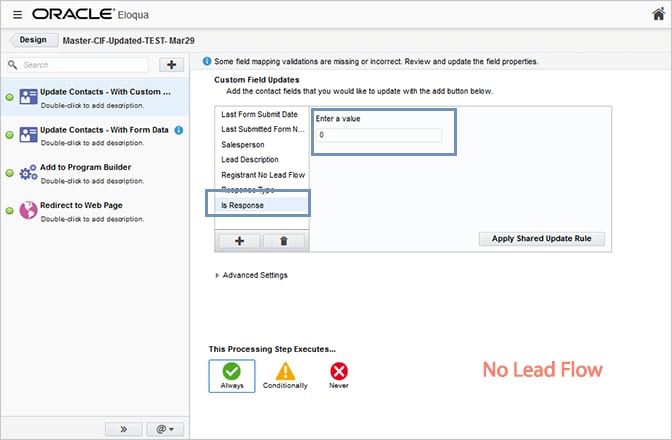
2) Select "Update Contacts – With Custom Values" and ensure the following values has been selected and enabled for No Lead flow
| Contact Field | Update Type | Value |
|---|---|---|
| Last Form Submit Date | Apply date stamp | |
| Last Submitted Form Name | Set to value | <to be left blank> |
| Salesperson | Set to value | <to be left blank> |
| Registrant No Lead Flow | Set to value | <to be left blank> |
| Response Type | Set to value | <to be left blank> |
Is Response |
Set to value |
0 |
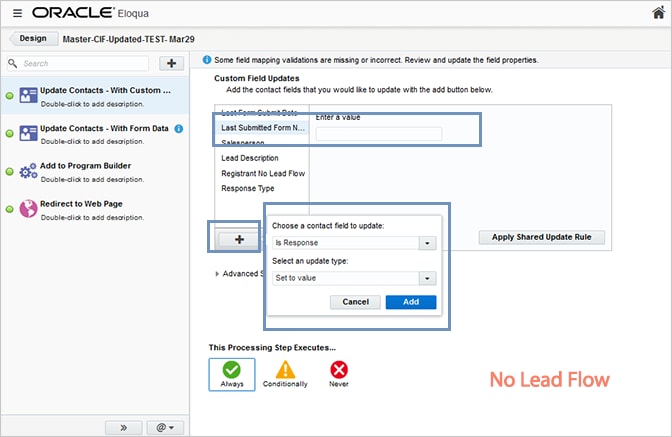
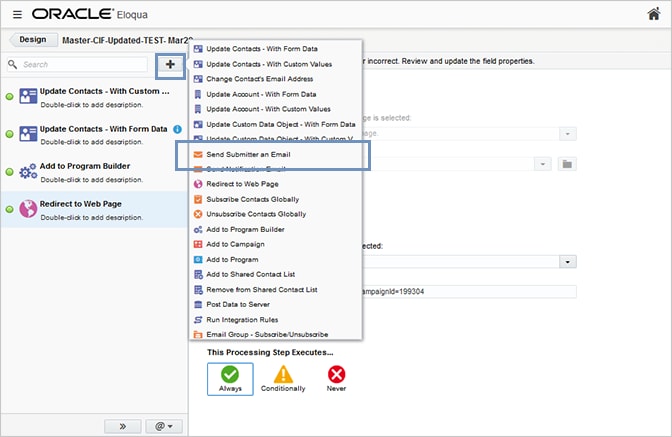
11. Click '+" symbol to select the processing steps as "Send Submitter an Email" and "Redirect to Webpage".
a. Send Submitter an Email - Configuring this section, enables the user to receive the thank you email, post form submission.
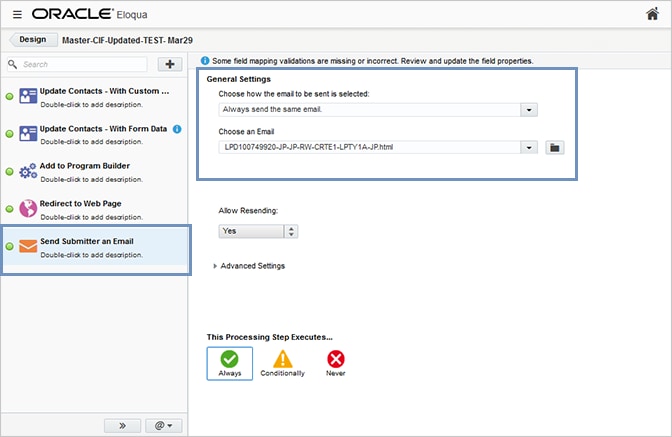
b. Please add Thank You Page Url in the Welcome Page code as shown in the below image.

12. Save the Form, Download the FORM HTML which required embedding in the Survey/form Template.
Click here to know more about the configuration details from the confluence page.
STEP 3 - Creating Form Pages (5 min)
Login to Eloqua.
13. Click Assets ⇨ Landing Pages.
14. Click ⇨ Create Landing Pages.
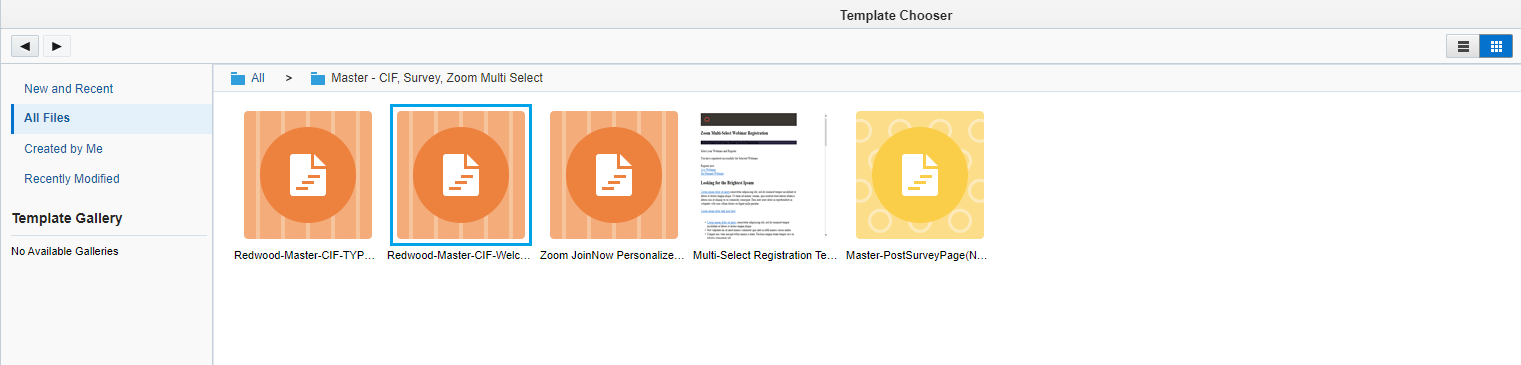
15. Select template Master – CIF, Survey, Zoom Multi Select -> Redwood-Master-CIF-Welcome-Page ⇨ Follow steps below:
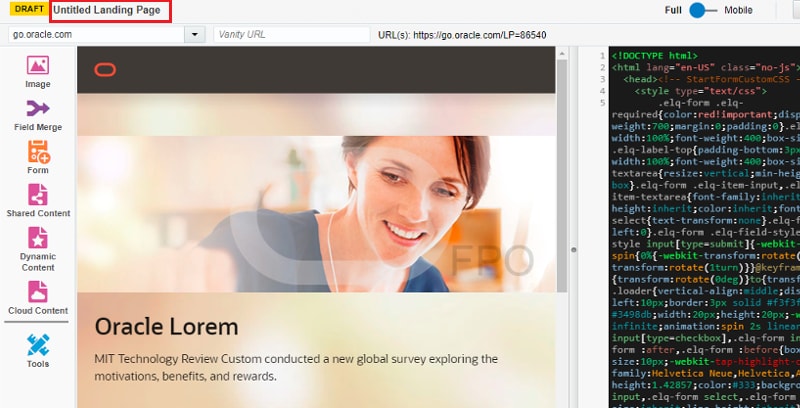
- Update the Asset File Name
- Select go.oracle.com domain
- Save the file into appropriate region folder.
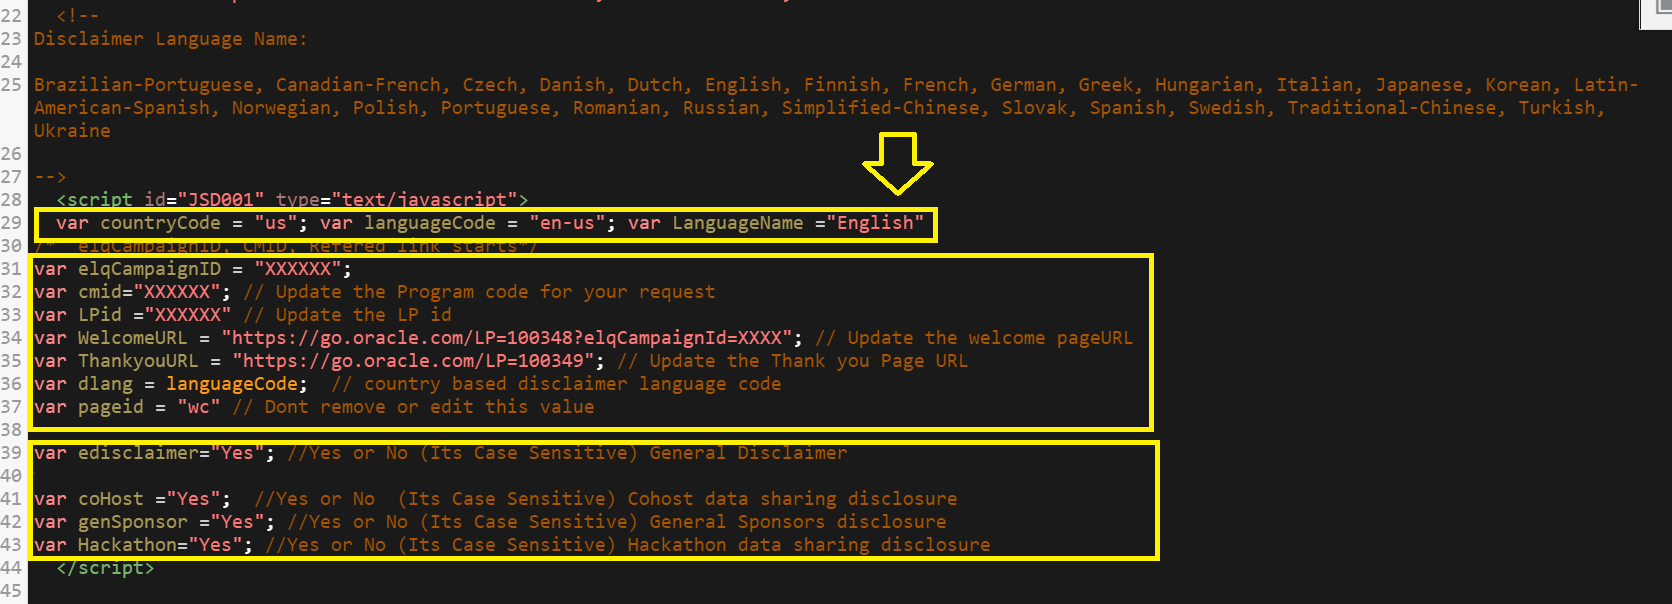
16. Update the following information in the coding:
- var countryCode = "us"; // Updates the country specific footer code links
- var languageCode = "en-us"; // Updates the footer code language
- var LanguageName ="English" // Updates the disclaimer and feild language. (The values can be referred under comments "Disclaimer Language Name:)"
- var elqCampaignValue = "XXXXX";
- var cmid="XXXXXXXXXXXX"; // Update the Program code for your request
- var LPid ="XXXX" // Update the LP id
- var WelcomeURL = "https://go.oracle.com/LP=XXXX?elqCampaignId=XXXXXX"; // Update the Welcome page URL
- var ThankyouURL = "https://go.oracle.com/LP=XXXX?elqCampaignId=XXXXX"; // Update the Thank you Page URL
- var pageid = "wc" // DO NOT remove or edit this value
To add or remove disclaimers - General, Sponsor, CoHost or Hackathon to the page, the following variables must be updated with required values.
- var gendisclaimer = "Yes" to Enable and "No" to Disable - General disclaimer
- var coHost ="Yes" to Enable and "No" to Disable - Cohost data sharing disclosure
- var genSponsor = "Yes" to Enable and "No" to Disable - Event ethics disclaimer
- var var Hackathon = "Yes" to Enable and "No" to Disable - Hackathon data sharing disclosure
- var var govempValidate = "Yes" to Enable and "No" to Disable - Government Employee validation
If they selected validation as "yes" and Government employee question option as "yes", then restrict them to submit the form.
If they selcted validation as "no", then allow them to register irrespective option selected for the Government Employee option selected. - Note: To trigger default country on page load, uncomment the code mentioned below within the function selectCountry() and update the appropriate country code (eg: KR):
jQuery("select[name=country]").val('KR');
jQuery("select[name=country]").trigger('change')
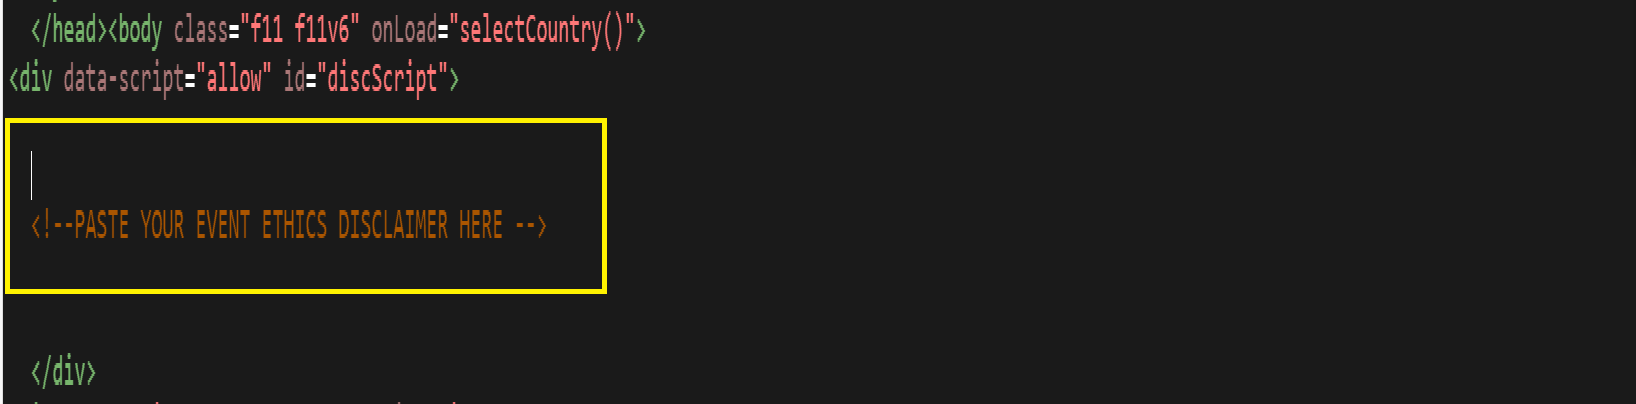
- Click Here to generate the event ethics disclaimer. Copy and paste the disclaimer code to the following highlighted section/placeholder.
17. Repeat the Step 18 to create the Thank you page by selecting the master template as "Redwood-Master-CIF-TYPage".
Note: The banner image size for the responsive CIF template is 1600 X 309
STEP 4 - Integrating Form (5 min)
18. Go to Assets ⇨ Form ⇨ Identify & edit your form.
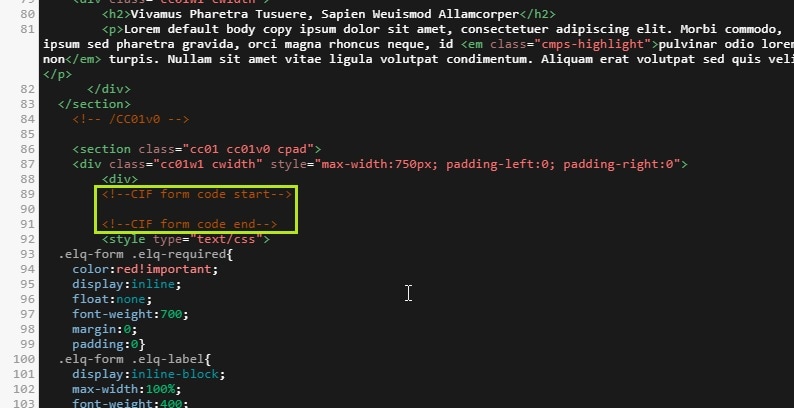
19. Go to Actions ⇨ Click View Form HTML ⇨ Copy the code
20. Paste the code into the Landing page. Refer the screenshot for the placement.
21. Place the CIF form pages and form into Canvas, and activiate it .
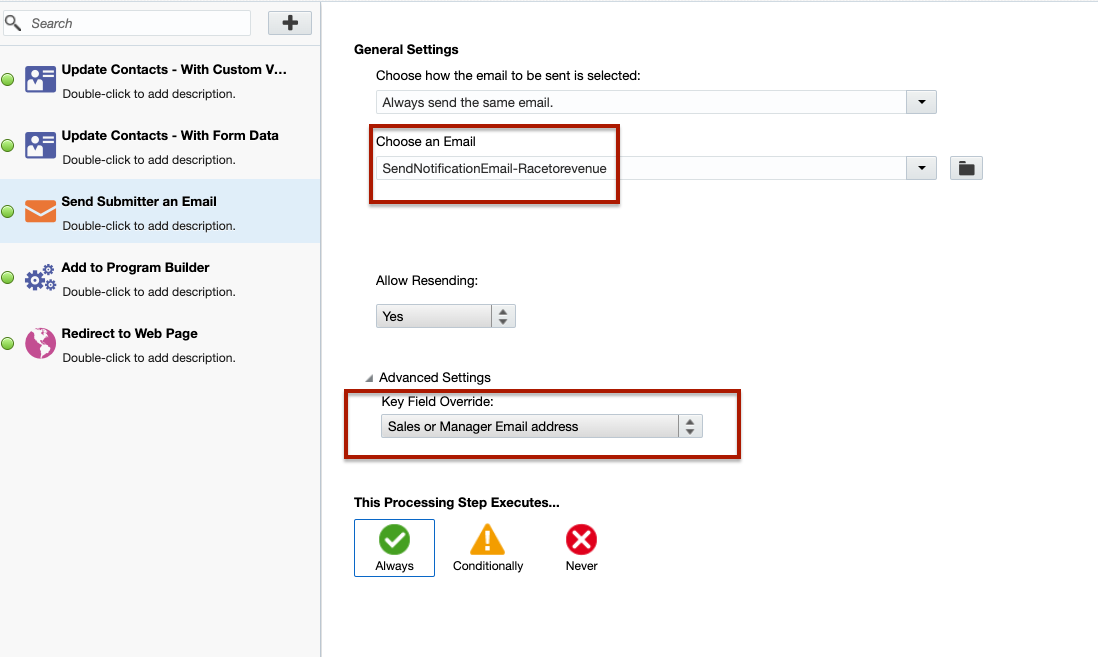
Enabling Send Notifications via CIF Form
When there is a need to trigger an email or notify the Sales team about a registration, you can create a hidden field in the CIF form and add the relevant Sales email address to it. Then, update the form’s processing step to configure 'Send submitter an email' with generic content that alerts the Sales team about the registration. Ensure the recipient is always set to the Sales email address.
Note:
1. If multiple email addresses are required, create two hidden fields and configure two 'Send submitter an email' steps, updating each field accordingly, since multiple emails cannot be stored in a single field.
2. Ensure the Sales email is added in Eloqua; only then will the TYEM notification reach the Sales team whenever a submission occurs.
Any custom form - (No Data flow to CXD and No Lead)
If form created to collect only custom questions or survey questions, which does not require any profile fields to be mapped as per the complaince (in this case, we might have seen the email address field only to understand who has responded the survey), then we dont require to have any of the processing steps as mentioned (except redirect to webpage / send submitter email if required)
When doing any "Any custom form" CIF page, and if they dont require a lead flow and not required to flow them to CXD. Then we suggest you to follow the steps below:
- Save the form to a regional Survey folder.
- Remove all processing steps except for the TYP redirect. and add Thank you email if required.
Related Topics
Nailed it?
If yes, click below to confirm completion of this topic.
Yes, I have understood this topic well