Emails
Eloqua email campaigns can range from a simple batch-and-blast campaigns to a complex multi-touch/ multi-channel/ nurture campaign. The email may be promoting an Event, Webcast or Landing page.
Here you will learn:
- Identify Request and Analyse
- Download Template
- Upload and Launch
- On-Demand Tasks
- Canvas Setup for Email Launch

 People
3 |
 Prep time
15 min |
 Time
1.5 h |
 Difficulty
Easy |
Video Tutorial
STEP 1 - Identify AND ANALYSE Request (5 min)
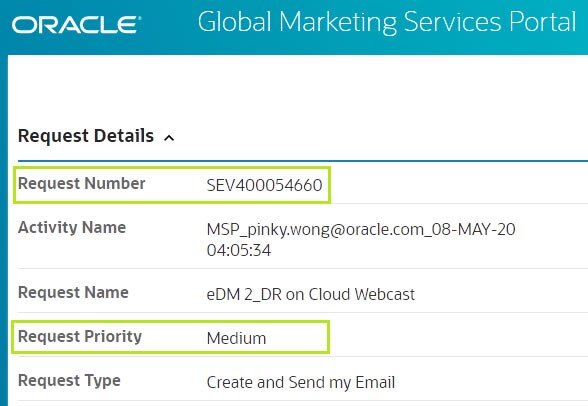
A request is raised by the marketer(requester) through the Global Marketing Services(GMS) Portal which is uniquely identified by the request number that starts with SEV (Create and Send my Email).
Workflow
The flowchart below, explains the email request status changes during it's lifecycle.
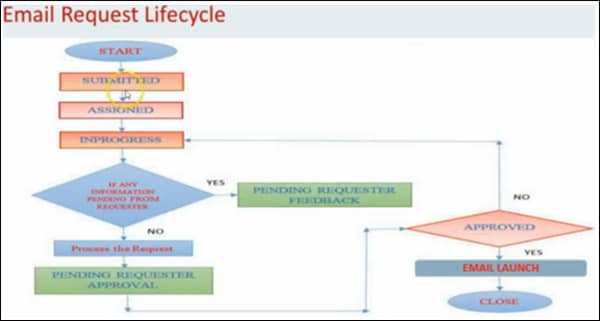
As a Demand Center Delivery Analyst, once the SEV request is Assigned, ensure the below are accurate and complete (Note: If any of the information is missing or does not adhere to the below criteria, check with the requester):
-
Ensure that the program code status is Active.
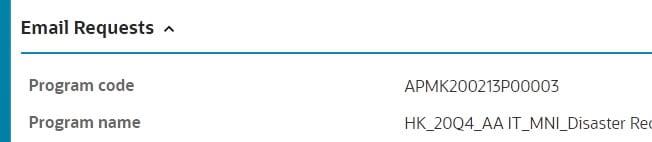
a) Find Program code: Go to GMS Portal ➔ Email Requests ➔ Program code
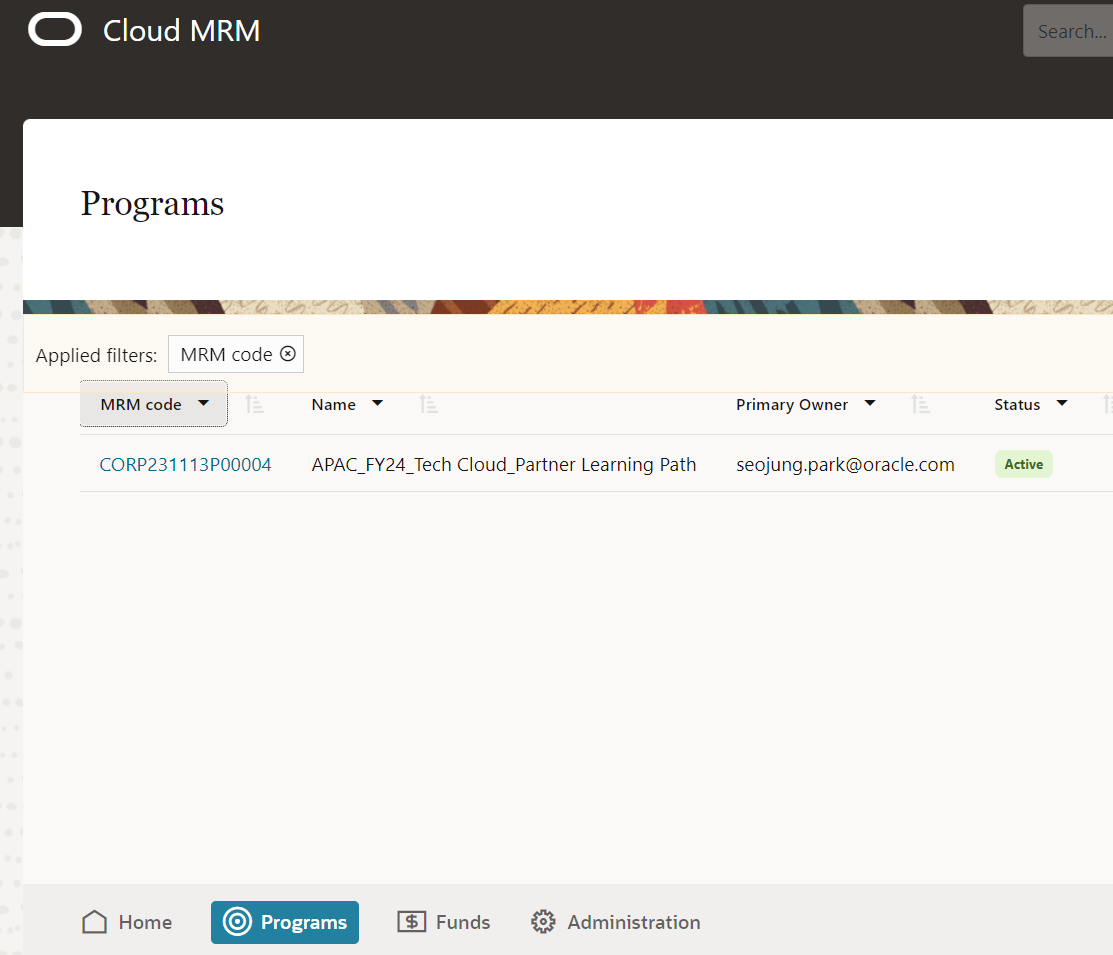
b) Verify Program code status: Go to MRM ➔ Search with Program code ➔ Check the Status
- Ensure that the MRM program code and the associated MRM program name match with what's provided in GMS Portal.
-
Email requests are prioritized High (1- 2 workdays), Medium (3- 4 workdays) and Low (5- 7 workdays). Prioritize queue accordingly.
- Check if the SEV request is associated with an LRT/OUL request, under Other Details
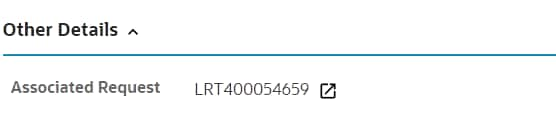
- Ensure that the program code/ name is the same in both requests - SEV(email) and LRT(list)
-
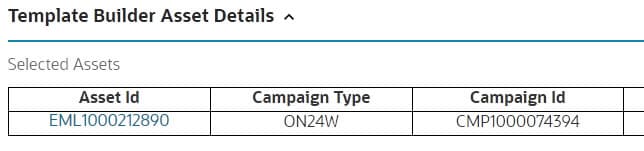
Check for the Template builder campaign ID/ Asset details. If not available check in the request summary/ comments.
STEP 2 - SET UP Email Asset
- Login to Template Builder
- Click on Manage Campaigns ➔ Search for TB asset ID or Program code.
- Update GMSS Request No with the GMS Portal Request Number
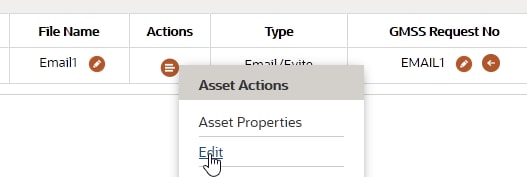
-
Actions ➔ Asset Properties.

Update the Email Stage, Email Version and Footer Type.
Note: The Footer Type for Invite emails should always be "Generic".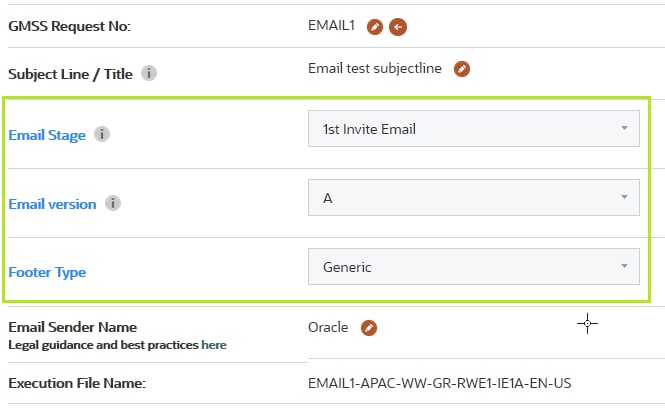
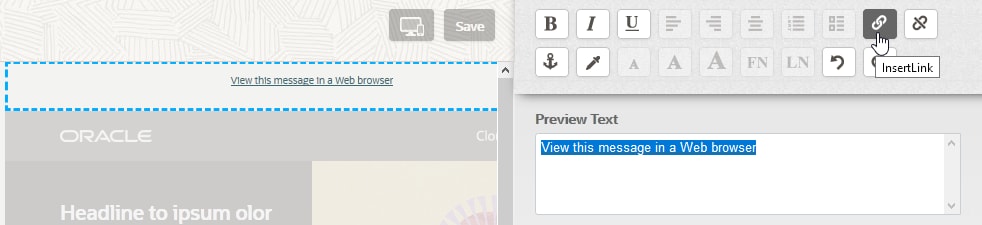
- For first draft, Download Assets (STEP 3) and upload online version into OCE (STEP 4). Update the online version link created under "View this message in a Web browser" in Actions ➔ Edit. Repeat STEP 3.
STEP 3 - Download Email Asset
- Login to Template Builder
- Click on Manage Campaigns ➔ Search for TB asset ID or Program code.
-
Actions ➔ Download (download email to local folder)
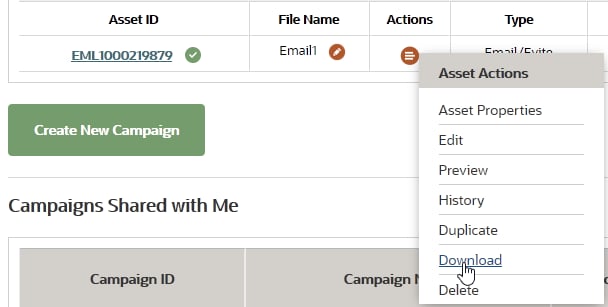
- Extract the downloaded zip folder, it will contain an Email (Upload to Eloqua) and an Evite (Upload to OCE. Learn how).

STEP 4 - Upload Email and Review
Upload Email
- Login to Template Builder
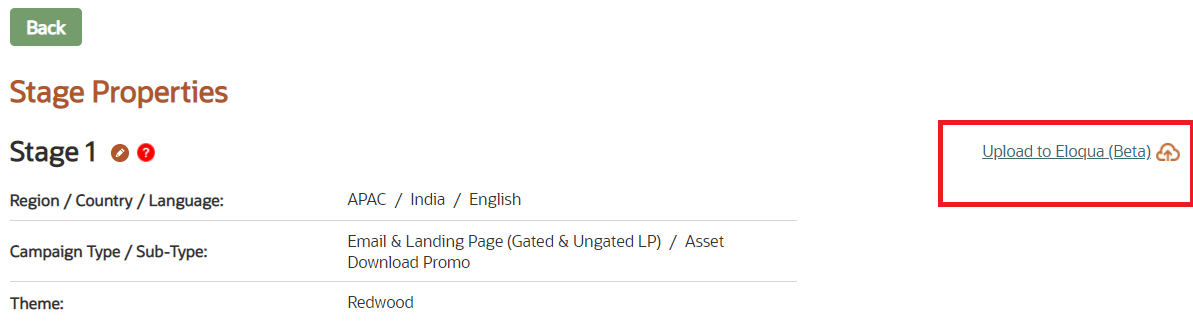
- Click on Manage Campaigns ➔ Search for TB asset ID or Program code.
- Click on the Upload to Eloqua (Beta) link.
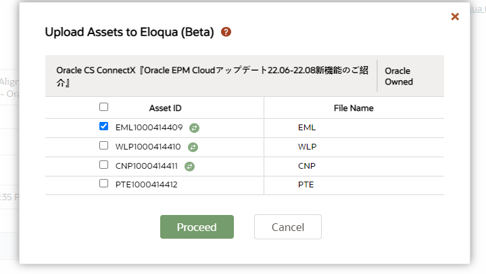
- Select the Email asset ID & click on “Proceed” button to upload the asset to Eloqua.
- Once the upload is complete, a pop-up will appear displaying the upload confirmation message & Eloqua ID will get generated in TB as shown.
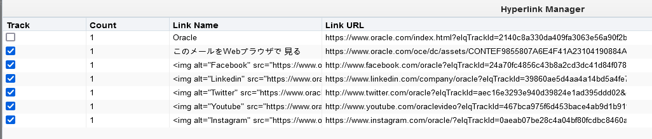
- Click on the Eloqua ID of the Email in Eloqua. once the email is opened, under Actions-> Manage Links-> verify that all links are tracked / checked except the link - https://www.oracle.com/index.html
- Click Save to save the email.

Review Email
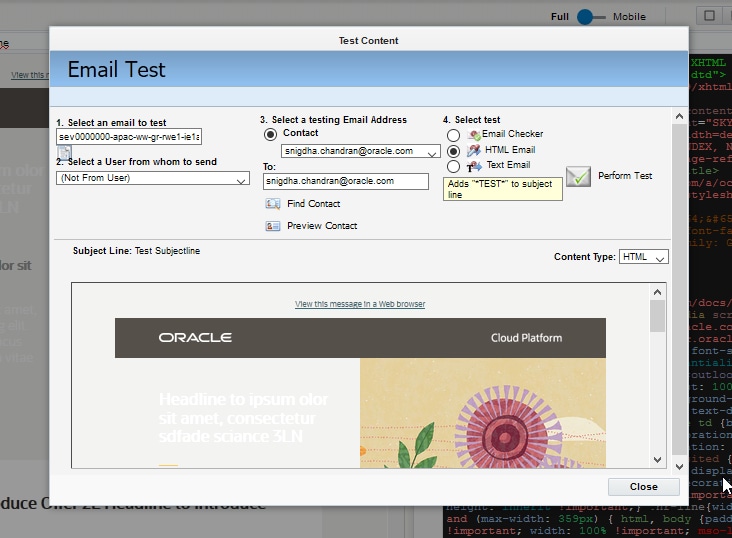
Before launching an email campaign, it is important that you send a test email so that you can be sure that the content displays correctly. Send the test email to yourself, open it in your email client, make any necessary edits in Eloqua and then finalize the email.
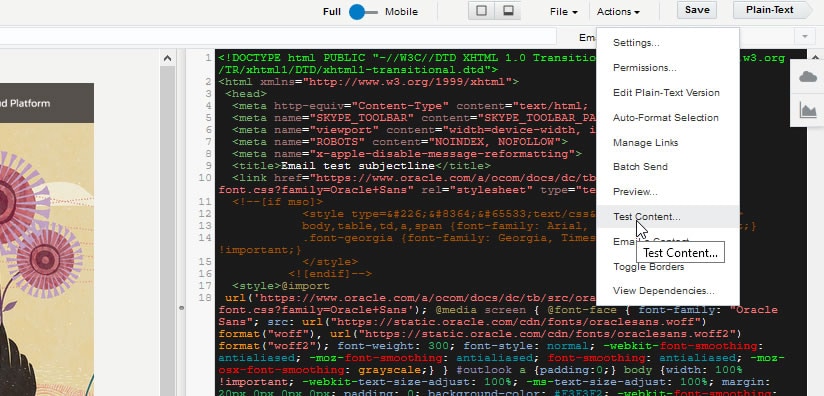
- Go to Actions ➔ Test Content
- Enter the email address to whom you will send the test copy.
- Always select HTML email.
- Click Perform Test to send the test email.
- Refer QA Checklist - Email best practices to review email.
PRO TIP
1. Eloqua Footer Type for invitation emails is Resp_Generic_language
2. Eloqua has a new function in the Subject Line called 'Predict' which could help us determine a better Open Rate. With this, whenever the prediction is poor you can cross verify with the Marketers if they would opt to change.
STEP 5 - Canvas Setup for Email Launch
Eloqua is a software as a service (SaaS) platform for marketing automation offered by Oracle that aims to help B2B marketers and organizations manage marketing campaigns and sales lead generation. Eloqua sends marketing advertisements to mobile devices, email, video and search results pages.
- Login to Eloqua
-
Find your Canvas: Search with Program name
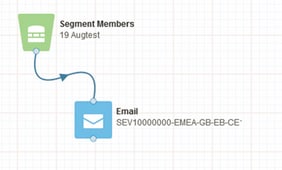
- Drag and drop:
Campaign Steps ➔ Email and Segment Members

a) Email: Associate email to placeholder

b) Segment Member: Associate List
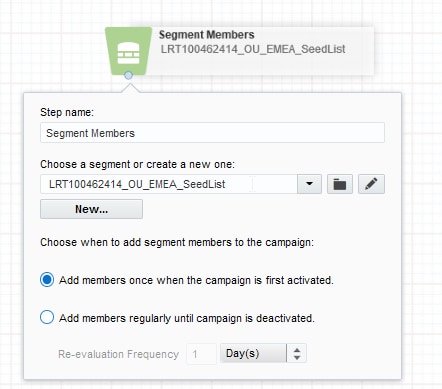
- Link the list segment with the associated email asset. The canvas would look similar to the picture below:
Activating Canvas for launch: Before activation, verify the canvas campaign settings
a) Set Campaign start date ➔ default is immediately unless you want to schedule the launch later time and date
b) Set Campaign end date to 1 year.
c) Campaign contact re-entry: If there is more than one email present in the canvas, choose ➔ Allow contacts to enter the campaign more than once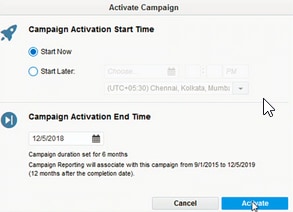
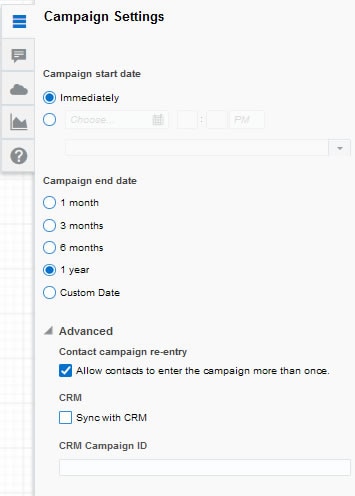
5. Once completed Save the canvas and Activate.
Related Topics
Nailed it?
If yes, click below to confirm completion of this topic.
Yes, I have understood this topic well