Landing Pages
Landing pages/pads are most often the significant part of any campaign that a target audience will view. The traffic audience will click-through a CTA link in an email or an advertisement page. The landing pad will have more related information and offer mentioned in the email/advertisement. In a campaign, mostly we see a welcome page which will give an overview of the offer, a form submission and then the visitor is taken to a thank you page where the offer can be viewed or downloaded. All these pages are parts of landing pad.
We will learn the following steps in how to identify a landing pad request, how to create it in Eloqua and publish it online.
- Identify Request
- Download Template
- Upload HTMLs
- Publish or Activate
- On-Demand Tasks
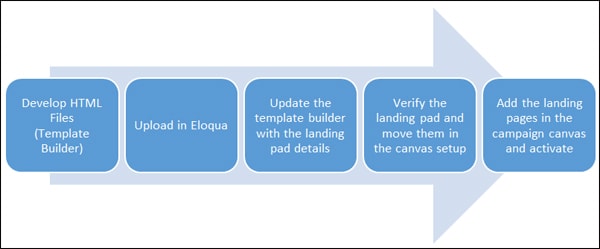
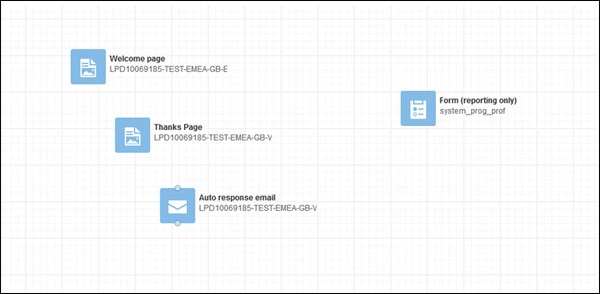
Landing Pad workflow is shown below
 People
2 |
 Prep time
15 min |
 Time
2 h |
 Difficulty
Medium |
Video Tutorial
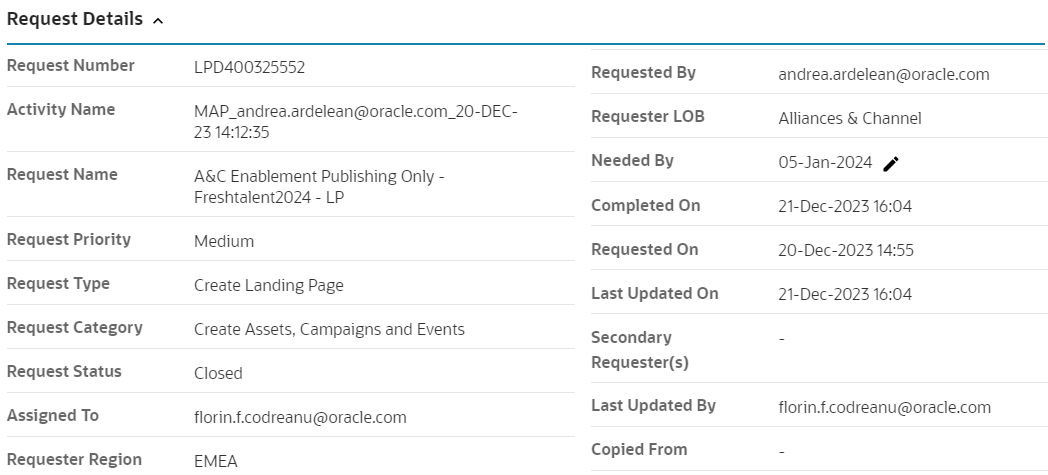
STEP 1 - Identify Request (5 min)
- Landing page format always starts with LPD.
- Check the request priority of the email and prioritize accordingly.
- Requests are prioritized High (1- 2 workdays), Medium (3- 4 workdays) and Low (5- 7 workdays). Prioritize queue accordingly.
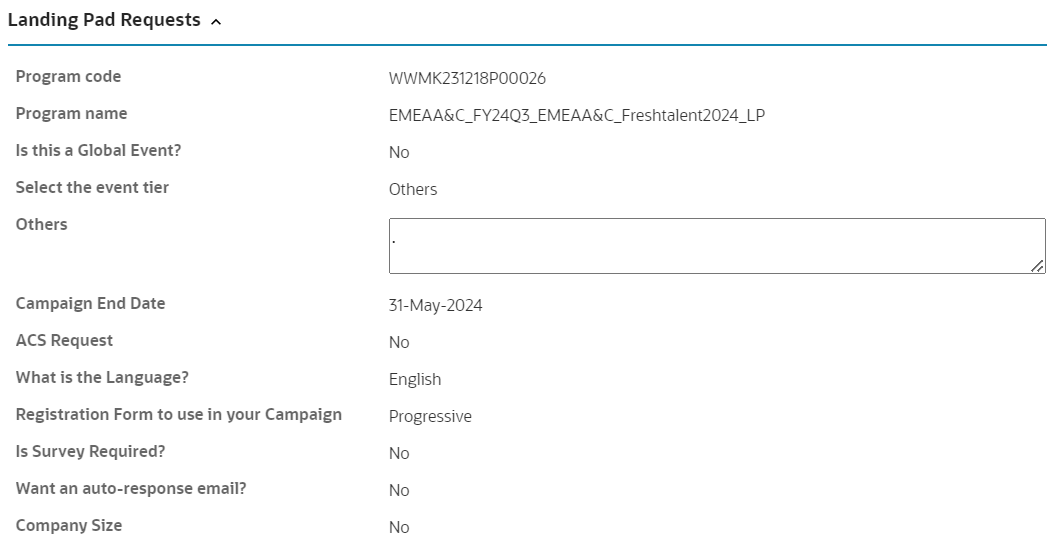
- Check program code and program name are same in the portal as in the MRM.
- Check the status of the program code in MRM, proceed only when the program status is active.
- Verify the type of form and update Template Builder as specified.
- Check whether the auto response email is required.
- Verify the survey and company size fields are necessary.
PRE-REQUSITE
STEP 2 - Download Template (90 min)
Template builder is the self-service application available for marketers to manage marketing campaigns and to build campaign assets such as emails, landing pages and event registration pages instantly, using responsive templates. One can build campaigns and assets without having to know any design coding languages.
- After verifying the request in the GMSS portal, search for the landing page with either the GMSS request number or one of the asset IDs, under the Manage Campaign option.
- Under stage properties verify all the fields filled by the requester are complete. If not, get back to the requester for their feedback.
- The requester should update all the fields where text is highlighted in black. The analyst should fill the fields where text is highlighted in blue.
- Once verified we work on the assets:

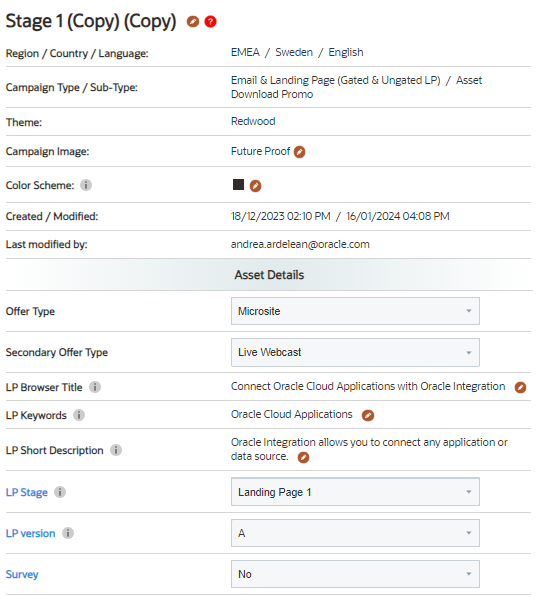
A. Welcome page
- Check the welcome page – it should not have any link present in the body content
- The banner image should only contain oracle brand marketing approved images. Also, as a best practice, there should be no banner text. If banner text is present, ensure its not more than 2 lines
- The placeholder image is provided for the primary asset. The requestor will provide the image or the asset for the primary asset. If the asset (pdf, video ) is provided
- Take a screenshot of the same, edit in Photoshop. upload in WCS and update the link in the placeholder with an appropriate alt text
B. Thank you page
- Before working on the thank you page, ensure that the asset properties are complete.
- The Thank you page will have the link for the primary asset. It may also contain secondary assets cross promoting related assets.
- Update the same primary asset image used in the welcome page.
- Upload the Primary asset resources in OCE and save the links generated.
- Update the OCE link in the CTA button
- If a secondary asset is provided, follow the same process as the primary asset and update the image and the links
- The RHS will have the cross promotion sticky widget. In here check whether all the social media links are provided
- The share link will be updated in the stage properties once the landing pad link is created
- Verify all the assets and links of the thank you page before moving to the auto response email
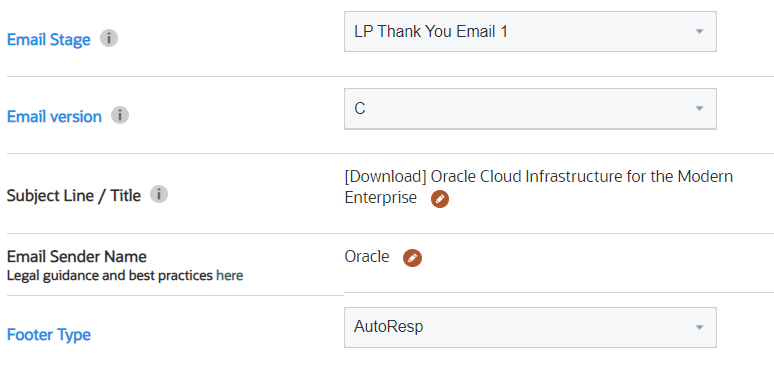
C. Thank You email
- Thank you email is an auto response email which is triggered once you access the thank you page
- Before working on the email, ensure that the asset properties are complete, including the subject line and the sender name
- Email stage should be LP thank you email, footer type auto response
- The content of the TYEM should be similar to the thank you page, including the assets and links
- As best practice there should be not more than 2 secondary assets following the primary assets.
- Update the asset images and links of both the primary and secondary asset if present, and complete the TYEM
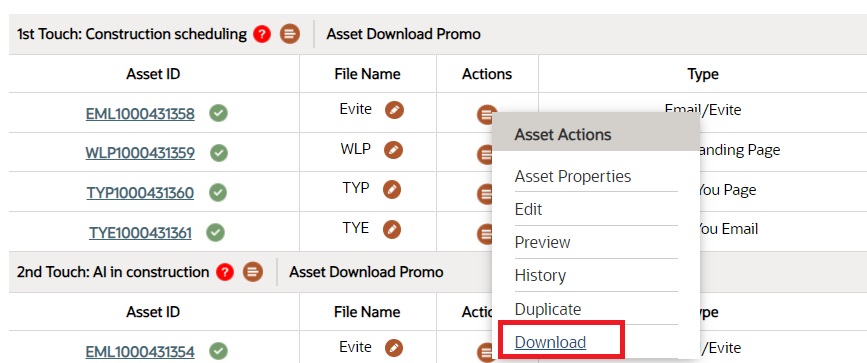
5. Update the link and assets in the template builder, and complete the first draft of the LP asset. Download the asset to your local drive
Updating Eloqua Properties
Once we create the landing pad links in Eloqua, go back to the Template builder and update the remaining fields to complete the campaign.
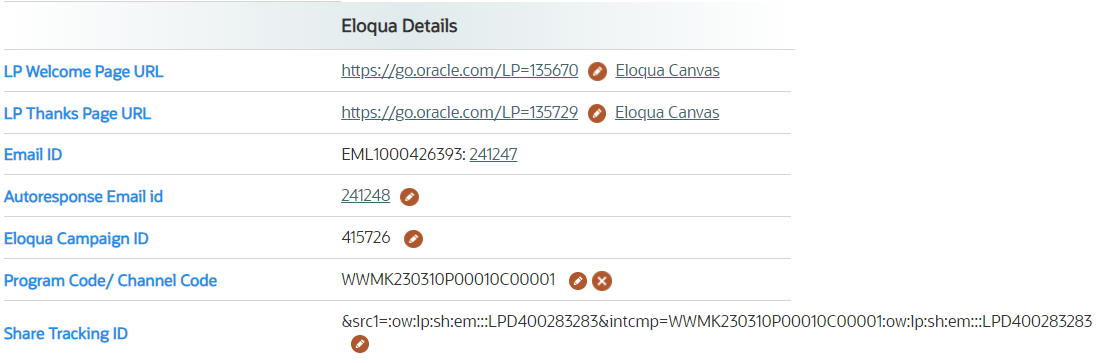
In the campaign, select stage properties and fill up the fields highlighted in Blue
- LP Welcome Page URL –enter the Eloqua generated page link without the Eloqua campaign code
- LP Thanks Page URL – enter the Eloqua generated thank you page link without the Eloqua campaign code
- Eloqua Campaign ID – enter the value from the Eloqua campaign canvas
- Program Code/ Channel Code – provided by the requestor in the GMSS portal
- LP Stage, LP version – default is landing pad 1 and A
- Auto response Email id – enter the value noted from the email asset
- Share Tracking ID – this is for sharing the LP link across various social media platforms. The share url is generated using the tracking url generator. In this case choose channel as oracle web, level 1 as landing pad , level2 as share-email. Enter your LP request number as the free text and generate the tracking url.
- Survey field – default is no, if required select yes
- Form type .There are 2 type of forms in template builder 8 field form and progressive form
- When the requester has mentioned 12-field standard form in the request portal – choose 8-field form in the template builder
- When the requestor has mentioned progressive profiling 3 step, 2 step - choose progressive form in the template builder
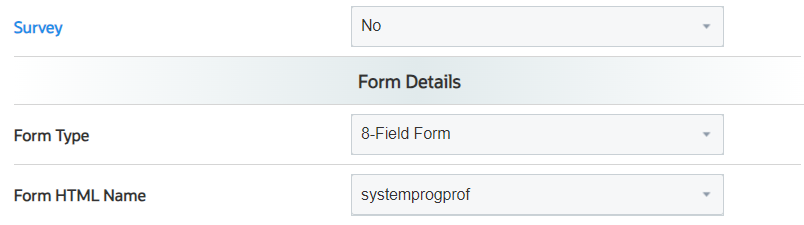
10. Form HTML Name – always systemprogprof
11. Contact me option, custom question and company size fields are updated as per requestor comments
12. After updating the values in stage properties. Download all the assets again from the campaign
STEP 3 - Upload HTMLs (20 mins)
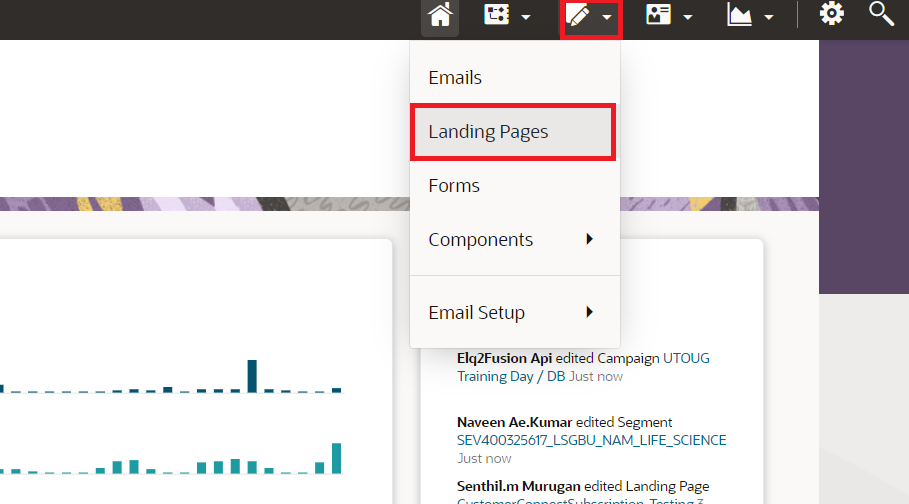
- Log in to Eloqua. Click Assets.
- Click Landing Pages.
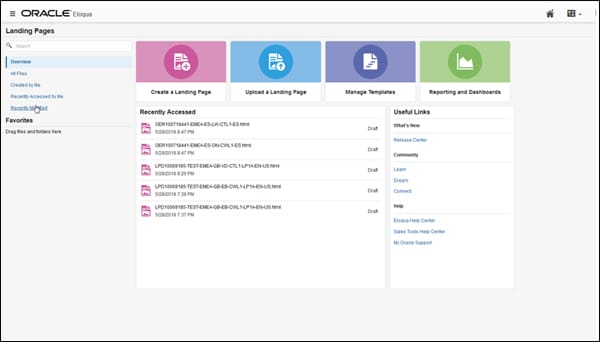
- Click Upload a Landing Page.
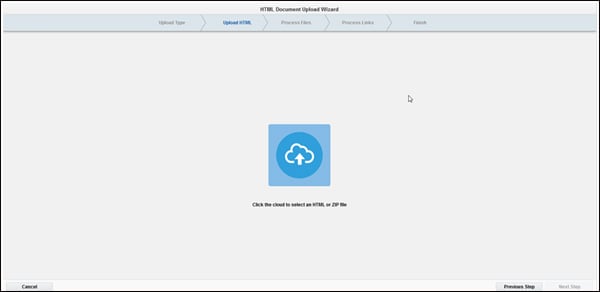
- Locate the file from your system by clicking "Click the cloud to upload a file."
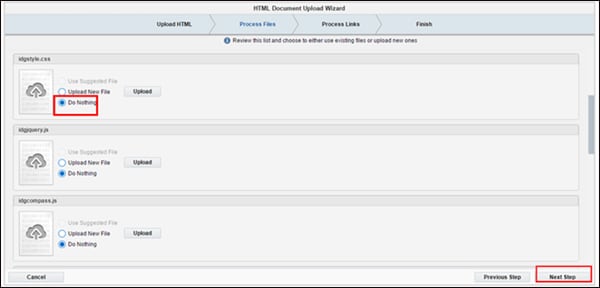
- All image files contained in the HTML landing page are listed on the upload page. Select Do Nothing for all images and other files. Click Next Step.
- Do Not track any of the links for Landing Pages
- Using the drop-down arrow or the folder icon, select the appropriate landing page folder and click Finish.
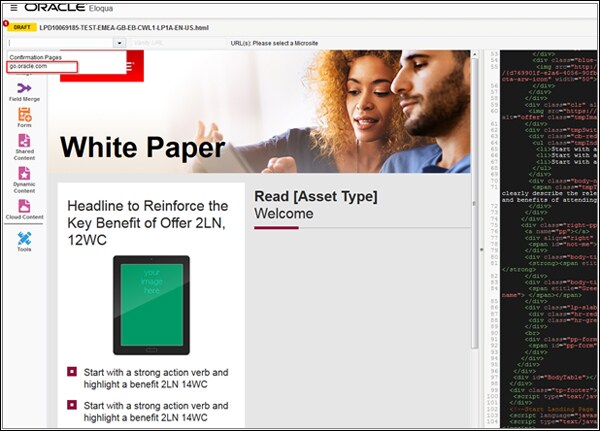
- Once the landing pad preview is uploaded, always-select go.oracle.com
- Click on save to complete the landing page upload
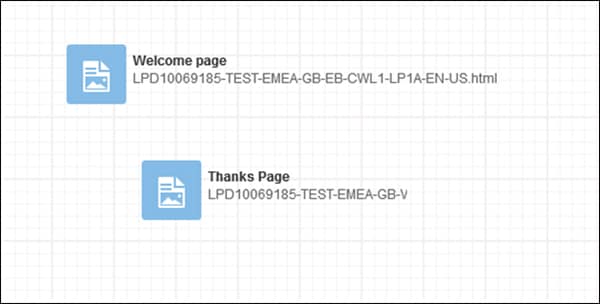
- The welcome page and thank you page format will be in the format of https://go.oracle.com/LP=xxxx?elqCampaignId=xxxx where eloqua campaign id is determined from searching the program name under Eloqua ➔ orchestration ➔ my campaigns
- DO NOT DELETE any of the created landing page, if a duplicate has been created by accident, rename the same as Trash-lpdxxxx
- Thank you email upload follows the same steps as email uploads
- Thank you email tracking footer should always be Resp_Auto_xxxx[Language]


PRO TIP
Open 2 Eloqua windows to upload the pages at the same time
STEP 4 - Publish or Activate (10 mins)
The campaign canvas is where you drop all of the elements of your campaign. Search for the Program name in Eloqua ➔ Orchestration ➔ Campaigns to arrive at the appropriate campaign canvas.
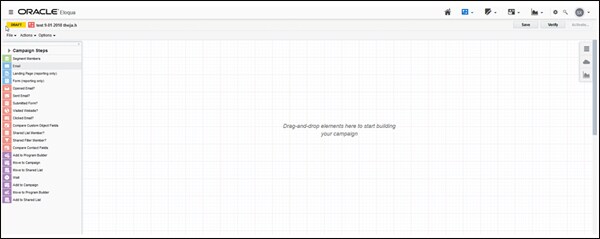
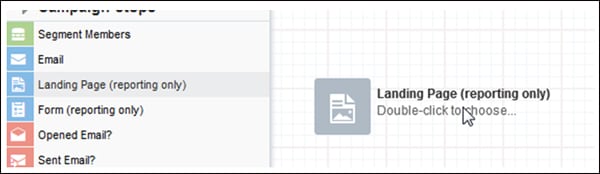
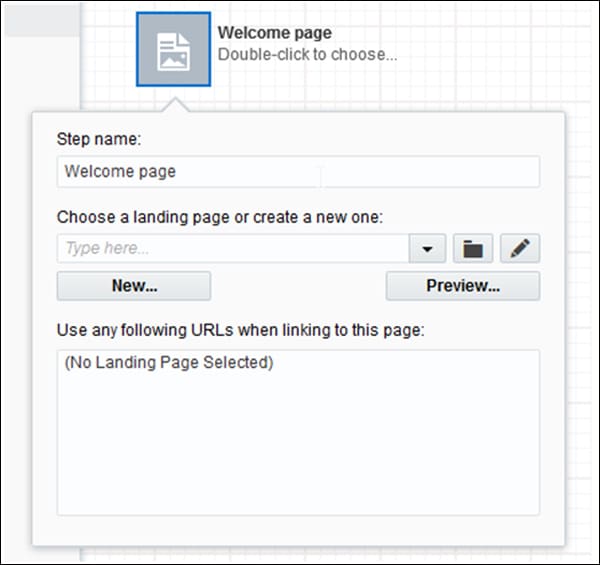
- To add the landing pad assets select campaign steps ➔ landing page
- Under choose a landing pad, search by your GMSS request number id and choose the welcome page.
- You can update the step name as welcome page
- Repeat this once more for the thank you page
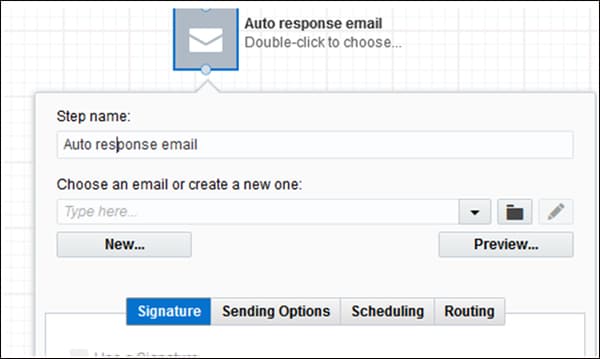
- For adding the auto response email select ➔ email
- Under choose an email, search by your GMSS request number id and choose the auto response email
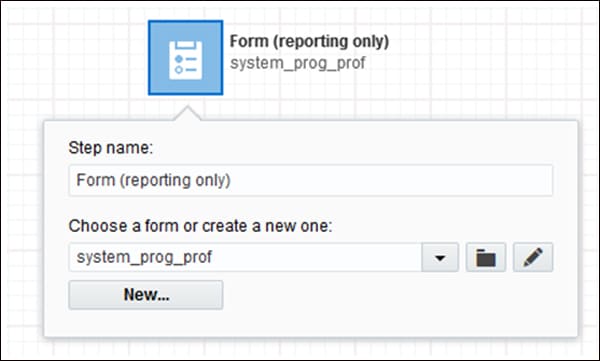
- Add the system form.
- Under campaign step ➔ choose form ➔ system_prog_prof. This is the same in case of any type of landing pads
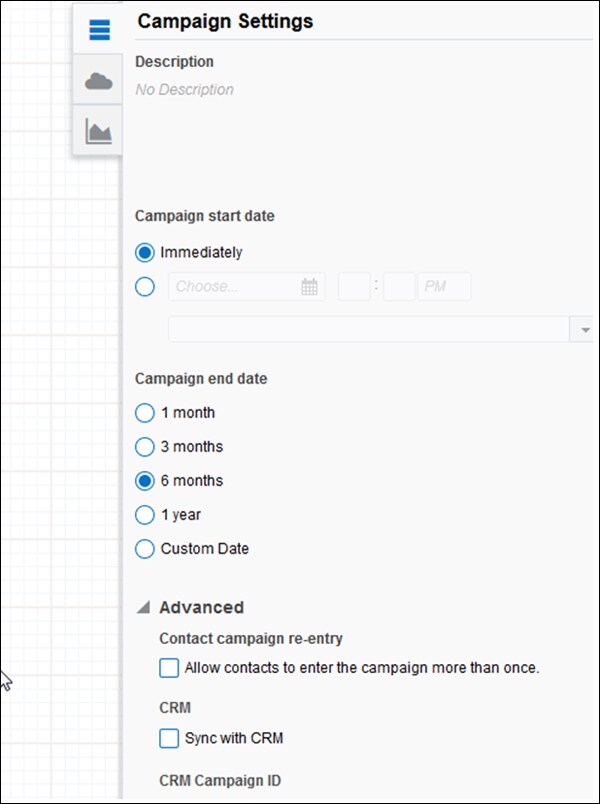
- Once completed, look into the campaign settings
- Campaign start date ➔ default is immediately unless you want to schedule the launch later
- Campaign end date ➔ choose a minimum 6 month period from the activation date
- Campaign contact re-entry - this is for email launched, so you can skip this
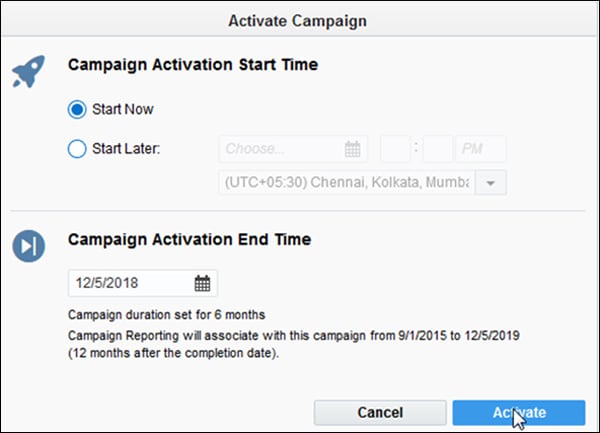
- Once completed save the canvas and activate
Secondary landing Page
A second landing page is added when multiple welcome and thank-you pages are required for the same campaign.
To do this the campaign canvas needs to be deactivated and the new LPs have to be added to the canvas and then re- activated. All the upload and activation process remains the same. Refer the Eloqua upload section for all the details.
Associating Email with Landing Page
If an invite email is to direct to a landing page, one will have to create email in Template builder and associate the Landing Page link in the email CTA.
- Upload the email to the respective folder (See Email section Eloqua for more information
- Upload the landing pages to the respective folder(See Template builder and Eloqua section for more information)
- Update the landing page link (welcome page link) in the email content (the Call to Action, or CTA, button)
STEP 5 - On-Demand Tasks
Ungated Landing Page
As the name suggests, these landing pages do not have any form submission. They are standalone pages with with one or more assets. They do not have thank you page or thank you email.
Please Note:
- In some cases, there can be secondary offer gating on these pages for which marketers need to set up a thank you page, to host the secondary offer. And they may also need thank you email for this.
- The ungated landing pads name in template builder will always start with ULP
- The welcome page and thank you page of the ungated landing pad set up are the same in Template builder and Eloqua.
- Please refer Template builder and Eloqua upload section for more details.
Related Topics
Nailed it?
If yes, click below to confirm completion of this topic.
Yes, I have understood this topic well