Creating Channels in Cloud MRM
Cloud MRM (Marketing Resource Management) is Oracle's planning and budgeting application, and the starting point for all Marketing initiatives and activities across the company.
A Cloud MRM Program must be created for your marketing activity/event before any execution can begin (PO creation, email demand generations, telemarketing, content creation, etc.). Once your program is created and active in Cloud MRM, you're ready to start executing.
Cloud MRM is integrated with our Modern Marketing architecture—including CXD, Eloqua and Oracle Sales Cloud—to ensure seamless, automated execution and lead flow.
Marketers can create programs directly in Cloud MRM or by raising a GMSS Portal request to have the Demand Center do it for them.
In this section you will learn:
- Searching for a campaign in MRM
- Creating a channel in MRM
- Additional tips
Helpful resources:
- For MRM troubleshooting tips, refer here
- For updates and support, follow #mrm-community on Slack
- For MRM support via email, reach out to MRM-SUPPORT_WW@oracle.com

 People
1-2 |
 Prep time
5 min |
 Time
5 min |
 Difficulty
Easy |
Searching for a program in MRM (1 min)
There are 2 methods to query for a program in MRM.
Method 1: Search bar
1. In Cloud MRM, paste the program code or the program name in the search bar
2. Click the result that appears below the search bar to open the program

Method 2: Global search option
1. In Cloud MRM, click the bottom menu option “Programs” to open a tabular view of all programs. NOTE: This method is not an exact match search. For example, searching for ‘est’ will return anything with that character sequence such as ‘guest’ and ‘test’.
2. Search by either program code or program name by:
- By code: click “MRM code”, then paste the code into the field prompt, then click “Search”
- Or by program name: click “Name”, then paste the program name into the field prompt, then click “Search”
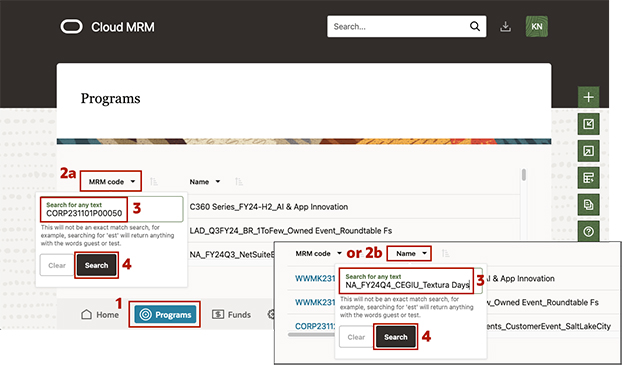
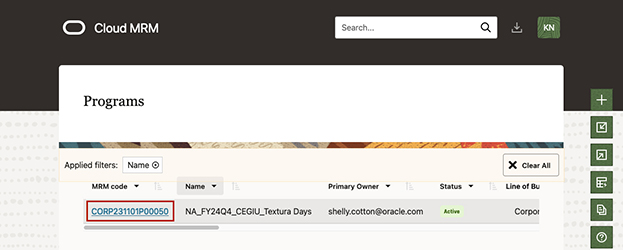
3. When the result appears, click the hyperlinked MRM code to open the program.
Creating a channel in MRM (5 min)
You may need a channel code for programs to make new a Eloqua canvas, examples include new canvases for email (SEV) sends, Zoom attendee filters and Zoom post event sends. Channel codes are also used for Multi-Follow Up Sales Channel (Multi-FUSC) events for track or session attendance-based lead flow.
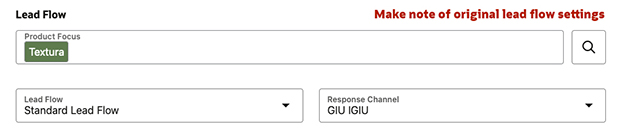
1. With the program open, stay on the “Details” tab and scroll down to the “Lead Flow” section.
2. Note the program’s “Product Focus” and “Response Channel”
- Pro tip: Take a screenshot and save it to your computer related to the request number you are working on. This is handy for referencing back to and for record keeping if there’s any sort of issue post campaign.
3. Change the “Lead Flow” drop down to “Multi-Channel” and then click the black save icon in the right menu.
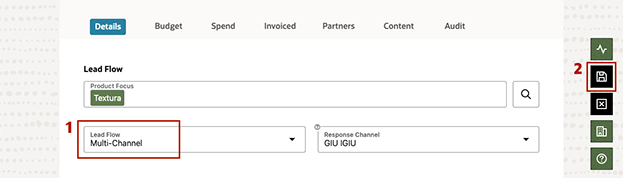
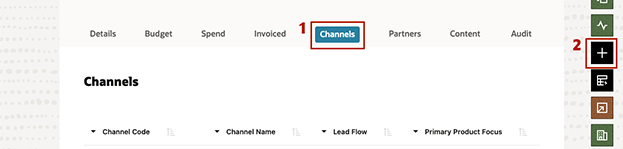
4. Once the new lead flow setting is saved, click the newly created “Channels” tab and then click the black + icon in the right menu
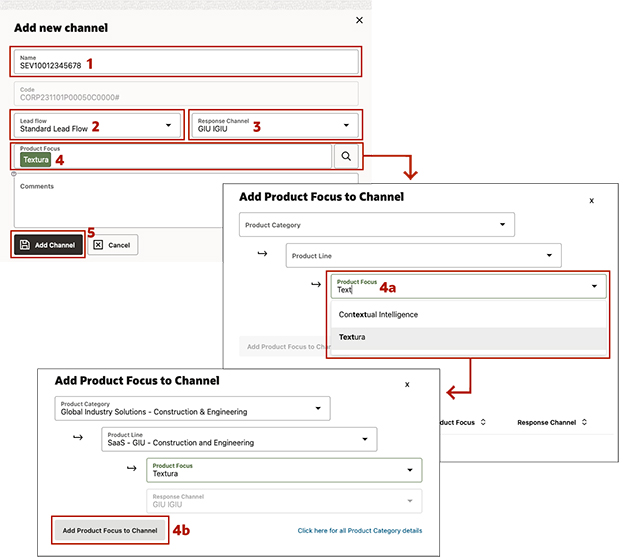
In the “Add new channel” dialogue box update the following settings:
- Name: Type in a name for the channel (Eloqua canvas examples determined by DMS analyst: ZoomAttended, Post_Event, SEV100123456. Multi-FUSC examples to be provided by the marketer: Developer, Human Resources, Learn from Revenue to Grow Revenue)
- Lead flow: Select the same lead flow setting the program was originally set to. (The exception to this can be Multi-FUSC, in which case this is determined by the marketer.)
- Response channel: Type in and select the same response channel setting the program was originally set to. (The exception to this can be Multi-FUSC, in which case this is determined by the marketer.)
- Product focus: Click the search icon and then follow the below steps to select the same product focus the program was originally set to. (The exception to this can be Multi-FUSC, in which case this is determined by the marketer.)
- In the new dialogue box you can optionally filter down products using the Product Category and Product Line fields or if you have the exact product name, type it in the Product Focus field and select the matching result.
- Once you have the desired product selected in the Product Focus field, click the button “Add Product Focus to Channel”. Then click the “x” button to close the product search dialogue.
- Once all the above settings are configured, click the button “Add Channel”
Additional tips
Need to edit a channel code?
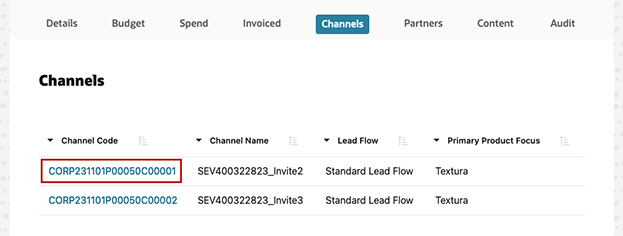
To edit an existing channel code, go to the “Channels” tab and then click the hyperlinked channel code in the table listing. This will open that specific channel code’s dialogue box where you can make any necessary updates and then click the button “Save Channel”.
Need to associate the program code or new channel code to a GMS Portal request?
Once a channel code has been created in MRM, new portal requests will default to selecting the first channel code instead of the program code. Likewise, pre-existing requests will be associated to the program code instead of a channel code. In some cases, you may be asked to reassociate the program code or associate a new channel code to your request. To do so follow the below steps:
1. With the portal request open, click the “Edit Request” hyperlink
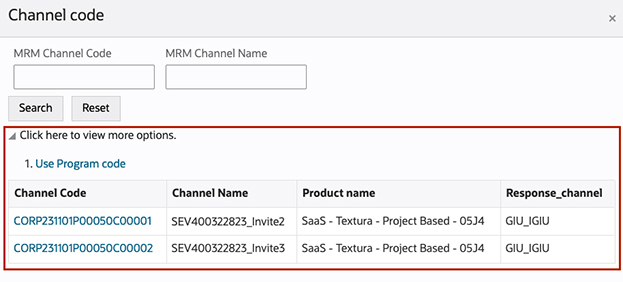
2. Scroll down to the field “Channel code” and click the search icon
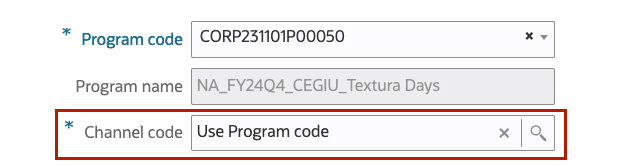
3. In the dialogue box do one of the following:
- To associate the program code, click “Click here to view more options” and then click the “Use program code” hyperlink
- To associate a channel code, click the hyperlink of the channel code related to the request
4. Click the button “Apply Changes” to save the new settings
Related Topics
Nailed it?
If yes, click below to confirm completion of this topic.
Yes, I have understood this topic well