How to update an Event in the MRM Calendar
MRM Calendar is a tool that can help everyone track all the Marketing Activities (Events) happen in a year. This includes In-persons, Webinars / Meetings and even Third Party events. Now each Activity has their own details whether budget or programs that is found in the MRM. Through this effort, centralizing everything in the MRM Calendar would benefit everyone since all the details can be found here with a simple search.
Here you will learn:
- Purpose of this Effort
- Where to locate the MRM Calendar
- Which Details needs to be Added
- Where to locate these important Details
Note: that once your OER request is approved then you can proceed in updating the event. Only the approved details shall be published in the MRM calendar whether the event is searchable or non-searchable. Only published events can be checked by the QA team.

 People
3 |
 Prep time
15 min |
 Time
1.5 h |
 Difficulty
Easy |
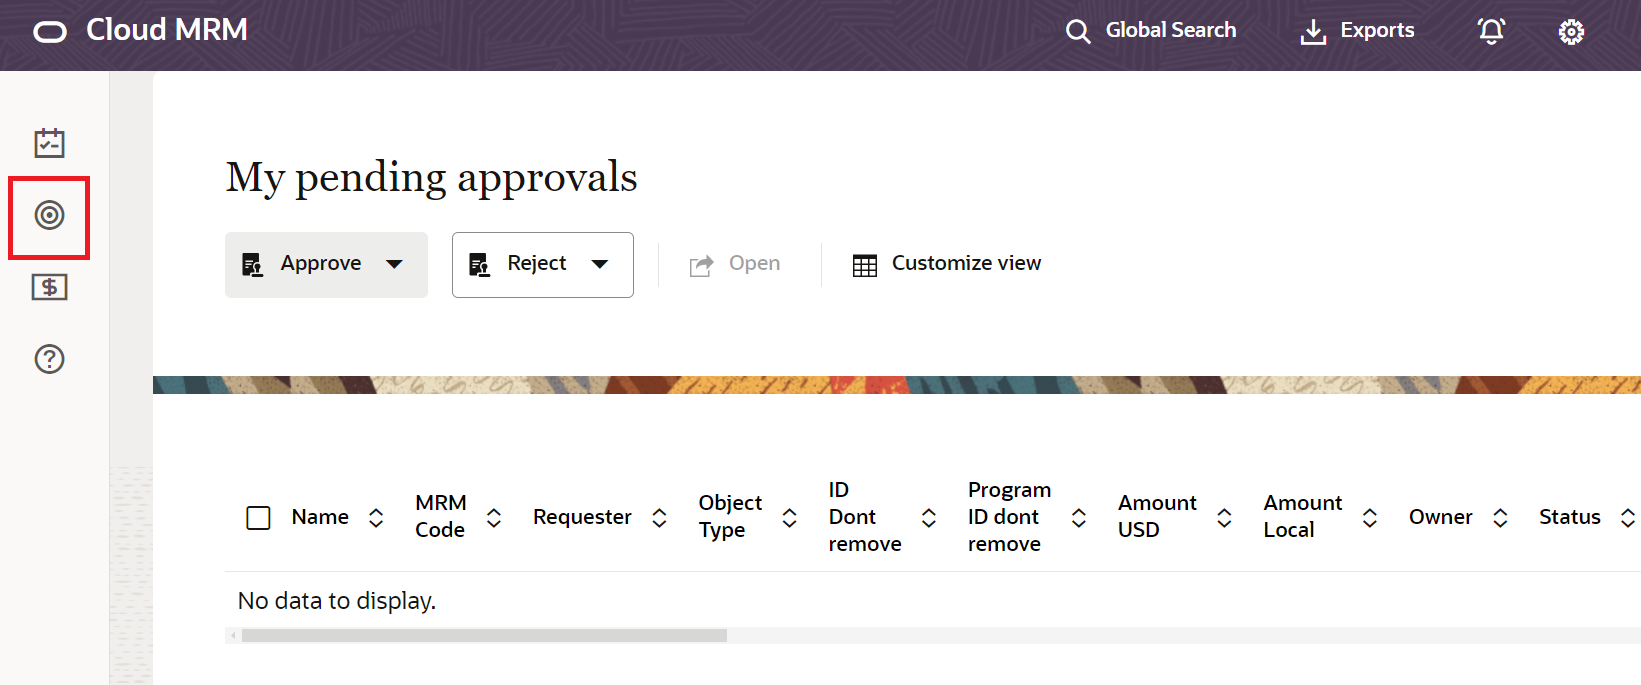
STEP 1 - Login to your MRM and Search your program code
Using your SSO, login to the MRM and go to the Programs tab found on the left side highlighted below in the image. Search for your MRM code. Simultaneously, the Global Search bar at the top could also be used.
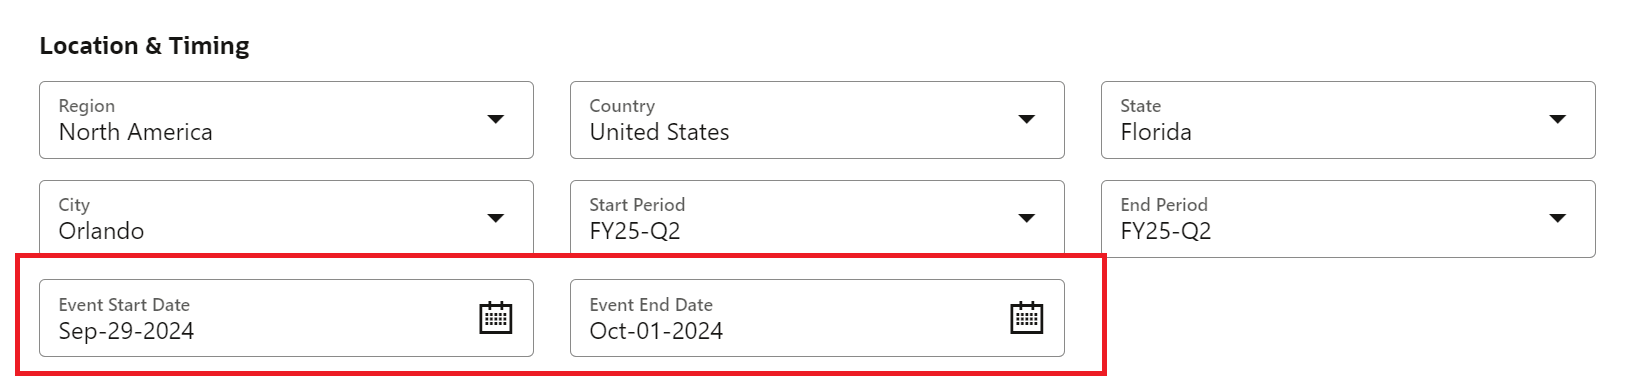
STEP 2 - Adding the Event Details
First to check are the Event Start and Event End Date found in the Location and Timing Section.
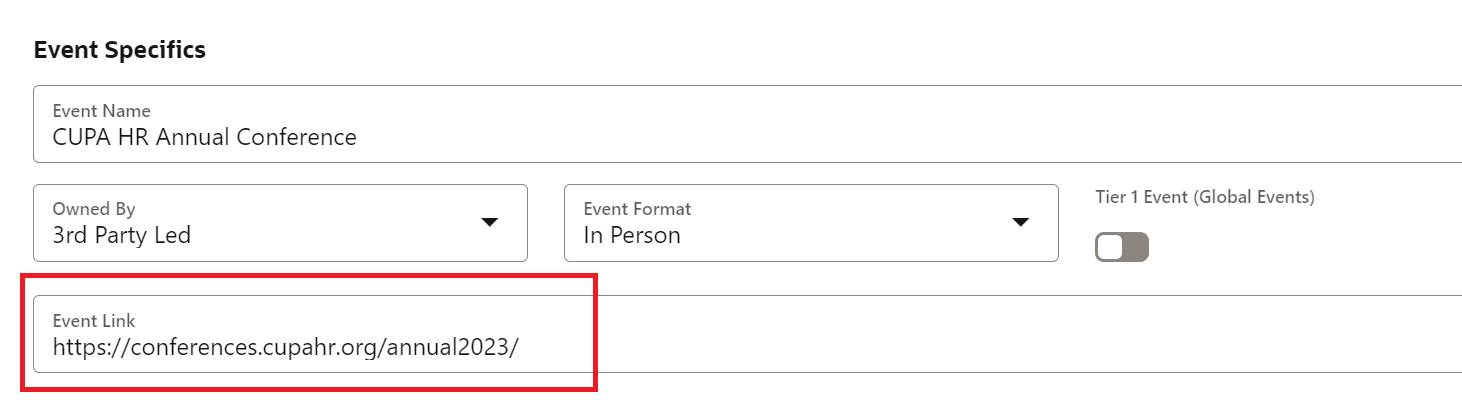
STEP 3 - Event Link
Next is to add the Event Link URL found in the Event Specifics.
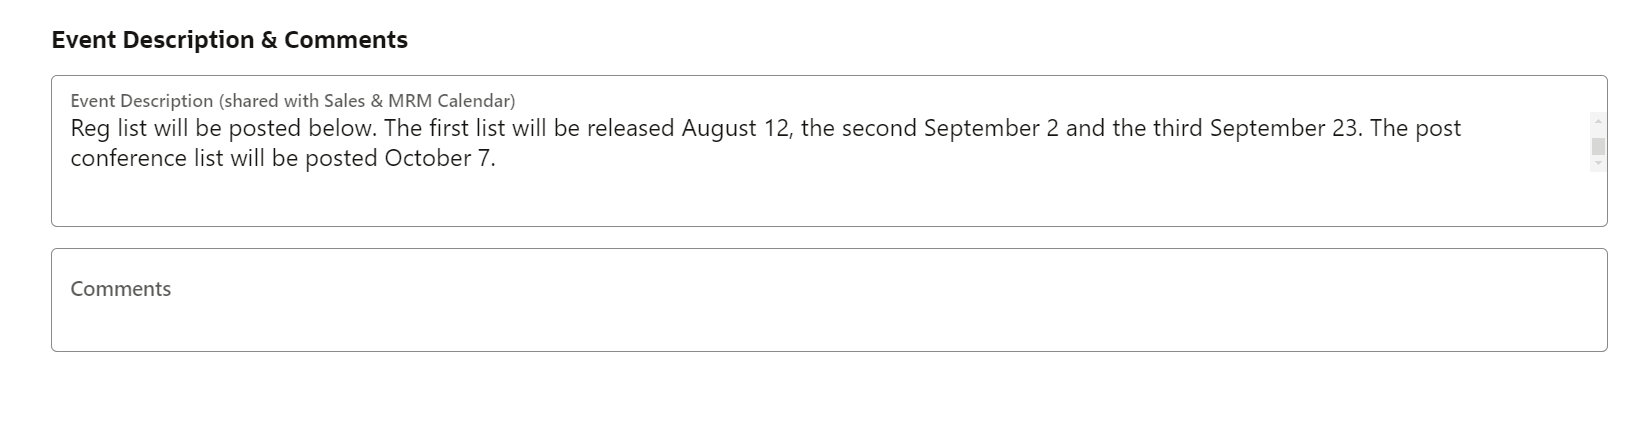
STEP 4 - Event Description
Lastly, add the Event Description and Comments that will be found at the bottom of the page.
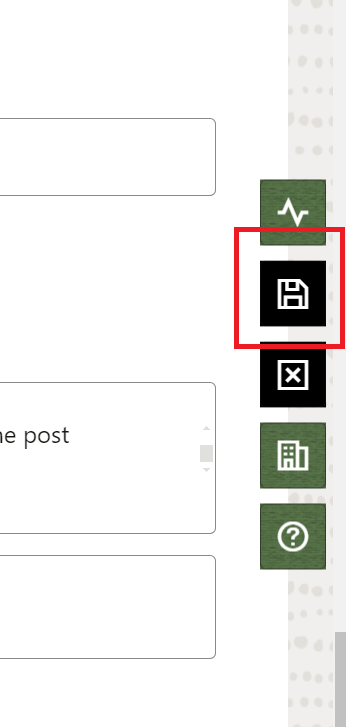
STEP 5 - Double Check and Save
Do not forget to click save on the button floating on the right
STEP 6 - How to Publish and Remove from the MRM Calendar
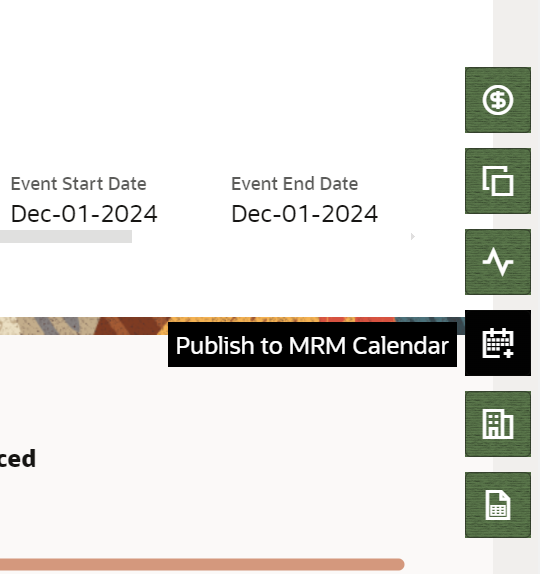
How to Publish?
Once you have added the required details, you will see on the floating buttons on the right where you can see the Publish to MRM Calendar. Click it and should be published immediately.
Note that all Program Details must be filled out. Additionally, the description field found at the last part must be filled out in order to publish.
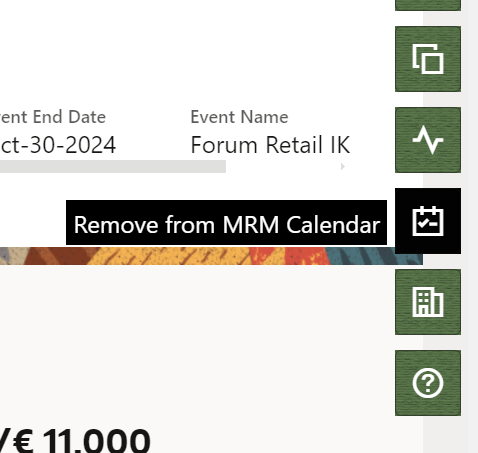
How to Remove?
When the event activity is decided to be cancelled or deleted. Once this is all done, you can click on the floating buttons on the right the Remove from MRM Calendar. It should automatically be removed from the Calendar.
Note that the event can still be seen however it cannot be edited.
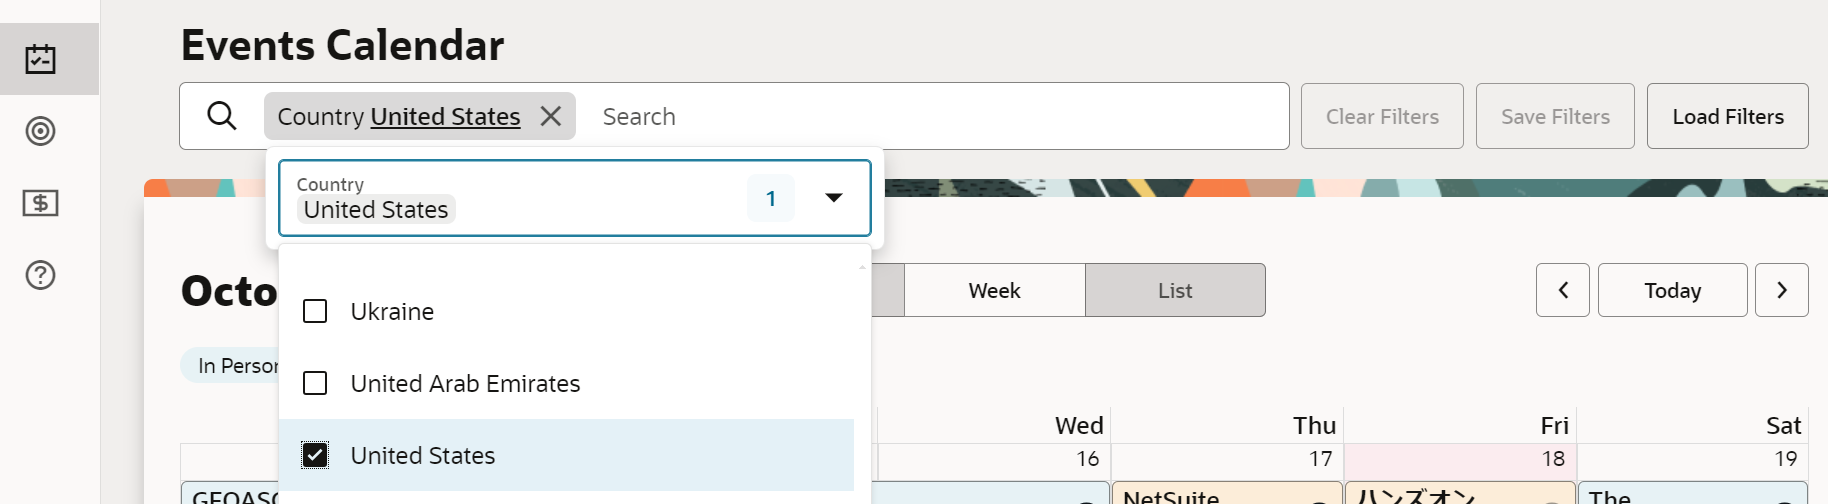
How to Save and Load Filter?
How to Save a Filter?
Once you enter the Events Calendar Tab from the left.
In the Events Calendar page, you can click the search box and it will show an array of filters you can customize and create.
Once you have created your customized filter. You can create by clicking the Save button found on the right.
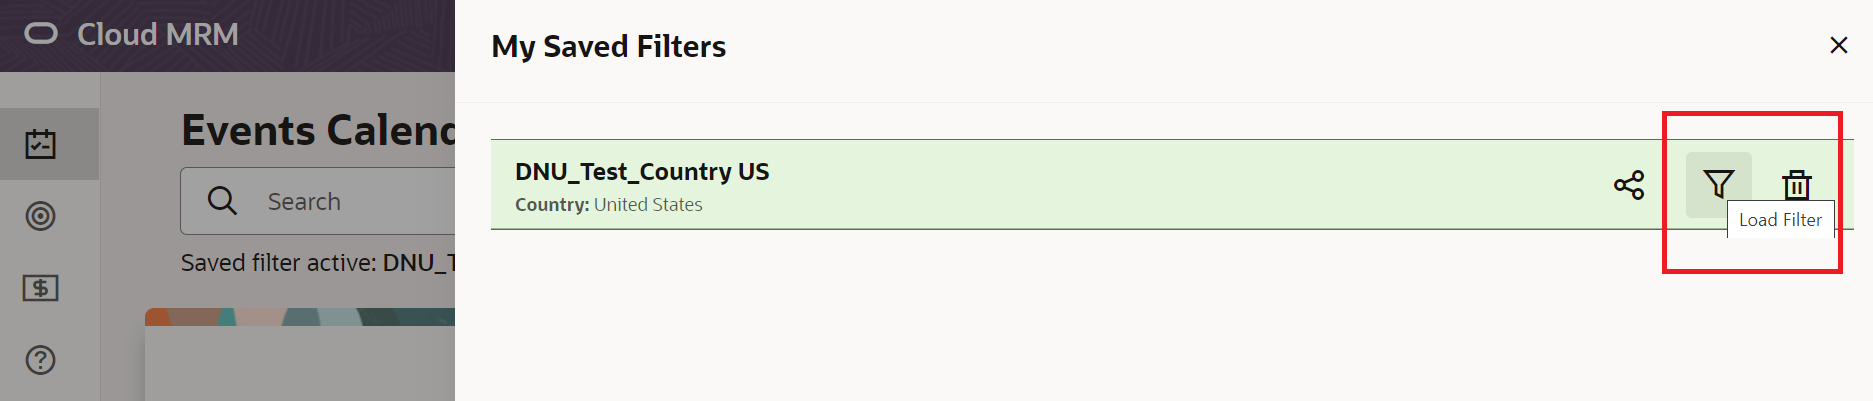
How to Load a Filter?
To load a filter you have created, simply go to the Events Calendar page. The Load Filter tab will be found the right. Click it and it will show your My Saved Filters pop up box. Select the filter you want to use by click the Load Filter logo found on the right.
Event Program Details
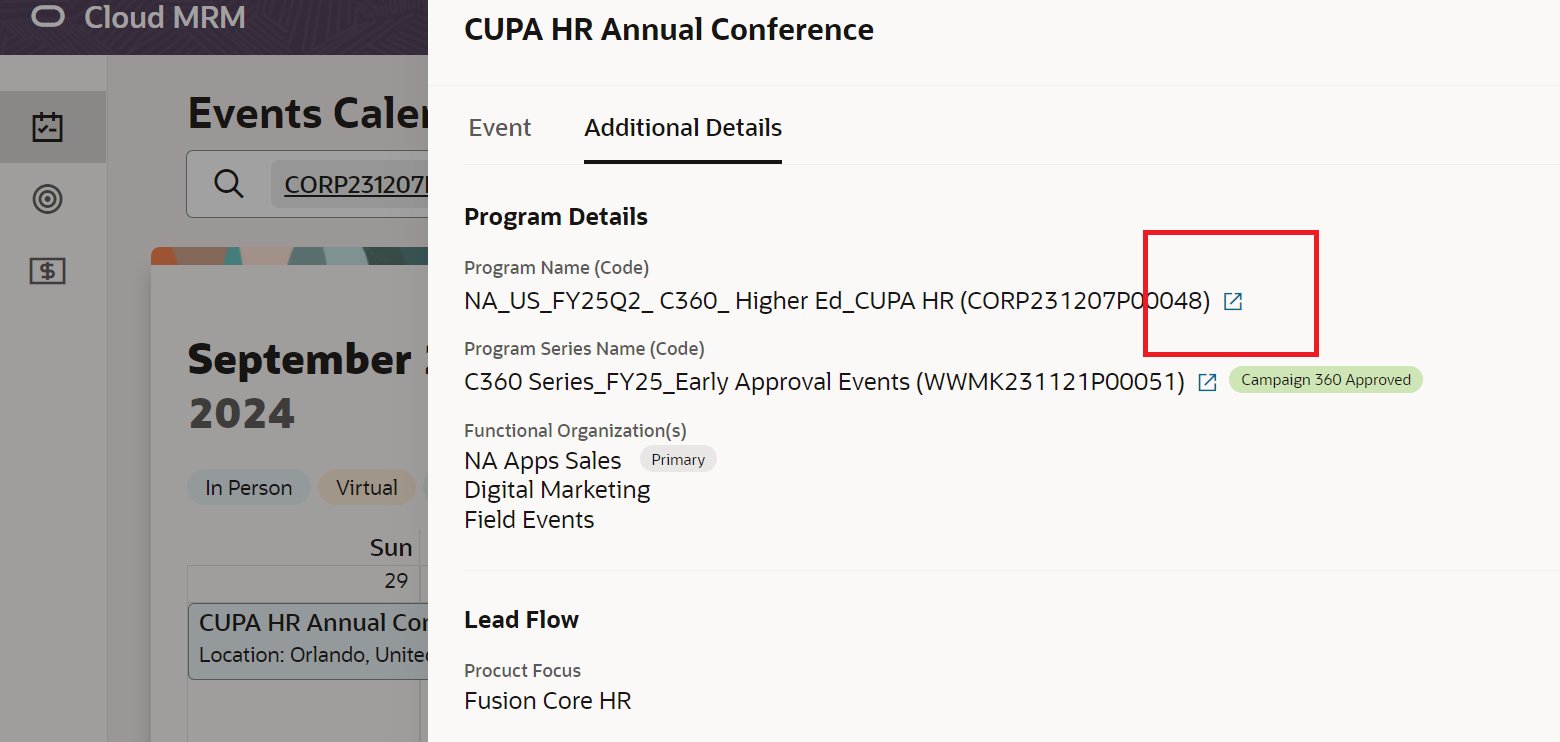
In the Events Calendar page, once you click on an event. A lightbox will pop out, and you can see the Event and Additional Details tab. Under the Additional Details tab is the Program Details where you can click the arrow up tab beside the Program Name which can also direct you to the Event's Program Details page.
Related Topics
Nailed it?
If yes, click below to confirm completion of this topic.
Yes, I have understood this topic well