What is Path Factory?
PathFactory is a content management platform that helps create intelligent campaigns, reuse content, track performance, and review content engagement.
Offers are added, and set into tracks for client prospects to follow. There are target tracks and recommend tracks, depending on the campaign objective. Target tracks are suggested for small number of offers, and are sorted into a determinate content flow. Recommend are suggested for wider campaigns, they do not follow a flow but are built into topic categories inside the track.
You can also add an Explore Page to any recommend or Target track, these give the visitors a quick view over all available content. Finally there are Microsites, which combine different tracks and external offers, allowing viewers to switch between them.
Looking through this guide you will learn how the tool works, how to upload content and how to set up campaign tracks and explore pages.
Access PathFactory
 People
1 |
 Time
30 min |
 Difficulty
Moderate |
Workflow
Video Tutorial
Add content
Single Offer Upload
Look at your campaign excel file, it should include all the info you need to set the offers
- Go to the content library tab
- Select “Add content” button, this should open the “Add and Configure Content” window.
- Choose the “Website URL” option
- Fill in the offer url, this will open the asset properties window.
- For assets that do not automatically pull a thumbnail image, you need to create and upload a thumbnail image.
- For PDF Files only, the “PDF Viewer Enabled” option must be turned to ON.

• Offer Title – This will be the offer public, published tittle
• Description – Ideally should match the content type
• SEO Tittle – not applicable yet, you can leave it blank
• Content Type – select from the drop down menu, if it is not available create a new one
• Custom URL Slug – low case preferred, no special characters nor spaces, just hyphens
• Content Engagement Score – 1 , 4 or 8 depending on the funnel stage 1=top, 4=middle, 8=bottom
• Internal configuration Name – identifies the asset within the platform. Ideally should match the offer tittle. English preferred. Localized Version will include the Language identifier at the end
• Funnel Stage – top, middle or bottom
• Estimated Cost - leave blank
• Persona - leave blank
• Industry - leave blank
• Expiry date - leave blank
• External ID - leave blank
• Topics – Copy paste from the excel file, case sensitive
Bulk Offer Upload
Look at your campaign excel file, it should include all the info you need to set the offers
- Carefully review your request file to make sure all video links are in proper format, and there are no PathFactory urls among the offer source urls.
- Create any new Topic, Content Type or Business Unit required on your track request.
- Go to the content library tab
- Select “Add content” button, this should open the “Add and Configure Content” window.
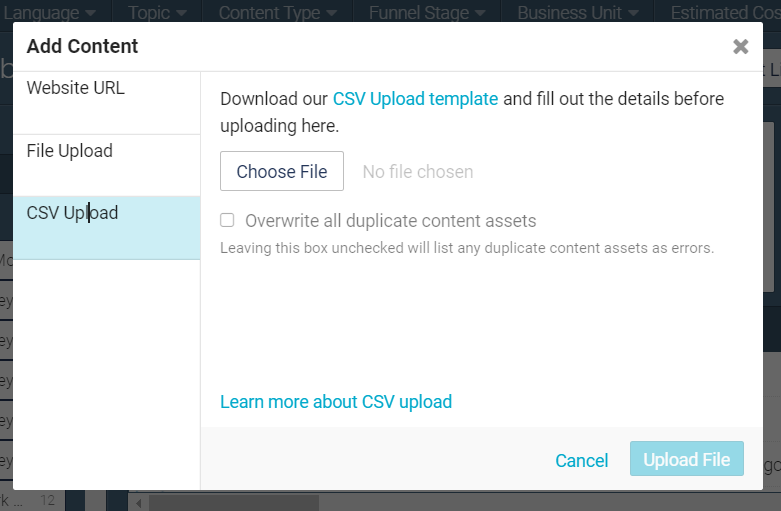
- Choose the “CSV” option
- Download the attached format
- Open in Excel, select the first column and separate text into columns (comma delimited option).
- Fill in the excel with your campaign offer data
- Replace any comma for a hyphen
- Save as Comma delimited CSV
- Upload that file into the PathFactory CSV Upload section
- You will get an email from Path factory detailing each asset’s upload status
- Create and upload thumbnails for any asset that did not automatically generate one in the process.
- For PDF Files only, the “PDF Viewer Enabled” option must be turned to ON.
IMPORTANT
Only modify the Slug id when you first upload an offer, or if you are sure that offer is not part of any other campaign. It is part of the asset url, so if it changes, it will affect all campaigns that contain that asset.
*For Video Offers Only,
Use the brightcove url format:
https://players.brightcove.net/1460825906/default_default/index.html?videoId=YourLinkID
so that the video format adapts to the PathFactory interface.
So if you get, for example, ISP3 Migrating JDE to Oracle's Compute Cloud video link as https://video.oracle.com/detail/video/5379393844001 , you should adapt it and upload https://players.brightcove.net/1460825906/default_default/index.html?videoId=5379393844001
Videohub URLs should be replaced with the corresponding Kaltura url. For this you will need to open the “Share” tab and copy the url. The sharing URL contains a few extra details, but it will still work in PathFactory. You can get to the base URL by removing the flashvars parameters.

So an url that is shown as: “https://cdnapisec.kaltura.com/p/2171811/sp/217181100/embedIframeJs/uiconf_id/35965902/partner_id/2171811?iframeembed=true&playerId=kaltura_player&entry_id=1_c6x9xpxb&flashvars[streamerType]=auto&flashvars[localizationCode]=en&flashvars[leadWithHTML5]=true&flashvars[sideBarContainer.plugin]=true&flashvars[sideBarContainer.position]=left&flashvars[sideBarContainer.clickToClose]=true&flashvars[chapters.plugin]=true&flashvars[chapters.layout]=vertical&flashvars[chapters.thumbnailRotator]=false&flashvars[streamSelector.plugin]=true&flashvars[EmbedPlayer.SpinnerTarget]=videoHolder&flashvars[dualScreen.plugin]=true&flashvars[hotspots.plugin]=1&flashvars[Kaltura.addCrossoriginToIframe]=true&&wid=1_1p5dv1t2”
Would end up being: "https://cdnapisec.kaltura.com/p/2171811/sp/217181100/embedIframeJs/uiconf_id/35965902/partner_id/2171811?iframeembed=true&playerId=kaltura_player&entry_id=1_c6x9xpxb&wid=1_1p5dv1t2”
PathFactory Links: Links starting with https://explore.oracle.com/ are existing PathFactory offers, they should not be uploaded again. Look at the existing asset internal name and add that to your track. If the required public name is different than the existing one, you can use the track “Override” options to customize the track view of the asset.
Tracks targeting china should never include YouTube Links, as that platform is not enabled there. These should be uploaded to BrightCove by the requester.
Event or Website registration pages that redirect to a new site when registering may break while redirecting.
Look out for Path Factory urls submitted as source urls. This means the asset is already in the platform and should not be re-uploaded. Look for the original asset and use it on the new track (content title, thumbnail and description can be overridden from a new track).
Set new Topics
- Go to the top menu, Gear Icon
- Select Content Tags
- Go to the “Topics” sub-menu
- Click on the “+ Add Topic” button
- Fill in the Topic name
- Save by clicking the “Add” button
Your topic will now appear on the topic list.
Set new Business Units
- Go to the top menu Gear Icon
- Select “Content Tags”
- Go to the “Business Unit” submenu
- Click the “+ Add Business Unit” button
- Fill in the Business Unit name. This should reflect region and pillar
- Save by clicking the “Add” button
The new Business Unit will now appear on the business unit list
Set new Content types
- Go to the top menu Gear Icon
- Select Content Tags
- Go to the “Content Type” submenu
- Click on the “+ Add Content Type” button. It will ask for:
a. Content Type, add the new content category
b. Funnel Stage, leave default setting unless directed otherwise
c. Estimate Cost, leave in 0 unless directed otherwise - Save by clicking the “Add” button
Your content type will now appear on the content type list.
Change Thumbnails
PathFactory automatically snaps a thumbnail of your asset as you upload it, or in case of videos, sets a default placeholder image.
Thumbnails should be created for BrightCove, VideoHub, Blogs, and Webpages. These do not generate a thumbnail. Other times thumbnails should be updated with a more appropriate Screenshot image if it is blurry of shows cut out text or images.
For updating
- Click on the offer to open the “preview content” section.
- Click on the thumbnail.

- Select “Upload”
- Select or drag the thumbnail image form your computer(JPG), size should be 500 x 374 pixels, and maximum weight allowed is 100 MB
- After the file uploads, select it
- Save
For a general vie won Thumbnails, and uploaded images in general, go to the “Image Library” section, on the top menu Gear Icon.
Set CTAs
For every track you need create a new CTA component.
- Go to the top menu Gear Icon
- Select “CTAs”
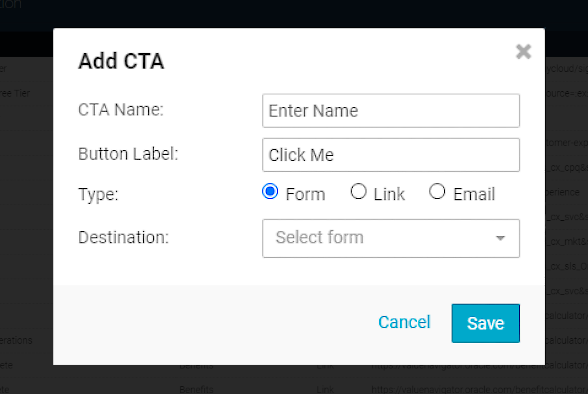
- The Add CTA button will display a popup where you can add:
- CTA name (this is not the button text, it is the CTA component name)
- Button Label is the text that will appear on the button
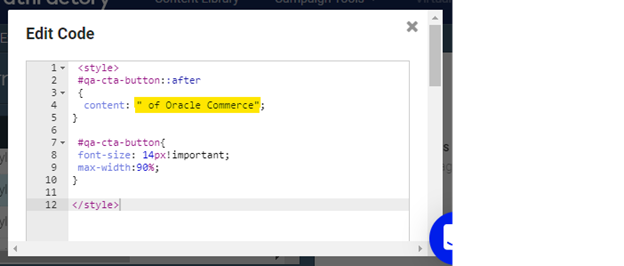
- Choose to either add a link or display a form or email address - If the CTA text is too long, you will have to create a CTA Styling External code to add any text that does not fit the CTA button text configuration field.
*All CTA Links should be tracked. Standard tracking values for CTA buttons are: Oracle web, PathFactory, CTA, use the Path Factory program code as referring Program code and follow the free text parameter generator.
Set Links and Sharing
You need to create a customized share section for every track.
- Go to the top menu Gear Icon
- Select “Links & Sharing”
- Select the “Add Configuration” button at the bottom of the side menu
- A pop-up window will ask you to set the new configuration name, click “Add Configuration” to save
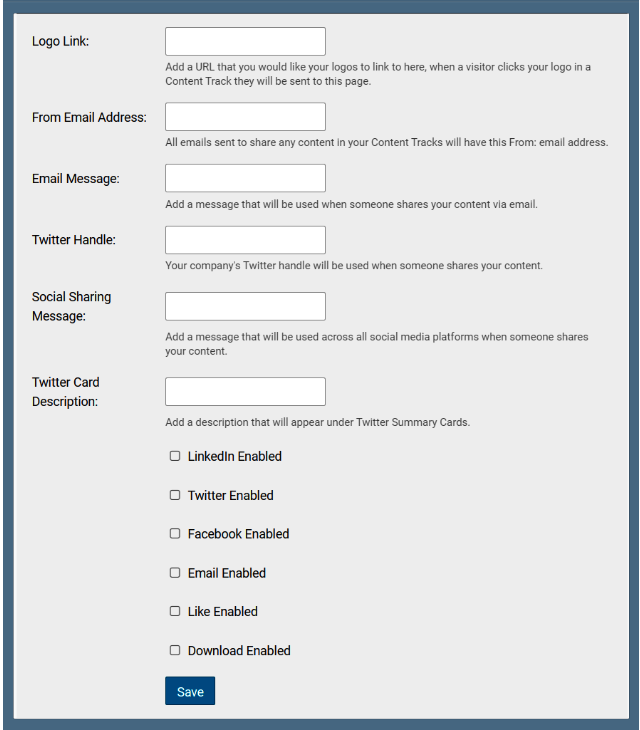
- On the configuration setup section, you can adjust the setting or leave it blank according to the requirements.
-Add a specific, tracked, logo url. Standard tracking values for Logos are: Oracle web, PathFactory, Oracle logo, use the Path Factory program code as referring Program code and follow the free text parameter generator.
- Customize the “email sharing” message
- Customize “From” email address
- Add a Twitter handle - Add a Twitter Card description - Add a Social sharing message - Determine which sharing channels you want to enable by selecting those checkboxes. - Determine if downloads are enabled by selecting that check box - Save
Additional Icons
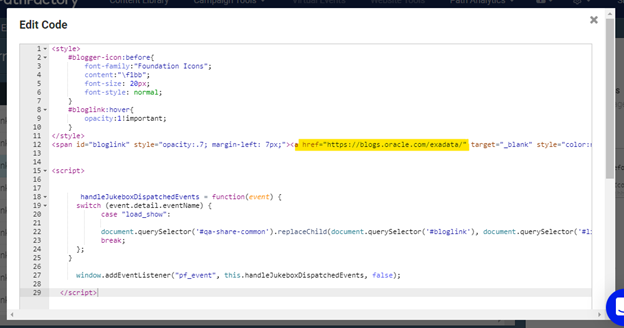
*For adding a blog option as part of the links and sharing configuration, you have to choose the “Like” option and create a new “Blog_Link” external code to replace it. Blog urls are not required to be tracked.
*For Adding Weibo and WeChat, choose the “Like” and “Download” and add the “Chinese Sharing Icons” external code to your campaign to replace them.
External Codes
- 1. Go to the top bar gear icon
- 2. Select “External Code”
- 3. Click on the “+ Add External Code” button, this will open a pop-up window
- 4. Add the Code Name, and paste the code. Click the “Add External Code” Button
- After creating an external code, refresh your track page, and the new code should appear on the external code drop down menu.
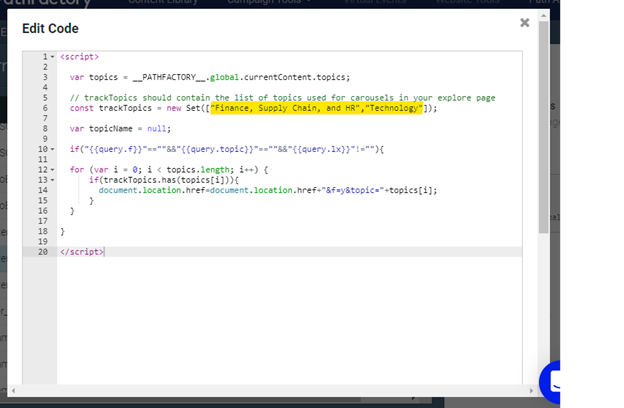
Pre- Filter
Naming: Pre-Filter_[Track Name]Each track topic should be updated within quotation marks, separated by commas, to match your track topic selection.
CTA Styling
Naming: CTA Styling – [Track Name]Add any additional text you need on your CTA button, as the content parameter, using quote marks.
Blog Link
Naming: Blog Link_[Track Name]Blog Url should be updated. There is no need to track it.
Chinese Sharing Icons
No need to duplicate or create new versions. Just use this external code as it is.Create Appearances
If you need to create a customized Look&Feel of your content track or change any element (color, font style, size…) then you should create a new Appearance configuration. Only exception is if you are already working on an appearance specifically created for that explore page, then it is safe to modify it.
-
 IMPORTANT notice before you start: Do not change components on existing appearances, this will affect all tracks that are currently using that appearance configuration.
1. Go to the top menu Gear Icon and select ¨Appearances¨
2. Click the “Add a new appearance” button, a pop-up will appear
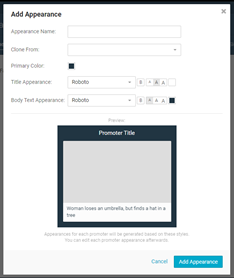
3. Set your appearance name and general settings. If you need to make only small changes from an existing appearance, fill in the “Clone From” field, and all the Appearance properties will be pulled from there.
4. The new appearance is now included on the side menu.
5. By selecting it, you can start customizing each element using the top menu.

Appearance Sections
These are the elements that can be customized on each appearance configuration
- General, here you can change the Icon
- Bottom Bar, change the Bottom bar promoter appearance
- Card, sets the Card Promoter Color, font, number of offers, and card placement.
- Cookie Consent, sets the cookie consent colors, fonts and button styles.
- CTAs, sets the font style, font size, color and button roundness
- Exit, set font style, size and color for the Exit promoter component, as well as the number of items to show
- Explore, configure the appearance of the explore page, select header option, font styles, select between a carousel or grid display, and arrow styles.
- Flow, set Style for the Flow Promoter, colors, logo option, font styles, signpost promoter color and font styles
- Header, set header background color, logo, logo size, and font style
- Inactivity, set the delay for the inactivity promoter to change the tab title
- Sidebar, set background color, font styles, placement and number of offers for the sidebar
- Signposts, set background color, and font styles for the signpost promoter
- Topic Sidebar, set logo, colors, share section colors, font styles, for the Topic sidebar
Create Tracks
Marketing Campaigns use PathFactory to present content to potential clients. There are 2 ways this content can be organized: as a target track, or as a recommend track.
Before you start creating your track, you should have already created the “CTA”, “Links and sharing”, tracking URLs, and any external code required to make these work.
Track Name:
Should always reflect, REGION_PILLAR_Track Name_[Laguage code]

Track label: Add the Requester’s name and surname
Target Tracks
A target track is a direct way to order the path you want the reader to experience. In which content Offers are selected and ordered.
How to create a target track Campaign
- On the top menu, go to “Campaign Tools”
- Go to the “Target” section
- Select the root folder, go to the “label” option and filter by “Demand Center Templates”
- Duplicate the appropriate pillar template using the “+Create Target Track” button. Make sure you select the right folder to set it in.
- As a track label please use your requester’s first and last name.
-
Add offers to you Campaign with the “Add Content” button. A pop-up will appear. Use the search box to pick the offers you want to add and then click “Add Content”

Pre-existing Path Factory offers can be added to new tracks. Properties for these should not be modified, only Thumbnail Images, Tittle, Description and Score can be overridden from within the track.
- Set the content order by dragging the offers up or down on the track page.
-
Remove content only from the track section. Click on the campaign offer to open the offer overview, which has the remove option at the bottom.

Target Track Components

This is how your target track initially looks like
This is how your target track initially looks like On the top you get the Name, edit, delete, clone, and share options at the left side; and you have the “+Add Content” button, and a switch view option between the track settings and the track analytics at the right. Just below that you get the Forms Strategy section. Finally, on the left hand side you get the Campaign Properties. So let’s see how to set these.
a. Track properties
Track Settings
- Folder - The root folder your track is set on.
- Custom Url - here you can add the vanity url identifier, “https://explore.oracle.com/” plus this identifier creates the custom url for this track.
- Search engine directive- For this option we should leave “No Index, Follow” .
- Appearance - Choose from appearances already created, BUT if you need to add something new, or need to adapt something, you must create your own new appearance.
- Language - English (but there is an option to configure other languages if needed)
- Links and sharing - select from the available created “links and sharing” configurations, or you can create a new one if needed.
- External code - Template-cloned tracks should have the necessary external codes. Add CTA Styling, Pre filter and/or Blog external codes if needed.
- Track Id - this is for internal tracking purposes, no need to touch it.
- External id - Fill this is with your Program Code
- Explore page - If your campaign has an explore page, select it here.
Promoters
- Flow promoter: (cannot be enabled if you are using a header) Mandatory for Target tracks.
This sets a side menu on your track page, which shows the offers available under small icons, as well as adding a “next item” suggestion button on the right bottom corner of the page, giving both a linear and nonlinear reading option. You can also add a CTA button, by selecting it from the created CTA options. - Signpost promoter: Used for a linear reading journey. It enables “previous” and a “More” buttons at the bottom of the page.
- Bottom promoter: (cannot be enabled if you are using a header)
Used for nonlinear reading. It adds a bottom bar with all offers available. - End Promoter:
This offers additional content (either in or outside PF) when the reader reaches the end of the track. It asks for a link (which should be tracked if it is going to be an external link), a CTA (given by your requester) and a Delay (which determines how long it will take for the end promoter to appear once the reader reaches the last track offer). This should be a tracked link. - Exit promoter: If the user is leaving the content track, it launches a popup offer with a “before you go” message and a track offer, to invite the viewer to keep browsing around.
- Inactivity Promoter: This one sends a browser tab message asking “are you still there?” if the reader switches tabs for too long.
Forms
Forms strategy, this section only allows you to enable or disable the form strategy, if you want to edit it, go to the top of the campaign content, to the Forms Strategy section.
Cookies
- Cookie Consent, should be On
- Cookie Message, should be Off
*This setting disables the tool standardized default message and uses Oracle`s customized message instead)
Other
Header, Enables or disables a header component. You can leave it off.
 Recommend Tracks
Recommend tracks are an open approach, in which an offer can be highlighted, and the reader is given a range of topic related offers to browse through. The order in which recommended offers are displayed cannot be customized.
- On the top menu, go to “Campaign Tools”
- Go to the “Recommend” section
- Select the root folder, go to the “label” option and filter by “Demand Center Templates”
- Duplicate the appropriate pillar template using the “+Create Target Track” button. Make sure you select the right folder to set it in.
- As a track label please use your requester’s first and last name.
- You will find the folder menu on the left hand side. You can either select the folder you are working on and add the campaign from there, or create the campaign directly from this view and add the folder as a characteristic as you go on
- Click on the “+ Create Recommend Track” button
- The campaign creation dialog will appear.
 • Set track Name
• Select Parent Folder
• Leave “Labels” section blank.*You can also Copy an existing Campaign, by searching for it on the “Clone an Existing” option.
Then you will get your new Campaign View
- On your new campaign, you can start customizing according to the requirement, and adding the campaign content
- Add offers to you Campaign with the “Add Content” button
-
A pop-up will appear. Use the search box to pick the offers you want to add and then click “Add Content”
Pre-existing Path Factory offers can be added to new tracks. Properties for these should not be modified, only Thumbnail Images, Tittle and Description can be overridden from within the track, and new topics can be added, but no topics should be removed.
Content for Recommend tracks cannot be ordered, but it can be sort into topics instead.
If you need to remove content, you should do so from the track section.
Click on the campaign offer to open the offer overview, which has the remove option at the bottom.
Recommend Track Components

On the top you get the Name, edit, delete, clone, and share options at the left side; and you have the “+Add Content” button, and a switch view option between the track settings and the track analytics at the right. Just below that you get the Forms Strategy section. Finally, on the left hand side you get the Campaign Properties.
So let’s see how to set these.
a. Track properties
Track Settings
- Folder- The root folder your track is set on.
- Custom Url- here you can add the vanity url identifier, “https://explore.oracle.com/” plus this identifier create the custom url for this track. For Recommend tracks, keep in mind the campaign url will not work by itself, it must be directing to a specific offer, so if you use a Custom url it should always be shared with a specific offer asset.
- Search engine directive- For this option we should leave “No Index, Follow”.
- Appearance- Choose from appearances already created, BUT if you need to add something new, or need to adapt something, you must create your own new appearance.
- Language- English (but there is an option to configure other languages if needed)
- Links and sharing- select from the available created “links and sharing” configurations, or you can create a new one if needed.
- External code- in this area you can select an external code component, such as external trackers. We use it for some headers, some footers and the oracle chat functionality
- Track Id- this is for internal tracking purposes, no need to touch it.
- External id- This is the Program Code
- Explore page- Select if your campaign is going to have an explore page.
Promoters
As this is an “Open” experience, recommend tracks don't have many promoters to lead the reader; instead they can use topic filters and have a Side Bar with all available offers.
- Topic Sidebar, you can enable it or disable it.
- CTA, this selects the CTA component you want to use for this track.
- Topics, allows to choose the topics that you want to use in your track. Content placement will be determined by this.
- Exit promoter, if the user is leaving the content track, it launches a popup offer with a “before you go” content offer, to invite the viewer to keep browsing around.
- Inactivity Promoter, sends a browser tab message asking “are you still there?
Cookies
- Cookie Consent, should be On
- Cookie Message, should be Off
*This setting disables the tool standardized default message and uses Oracle`s customized message instead)
Other
Header, Enables or disables a header component.
Content Strategy
For both Target and Recommend tracks. At the top of your campaign page is the Content Strategy area, it determines the registration forms displayed, and when they are displayed.
Content Rule

Sets hard-gated content in your track.
- Use the form “Progressive_Profiling_GLOBAL”, unless the requester asks for an exception.
- Under “Display Behaviour” select the Offers you want to be in this category.
- Set trigger time to “Shows after spending: 30 seconds on content”.
- Set Form Behavior to:
Show to unknown visitors = On
Show to known visitors = On
If submitted, allow form to show again = Off
Allow visitors to dismiss form = Off
Keep promoters active when form is shown = On
Track Rule

Track Rule manages time based forms that appear after the reader has engaged with a number of assets.
- Use the form “Progressive_Profiling_GLOBAL”, unless the requester asks for an exception.
- Set Display Behavior to:
- Set Form Behaviour as follows:
Serve based on = Content assets viewed
Serve after viewing = 3 content assets
Serve after spending = 20 seconds on content
Show to unknown visitors = On
Show to known visitors = On
If submitted, allow form to show again = Off
Allow visitors to dismiss form = On
Keep promoters active when form is shown = Off
Exclusions

Exclusions, determines which content will be ungated, and will not display a form.
Go to the “Do not show” fields and choose all the offers that exclude registration.
Nurture Campaigns through Path Factory
 The main characteristic of a Path Factory Nurture campaign is that it only requires Eloqua Emails, as all the offered content is directly uploaded in Path Factory.
However, you have to take care setting and managing unique Slug IDs for your offers. Slug IDs are essential to the functioning of Nurture Campaigns, as they are used by the List team to set the CDOs (Custom Data Objects) validating the compare step which determines when a new email stage is sent.

Related Topics
Nailed it?
If yes, click below to confirm completion of this topic.
Yes, I have understood this topic well