WCC- Content Upload
Webfolders are a feature in Oracle WebCenter Content (WCC) that allow you to deploy content, such as assets and files, to a specific location on the server. This content can include various file types like images, HTML, JavaScript, CSS, fonts, PDFs, ZIP files, documents, videos, and more.
The key characteristics of webfolders are:
- Mapped location: Webfolders have a specific URL that is mapped to a location on the server.
- No inline editing: Unlike other content in WCC, webfolder content cannot be edited inline.
Webfolders are useful for organizing and managing large collections of content, and for making that content accessible to users through a simple URL.

Video Tutorial
Guidelines to upload assets to WCC
- Have your own webfolder to deploy and manage your content
- Retain original filename in the URL
- Supports relative path for linking within the pages
- WCC Webfolder content is accessible outside Oracle firewall
- Bulk upload via webdav (WebCenter Content Servers)
-
Webfolder support http protocol. However the s folder is configured to support https protocol https://www.oracle.com/webfolder/s/your folder path/filename.extn
- Mapped Folder Web Location creates a mapped URL with the folder structure that is similar to your local PC or Mac physical folder path.
E.g.,: standard server URL path is http://www.oracle.com/webfolders/your folder path/filename.extn
- Mapped Folder Web Location creates a mapped URL with the folder structure that is similar to your local PC or Mac physical folder path.
Request Access for WCC
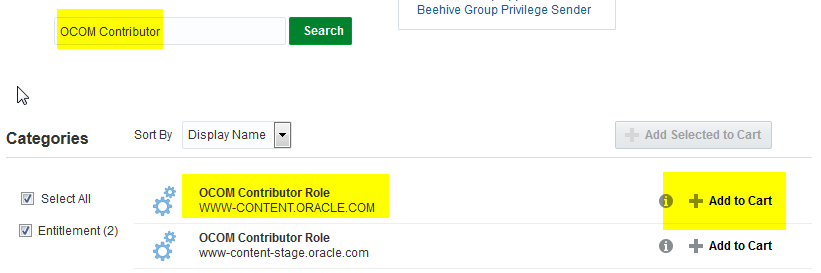
- Request access via oim.oraclecorp.com with your SSO login and click on "Request Access" and select "Request for self".
- OCOM CONTRIBUTOR: Contributor Access (Oracle.com, Partnerships, OU English and Regional, Demand Marketing, OOW, JavaOne, Events website)
- Request this access when your content website section is oracle.com and Click Next and Submit with appropriate justification.
- A notification email will be sent to your Manager for approval. Once your manager approves, secondary Admin will be notified for Access Approval.
- Admin will approve based on Justification and eligibility to get access.
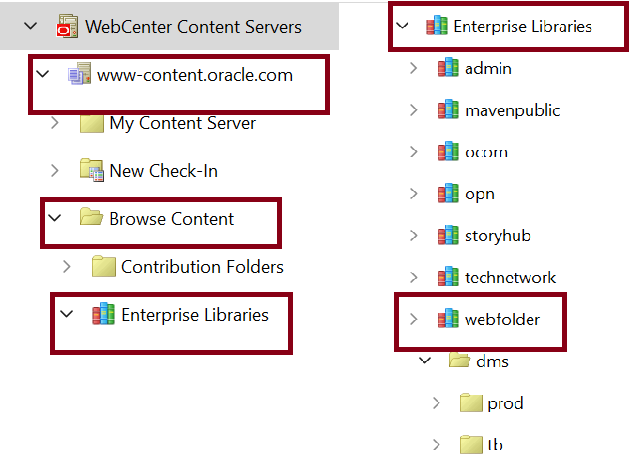
Navigate to WebFolders
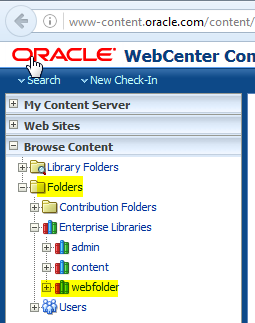
1. Login into WCC https://www-content.oracle.com/content with your SSO
2. Browse webfolder folder from left navigation “Browse Content”
3. Browse for the assets folder as shown below
Folder/Enterprise Libraries/webfolder/
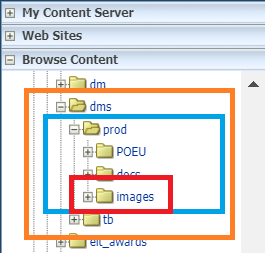
New Path (after upgrade)
Production Content Assets
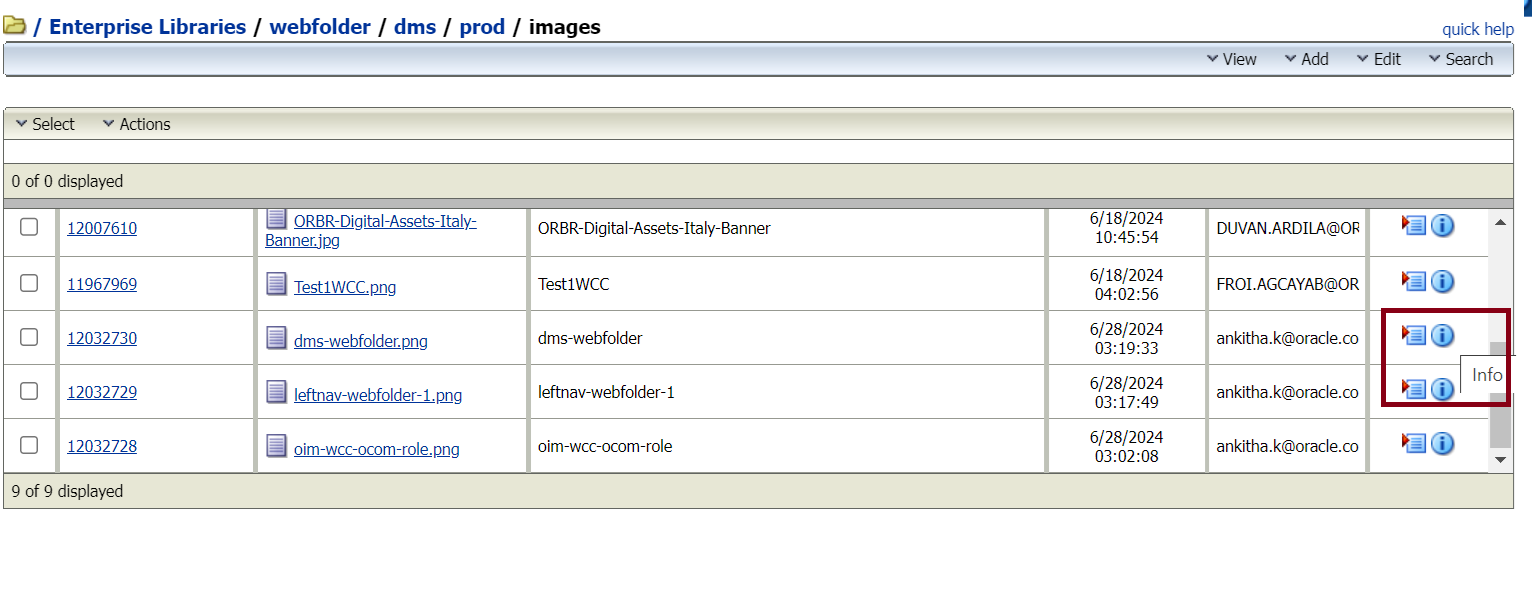
Folders --> Enterprise Libraries --> webfolder --> dms --> prod-->docs
Folders --> Enterprise Libraries --> webfolder --> dms --> prod-->images
Don't Do
Do not upload more than 3000 images/docs in a folder, though WCC platform will allow to upload more assets without any errors.
The file name should not exceed more than 35 Characters.
Do's
Contact Operations Team for a new folder creation or any other queries.
Tips
Check-in similar to pre-fill metadata. Process is same but go inside content info of individual item by clicking Content info icon to Check-in Similar Content

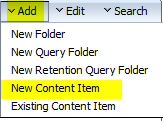
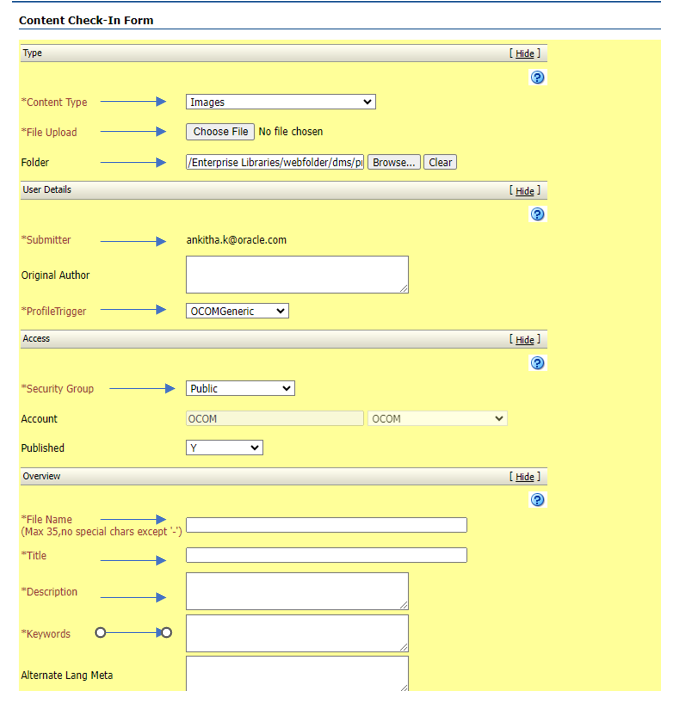
Adding New Content
- Locate the folder where the content needs to be deployed
- Click on Add tab in the top right
- Select New Content Item to see the check-in form
- Fill the mandatory metadata (*default values from parent folder will be inherited)
- File Upload: browse the file you need to upload
- Folder (*this will be auto-filled when you browse webfolder folder from left navigation)
- File Name: default value is your file name (max 35 alphanumeric chars and hypen "-" is the only special char allowed)
- For Images (png, jpg, gif) - Content Type: Images
- For other content, (pdf, html, xls, doc, ppt, zip, etc) - Content Type: Generic Content
- Web Site Section: this will be set up initially by Web Tech team and for Demand Center would be (oracle.com English Site : DM)
- Submit the Check-in form to upload the file.
- Go to Document information to view the content details as per the image here (Mapped Folder Web Location).
Copy the Mapped Folder Web Location URL for testing
http://www-content.oracle.com/webfolder
Note: In testing URL https is not supported so always use http - For Live URL: Remove "-content"
Note: To pre-fill same metadata use Check-in similar. This will pre-fill same metadata and you can browse new file and change the file name field. Rest all will be copied from source content ID.

Modifying Existing Content
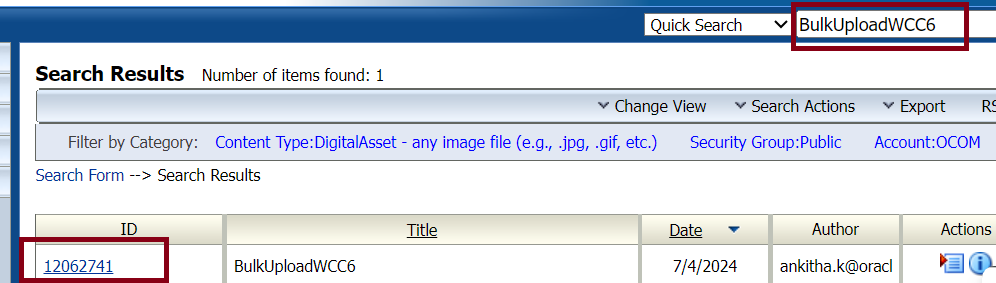
- Search the file using the content id or the file name.
- Click on the info button under Actions Menu and the Content Information of the respective page will be loaded
- Scroll down till the end and click on the Native File to download the file.
- Do the necessary changes on the page
- Select Checkout from the Content Actions menu and select CheckIn
- File Upload: browse the file and upload
- The meta information's can be changed if required.
- Click on Check In button to Submit the form.
Note : To delete a content item, jump to content info for the page and click on Delete under the actions in the Revisions session.
Note: Please be careful while deleting the assets - If it's a data file (Folder Path is not associated), if we delete the latest Released revision, only that particular version will be deleted and the immediate previous version will be live.
If it's an asset and folder is associated with it, then upon deleting the latest released revision, all the subsequent revisions will be expired and the page will land to 404 error.
How to Install the Oracle WebCenter Content Desktop - DIS?
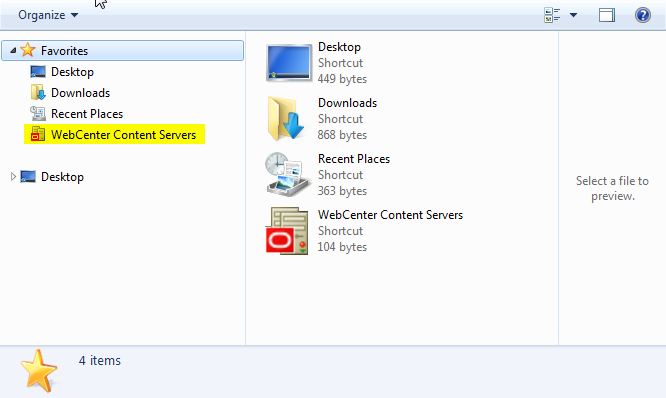
- To start, you must first download the latest version of the WebCenter Content Desktop Client.
Note: That this only supports Windows for now. - Open Windows Explorer, you should see Oracle Content Servers in the left pane.
- Right click on Oracle Content Servers and select ‘Add Server’.
- Enter the following information:
- Server Name: www-content.oracle.com
- Server Type: Webcenter Content Server
- Server Webdav URL: https://www-content.oracle.com/content/idcplg/webdav
- Server CGI URL: https://www-content.oracle.com/content/idcplg
- Click OK and proceed. If you get a message about a failed test connection, ignore this.
- Enter Email address and click next.
- Generate the bypass code by following the steps to Self-Service Bypass code.
- Enter the bypass code and click next.
- Navigate to Webfolders and access the files.
How to Upload in Bulk?
Video Tutorial
- Once you have downloaded and set up the WebCenter Content Desktop Client, you can now start browsing your allocated folders.
- Click the WebCenter Content Servers > www-content.oracle.com > Browse Content > Enterprises Libraries > Web Folder > dms > prod/tb.
- To upload in bulk, you should open the image folder in another window and drag and drop your files (images, docx, js etc.) to the content server. You may also drag your files from the desktop.
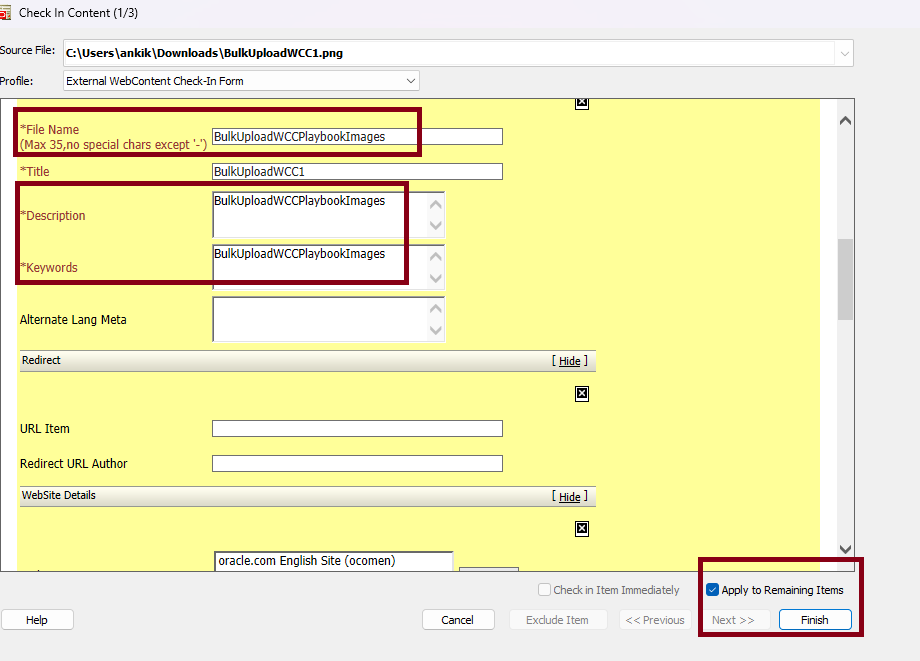
- After dropping your files, it will trigger the Check In Content lightbox wherein you must fill out the necessary details. Title of the file will be automaticcaly taken when you upload the file, but file name, description and keywords can be added with a common name which will get updated to all the files you upload.
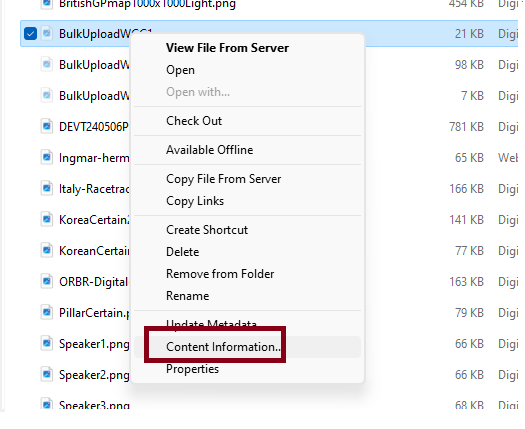
You must tick the Apply in remaining Items in order for you to update the common File Name, Description and Keywords of each file you upload. - Once finished, in order to view your content live. Just right click the file and select Content Information. A lightbox will pop and just locate at the bottom the Mapped Folder Web Location.
- Number of items to be uploaded: At given time, upload 50 to 100 total items or total asset size is less then 70 MB. You can repeat if there are more assets. This is to avoid performance issues for others and avoid delaying publishing process.
- File size: Less than 70 MB per file or total size.
Note: If you wish to uniquely assign the File Name, Description and Keywords of each file you upload then use Check In Item Immediately option.
Do's
- Upload files and folder(s) containing total of max 100 items.
- Upload file and folders (s) in batches when there are more than 100 items with a time interval of 30-60 mins or preferably when first batch upload is completed.
Don't Do
- Do not upload folder(s) containing more than 100 items in total.
How to Delete in Bulk?
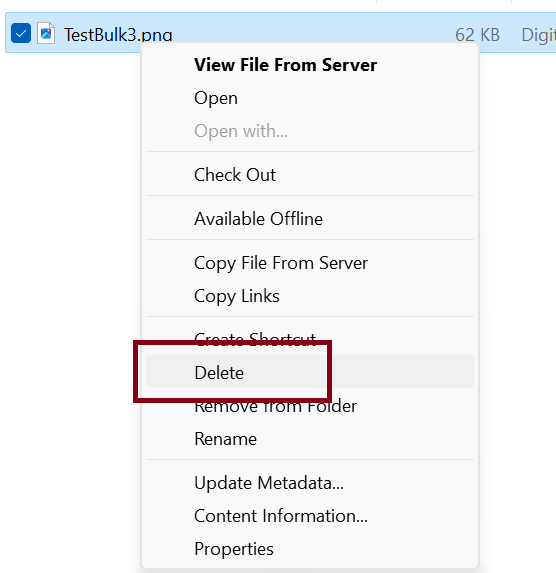
- Right click on the file/s you want to delete and simply just select delete. Items deleted will be moved to the trash. So always make sure to select the right files when you do this.
- Do not delete folder(s) containing more than 100 items in total.
- Do not delete folder(s) when the total content items within the folder is unknown.
- Do not delete folder(s) in the Trash folder via WebCenter Content Server UI or WebDav (Desktop Integration Suite (DIS)).
- Do not move or copy folders when items are unknown or more than 100 items.
Don't Do
How to Purge URL's through Akamai Network
The Akamai Network is a tool which helps purge contents (clear cache) through URL and other methods. Caching is an effective way to help your system increase performance and decreases resources that takes space.
- To begin, login to your Akamai account through this link.
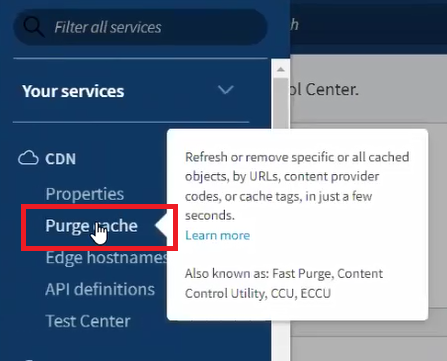
- Once you're logged in, you will be directed to the home page. On the upper left, you will see a Hamburger button. Hover it down and under the Your Services you will see CDN and select Purge Cache.
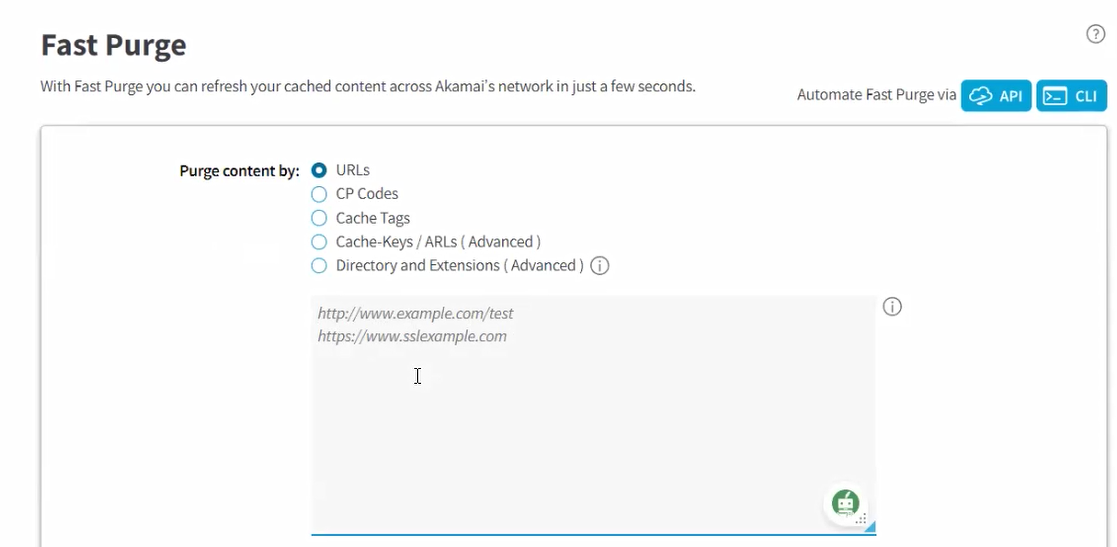
- Once selected, you will be directed to the Fast Purge page wherein you need to fill out the below details for the caching process.
- Select URL in the Purge Content options.
- Paste down the URL/s you wanted to clear cache.
- In the Current Network select Production.
- For the Purge Method select Delete.
- Recheck your details and click Submit Purge. Allow a few seconds for it to process.
Note: To request access, you may reach out to our team.
Note: That you can do multiple URL's at once, just follow the correct format.
How to Create a New Goto Redirect
A GoTo URL Redirect is an effective way to shorten your URL links to a customizable URL which can be shared to people outside our organization.
Do note however that this function was migrated from WCC to WCS and if you wish to have this function. You must request an access to the WCS.
How to Request an Access?
- Go to the OIM and request 'OCOM-GotoRedirectContributor-Role' access. Keep in mind to request for the production environment [www-sites.oracle.com].

Creating your Goto Redirect
- Login to the https://www-sites.oracle.com/sites/.
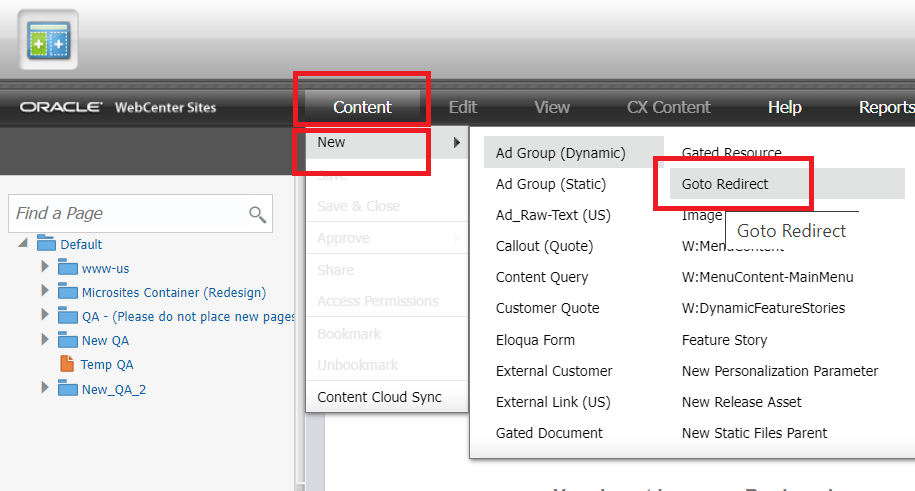
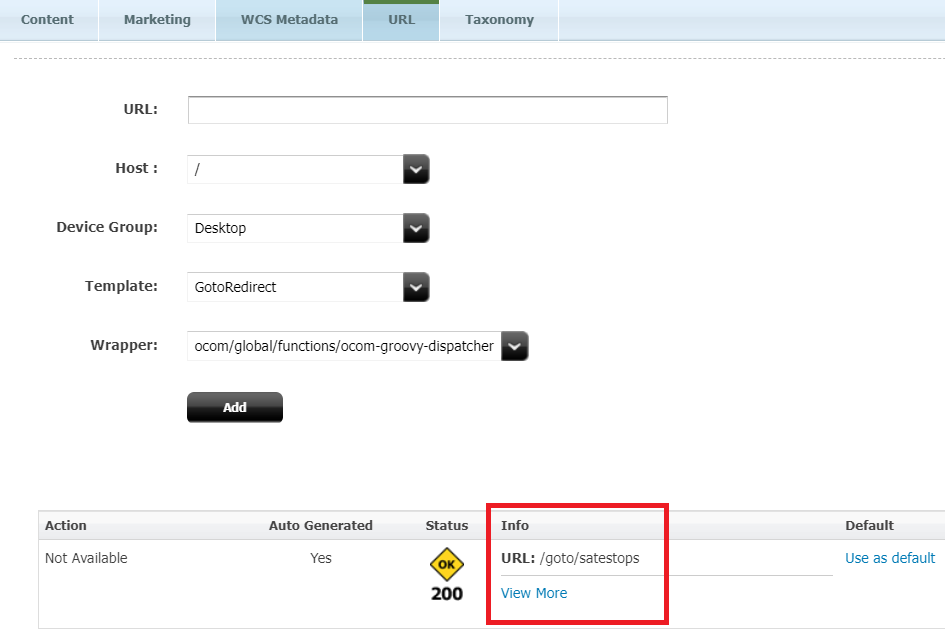
- Once you're in, hover down on the Content tab > select New > GoTo Redirect.
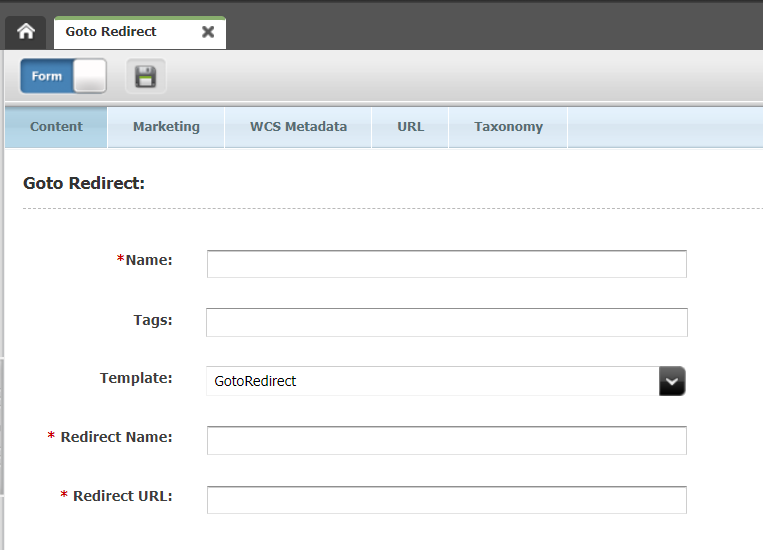
- It will redirect you to the form wherein you need to fill out the required fields (Name / Redirect Name / Redirect URL).
- Once done, proceed in saving by clicking the save logo above.
- Simultaneously, you may also check the generated URL under the URL tab.
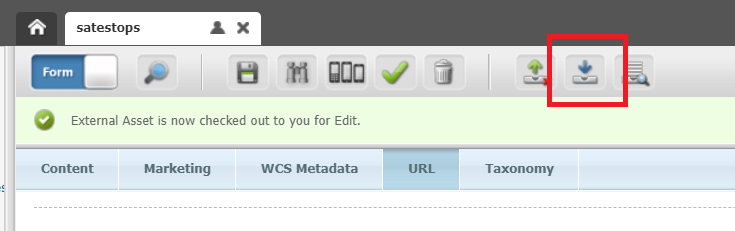
- To proceed to the next step, you must click the Check In icon
- If the Status indicates that the asset has been checked out. This means that the asset is locked by the user and other users will be able to edit the asset.
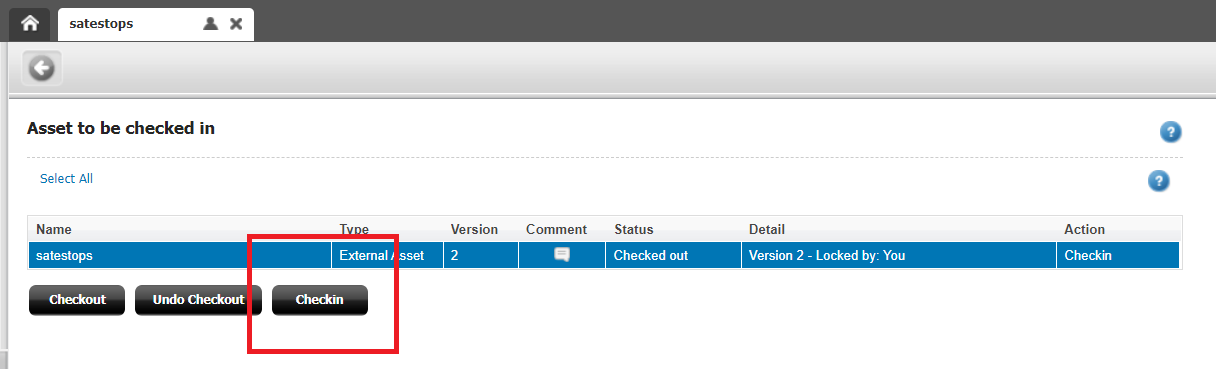
- Fill in the comment as required and click Check In button below.
- Once done, you may click the Go Back icon on the top.
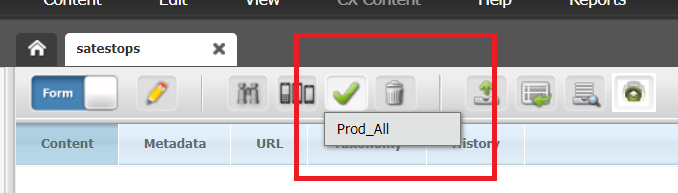
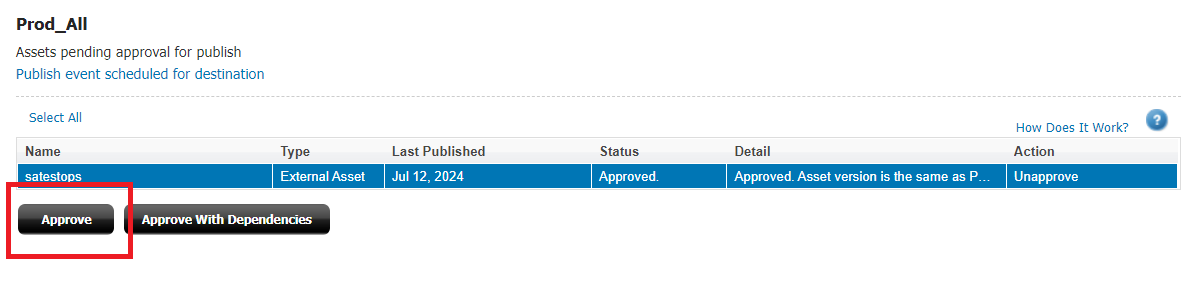
- Click the Approve Icon on the icons above and select "Prod_All" to publish the asset to production delivery server.
- Click Approve button once again. Note: that the status will be as "Needs Approval" and once approved, the status will be updated to "Approved".
- A notification will then pop. You may click the "Go back" icon and wait for 5 minutes to get the asset published. Simultaneously, you may view the status of your asset under the View tab then Status.
- Note that if the status for Prod_All says "Asset version is same as published", this means that the asset is published and ready to be tested. Otherwise, kindly wait for a few more minutes.
- Do not forget to test your GoTo URL on the browser.
- a. Name: Is basically the name of the asset and the one that is displayed when the asset is searched. In most cases, this will be the same as the Redirect Name.
- b. Redirect Name: Will be your goto keyword and will be used in the "goto" URL. Say you have to input 'mytest' as the keyword to access the url and it will appear like this 'www.oracle.com/goto/mytest'.
- Additional Note: This field is case insensitive, meaning "mytest" and "MyTest" would be considered duplicates. If this occurs, a "Cannon save asset" error will be displayed and a new redirect will NOT be created.
- c. Redirect URL: Is the destination path. This will be the goto url or target url where you intend to redirecting your audience to.
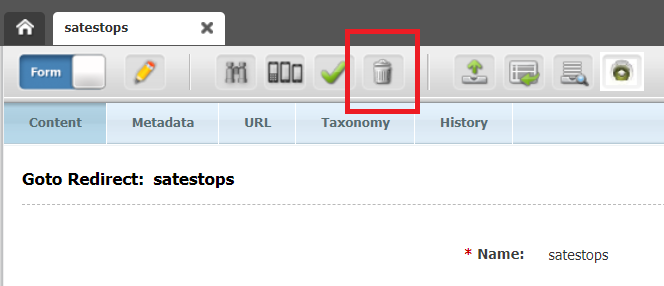
How to Delete a GoTo Redirect?
- Locate and click on the delete icon or Edit > Delete.
- The Delete Asset(s) page will show. Confirm the deletion by clicking the "Delete" button.
- A confirmation notification will appear that the asset has been deleted.
Guidelines
- The Redirect Name must be created in lower case letters only. If GoTo Redirect is created in upper case then it will go to a 404 page. But the GoTo URL can be used in any case. For eg., the following GoTo keyword created in WCS as 'test-goto' in lowercase can be https://www.oracle.com/goto/TEST-goto or https://www.oracle.com/goto/test-goto
- Creating two different redirects with the same Redirect Name (one with upper case and another with lowercase) is not going to work. It will be considered as duplicates.
- The same goes with a underscore and hyphen. If your GoTo redirect keyword exists in the system with either underscore, a same name but with a hyphen will not work as well.
- The Redirect name should not end with a /index.html or /
- The 'Name' and 'Redirect name' should have the same value. So that it will be easy to search using the name. Do note however that it is possible to have a duplicate Name so make sure what you create is unique or something you can remember easily.
Related Topics
Nailed it?
If yes, click below to confirm completion of this topic.
Yes, I have understood this topic well