Eloqua Flex Field
Flex fields are merge fields used to add or modify a personalized / specific content, as appropriate for each of the contacts receiving the email. For example, to add the customer's company details in the email content, a flex field can be created to call the company details of the specific contact when the email is sent out, so all the contacts in the target list will be able to see their respective company details in the email content.
There are eleven flex fields currently available and each filed is used for a different purpose depending on the request type.
In this section you will learn how to:
- Identify Request
- Add a Flex Field
- Update a Contact

 People
3 |
 Prep time
15 min |
 Time
1.5 h |
 Difficulty
Easy |
STEP 1 - Identify Request (5 min)
There is no specific request type or any field in the GMSS portal request form for flex fields, the requester will only mention the field that needs to be dynamically populated as a requirement. The analyst has to assess whether or not to use a flex field.
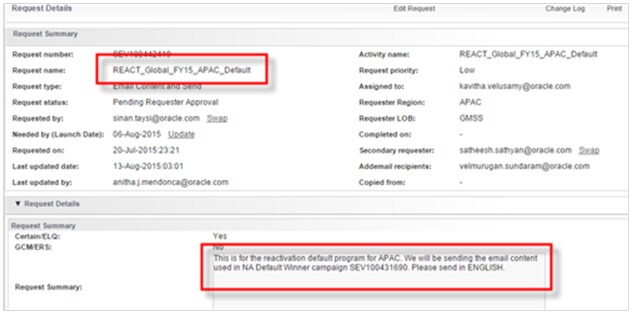
Please Note: The type of flex field to choose can be different depending on the request type, hence it is advised to check with the list analyst working on the audience to know which flex field to use. Below is a sample reactivation request for which a flex field is generally used.
PRE-REQUSITE
STEP 2 - Adding a Flex Field (5 min)
To insert a flex field in the email, follow the below process:
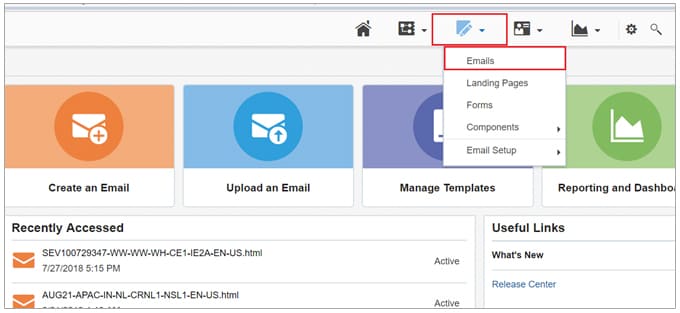
- Log in to Eloqua.
- Click on the edit icon and click Emails.
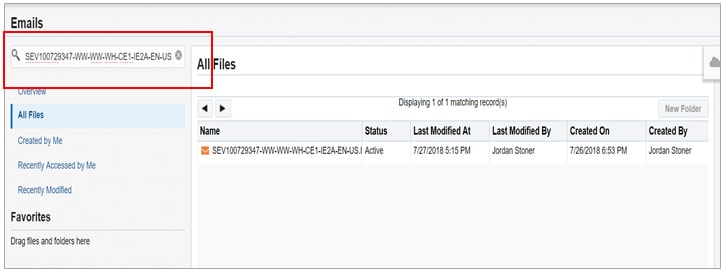
- Search for the email in the search bar, and double click on the email name to open the email editor.
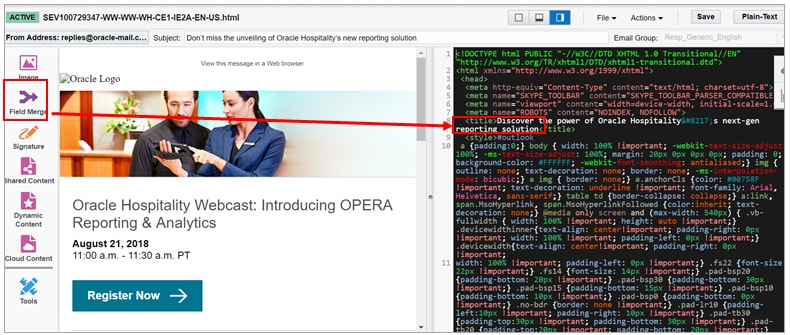
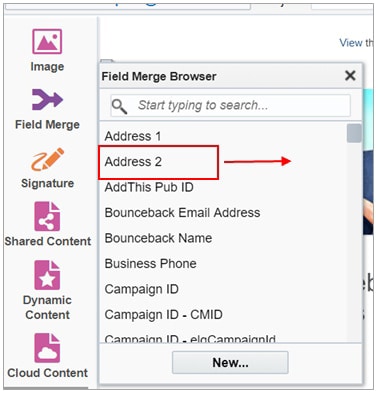
- Select the text location where the flex field has to be included, by positioning the cursor in the html section of the content, and then click the Field Merge icon.
- Drag the applicable flex field to the selected text location.
- Save the changes.
STEP 3 - Updating a Contact (5 min)
Flex fields can be added to either a single contact or to multiple contacts.
Single Contact Update refers to updating a single contact with a flex field. Single contact update is done manually by the production team.
Multi Contact Update refers to updating multiple contacts with a flex field. The delivery team can only add the flex field in the email asset. The flex field content / value is updated by the list management team.
Follow the below process for single contact update
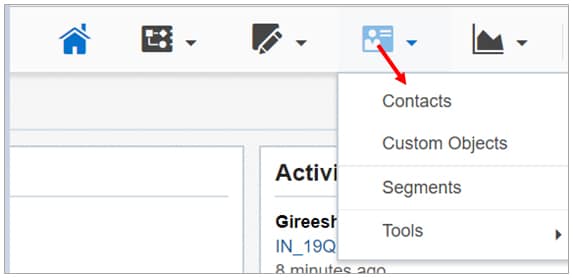
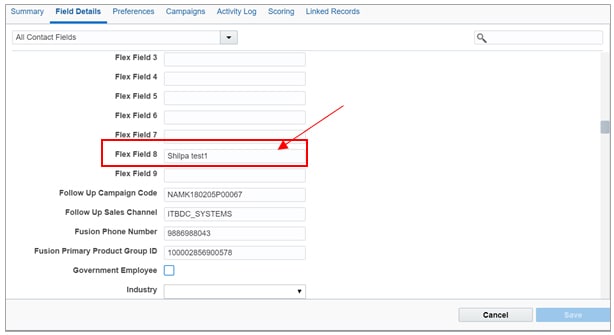
- Click on Contacts.
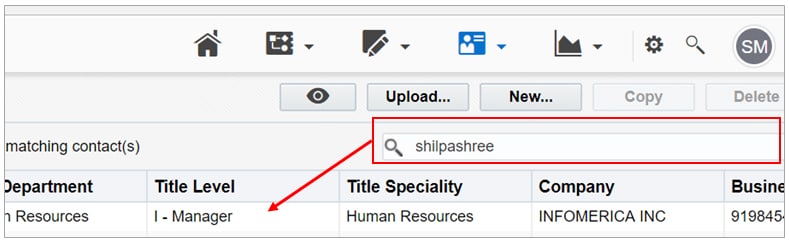
- Search for the contact and open the contact to edit it. You can search by email id or contact name. Double click on the contact name to open.
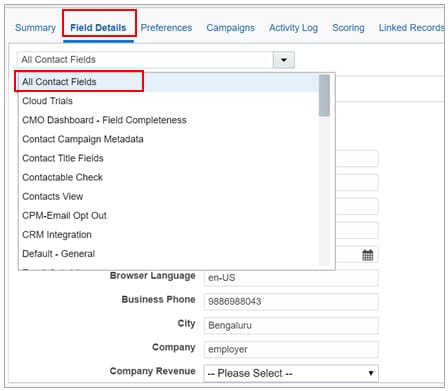
- Click Field Details and select All Contact Fields from the drop-down list.
- Add the content in the respective flex field, as per the requirement. Click Save.
- Send a test email to check if the merge field is reflecting the content. To see how to send a test email, click here.
Related Topics
Nailed it?
If yes, click below to confirm completion of this topic.
Yes, I have understood this topic well