Eloqua Survey
A Survey is created if there is a business process requirement to collect custom questions, in addition to the progressive profile form fields. This helps capture customer’s feedback when a customer registers via an online landing page campaign.
The Survey is built in Eloqua, along with a Welcome Page, Thank You page and Thank You/ Auto-response Email. The 'Welcome Page Form' submission collects the profile field’s data and 'Survey Page' captures the custom field responses. Please make sure all the important customer feedback question responses are captured under the form submission data section.
In this section, you will learn:
- Creating a Survey
- Configuring a Survey
- Integrating/Validating a Survey
- Response Information
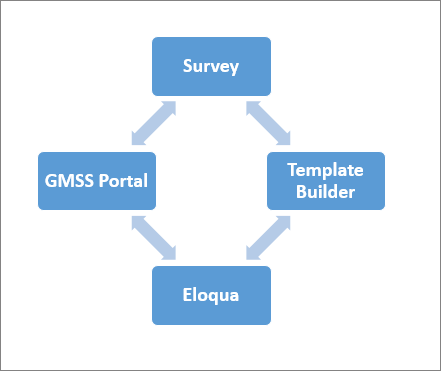
Where does it fit in?

Tools Used to Create Survey Page
 People
3 |
 Prep time
15 min |
 Time
1.5 h |
 Difficulty
Easy |
STEP 1 - Creating a Survey (5 min)
Preliminary steps:
- Update your Template Builder Campaign as per details provided in the GMSS Portal request.
- Download Assets from Template Builder - Welcome page, Survey page, Thank you page & Thank you e-mail. Upload them into Eloqua and keep the Eloqua asset ID/URLs ready.
To create a Survey, please follow the process mentioned as below:
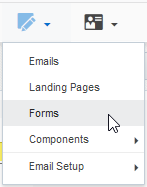
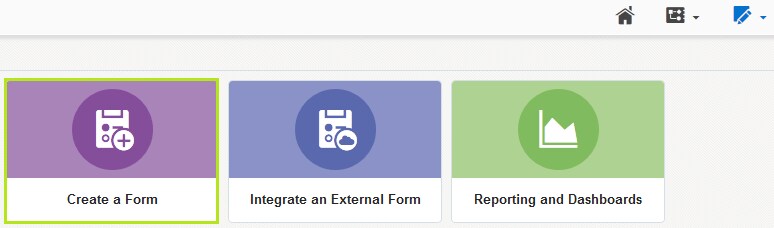
- Select Form in Eloqua - Under Forms, select Create a Form. Select All Files (LHS) and click Master-Survey-Form-New.

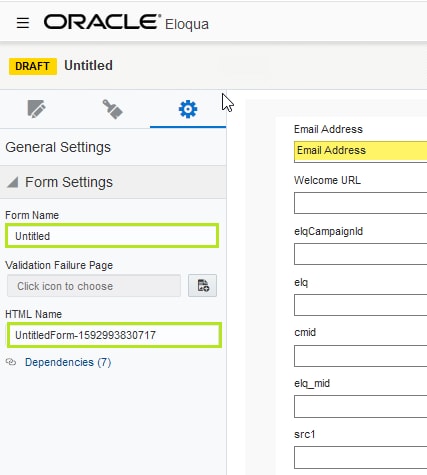
- Update the Form Name and HTML Name with the appropriate naming convention. Save it in the respective regional fiscal year folder.
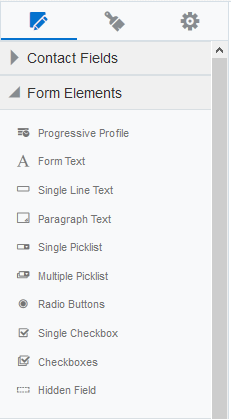
- To Add Custom questions – Click on Form Elements and select.
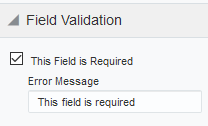
- If the question is required to be mandatory, check This Field is Required under Field Validation.
- Creating Picklists (Single Picklist, Multiple Picklist, Radio Buttons, Checkboxes)
a) Click on the element - Update the Label with the Question.
b) Under Field Choices. Click Select List
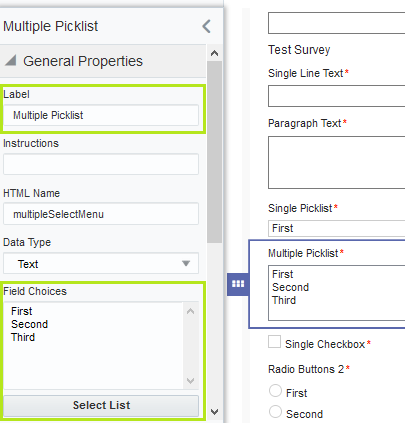
c) Create a Pick List with the Answer selection fields to the respective question as shown below.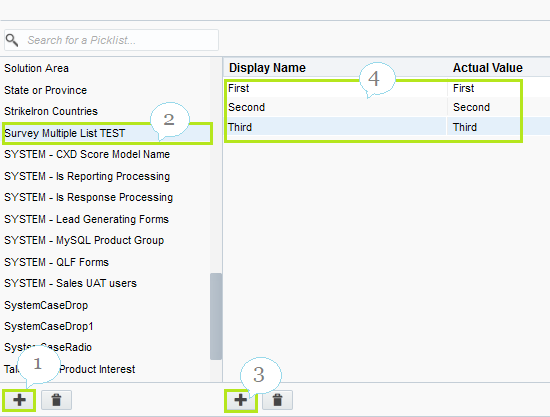
1. Add new list.
2. Rename List to custom name.
3. Create list option.
4. Rename each option with custom text as required.
STEP 2 - Configuring a Survey (5 min)
Click Processing button (RHS) and update the processing steps information, to link the 'Thank you Page' and 'Thank you Email' to the Form.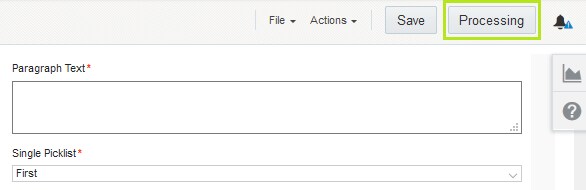
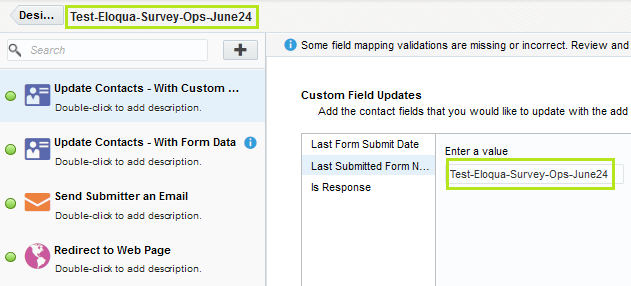
- Click Update Contacts – With Custom Values – Update the Last Submitted Form Name with your respective request Form Name.
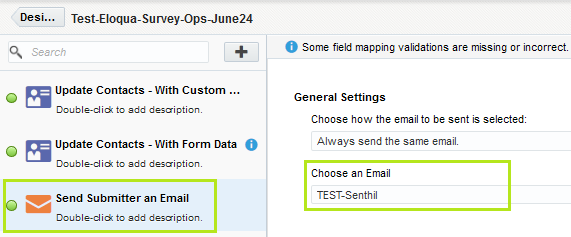
- Click Send Submitter an E-mail – Update with respective request’s Thank you Email asset name in Eloqua. Also, check for the Email Address Key Field Mapping at the LHS bottom button @
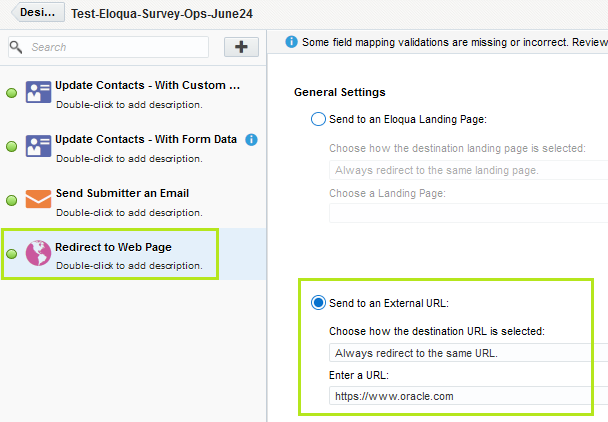
- Click Redirect to Web Page – Under Send to an External URL, update with respective request’s Thank you Page URL as shown below.
STEP 3 - Integrating/Validating a Survey (5 min)
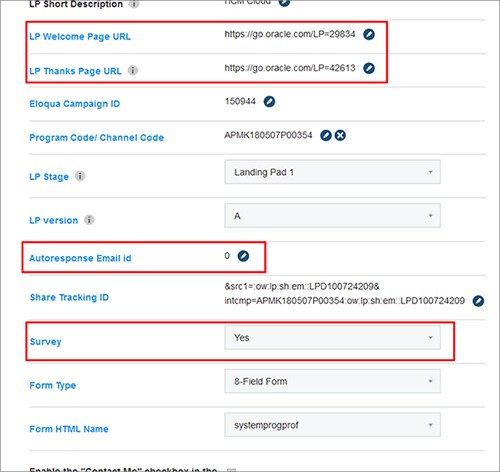
- In Template Builder - Update the Campaign Stage properties with the Welcome Page URL & Survey Page URL and set Survey field to Yes.
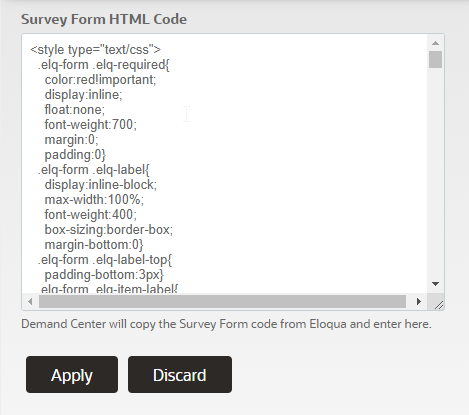
- Open Survey Template in Template Builder. Paste Eloqua Survey code in the - "Survey Form HTML Code" component.
- Download the 'Welcome Page' & 'Survey' from Template Builder and upload into Eloqua.
STEP 4 - Response Information (5 min)
Once the Survey set up is ready, register through the 'Welcome Page URL' and check the flow with form questionnaire validation functionality and form data capture.
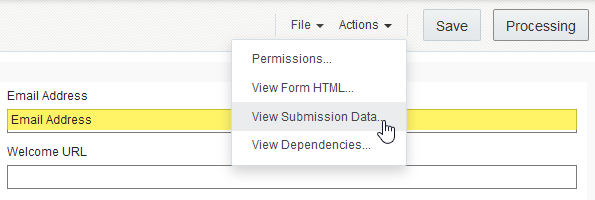
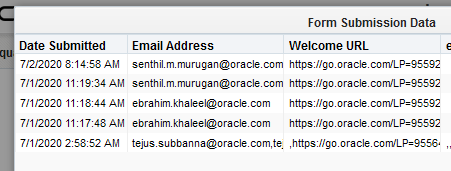
- In Eloqua form Actions -> “View Submission Data”
- Ensure that all the custom feedback responses are capturing correctly along with the email address, elqCampaignId, cmid, src1 and the rest of the fields.
Related Topics
Nailed it?
If yes, click below to confirm completion of this topic.
Yes, I have understood this topic well